Umbrel Deployment
Deploy BFFless on your Umbrel home server with Cloudflare Tunnel for secure external access.
Video Walkthrough
How It Works
BFFless on Umbrel uses Cloudflare Tunnel to securely expose your home server to the internet without opening ports on your router.
Key Benefits:
- No port forwarding - Cloudflare Tunnel creates an outbound connection from your home
- Free SSL - Cloudflare handles HTTPS certificates automatically
- Wildcard subdomains - Host unlimited sites on
*.yourdomain.com - DDoS protection - Cloudflare shields your home IP from attacks
Prerequisites
Before you begin, you'll need:
- Umbrel running on your home server (Raspberry Pi or x86)
- Cloudflare account with at least one domain
- Domain managed by Cloudflare (DNS hosted on Cloudflare)
Installation
Step 1: Install BFFless from Umbrel App Store
- Open your Umbrel dashboard
- Go to the App Store
- Search for "BFFless" or browse the Developer Tools category
- Click Install
The app will be available at http://umbrel.local:5537, but you'll see a setup page explaining that Cloudflare Tunnel is required.
Step 2: Install Cloudflare Tunnel App
- In the Umbrel App Store, install Cloudflare Tunnel
- Once installed, open the app and follow the authentication flow to connect to your Cloudflare account
Setting Up Cloudflare Tunnel
Step 3: Create a Tunnel
If you don't already have a tunnel, create one:
- Go to Cloudflare Zero Trust Dashboard
- Navigate to Networks → Connectors
- Click Create a tunnel
- Select Cloudflared as the tunnel type
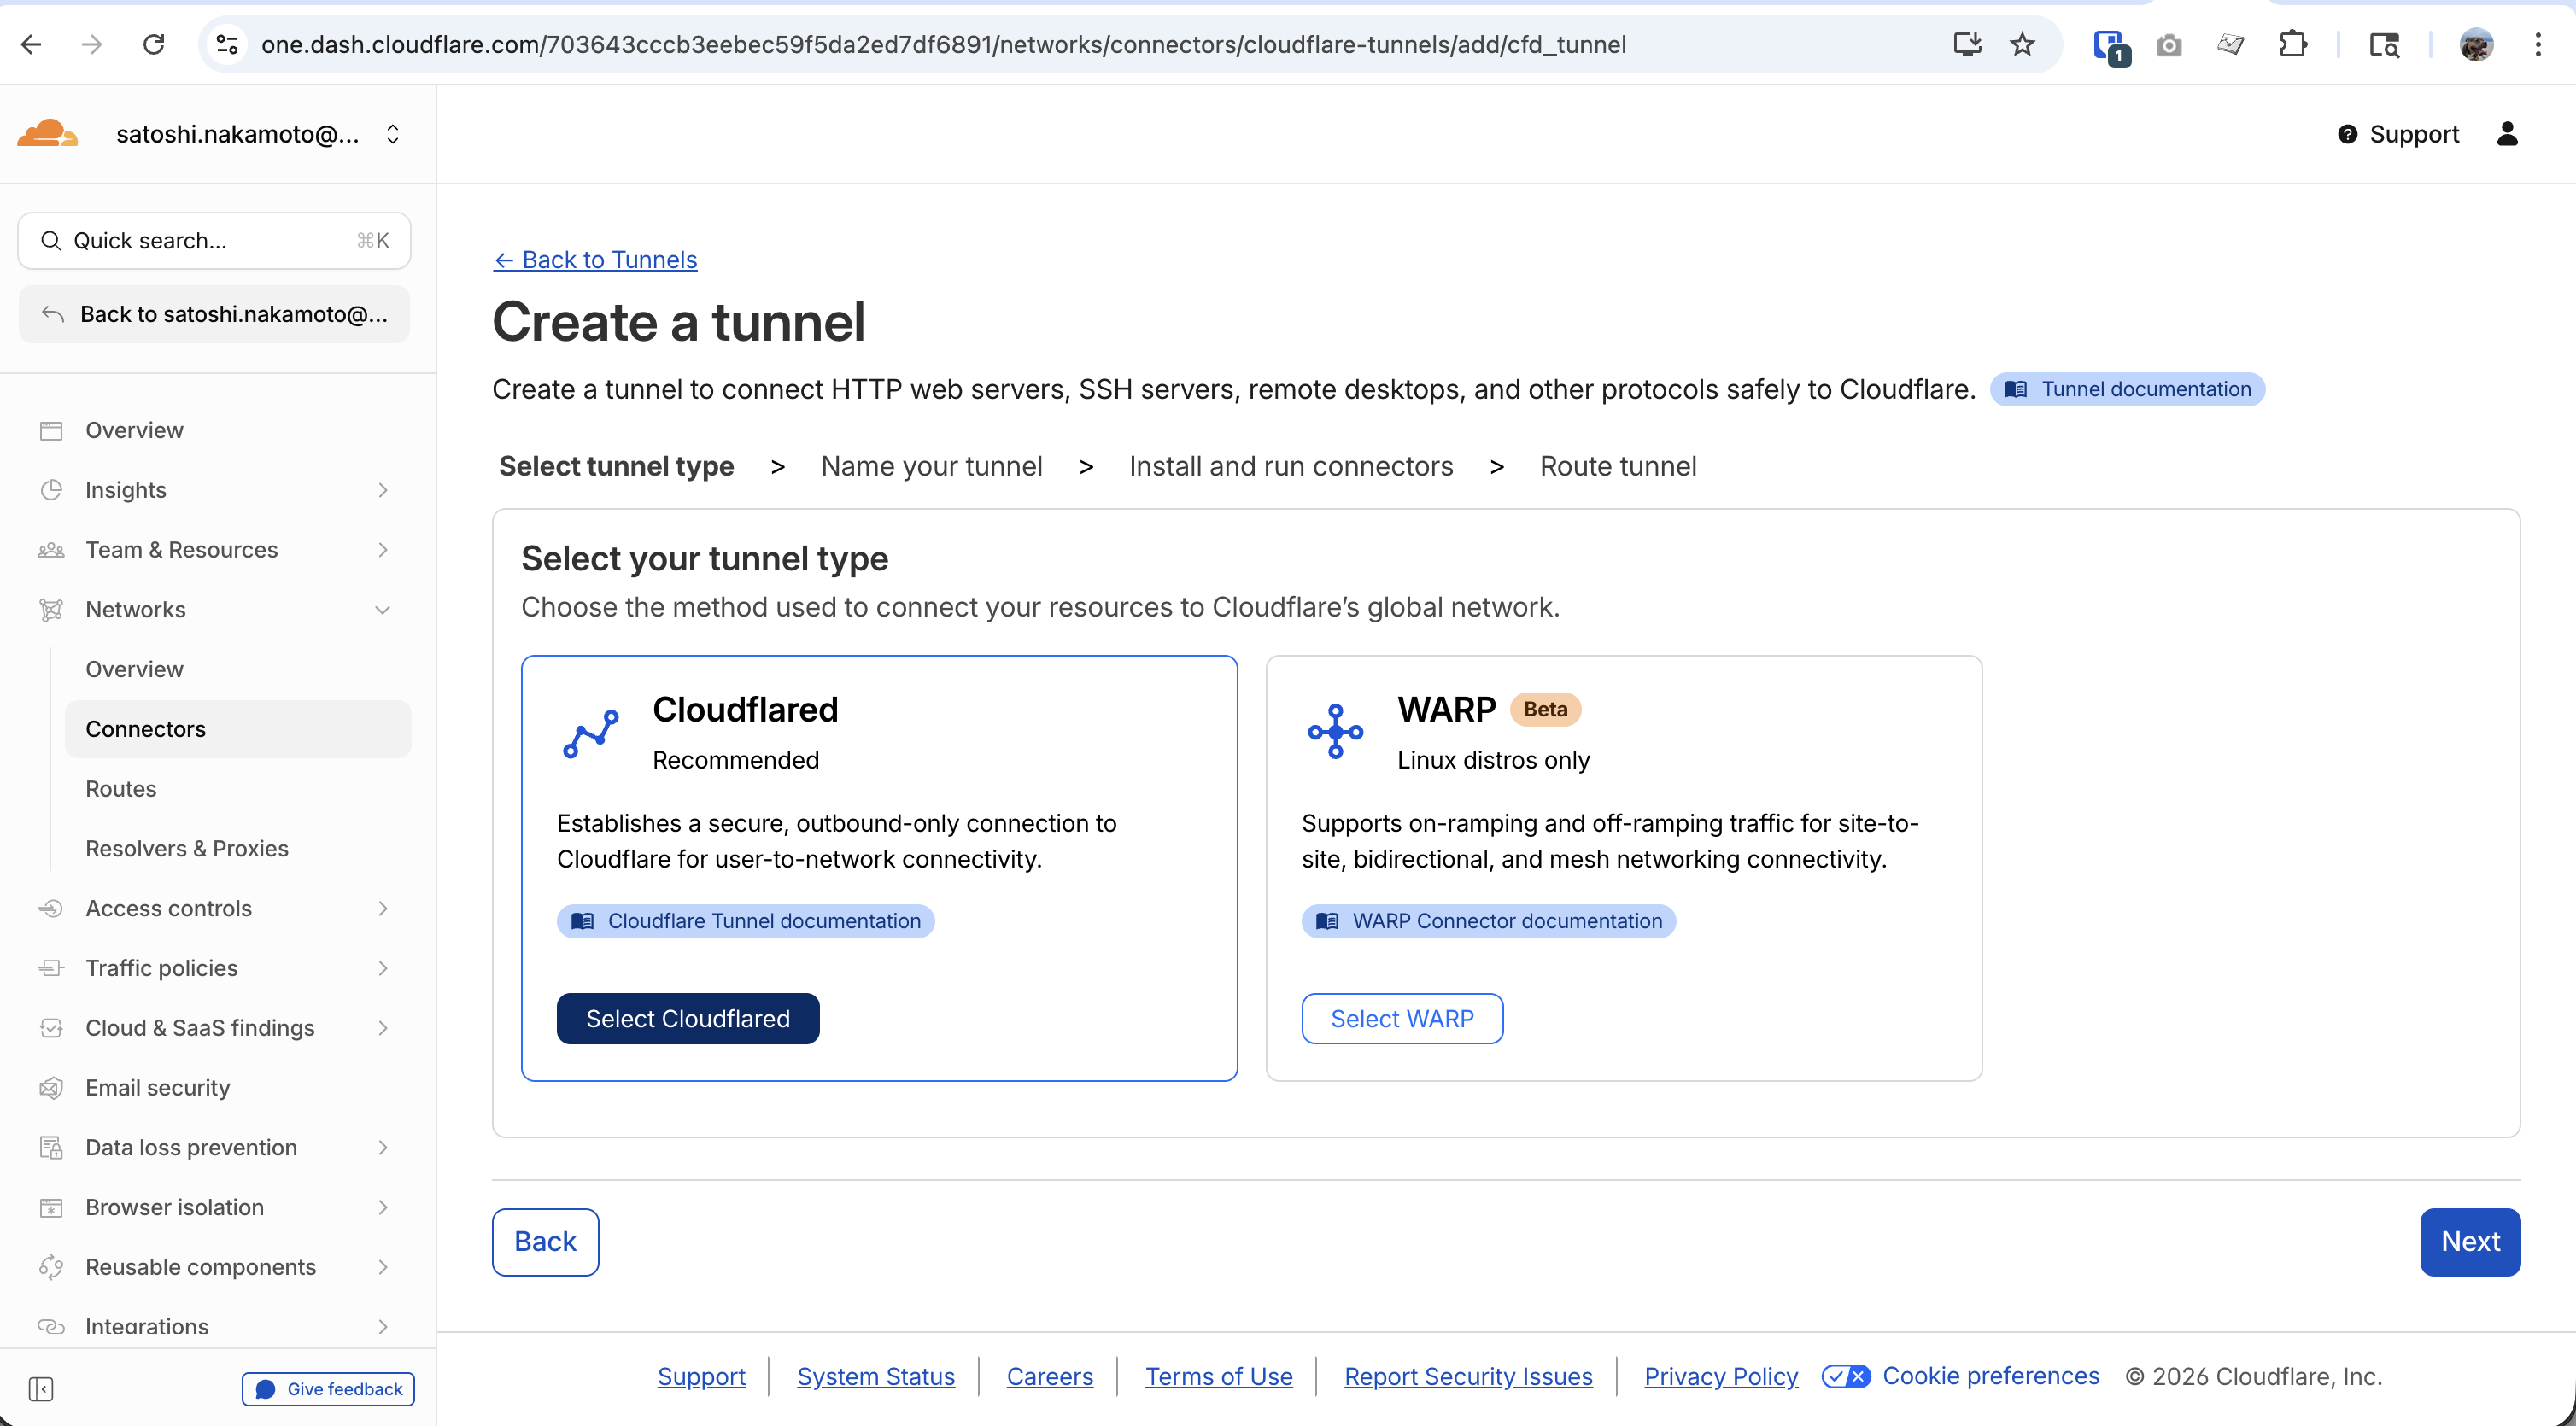
- Name your tunnel (e.g., "BFFless Umbrel")
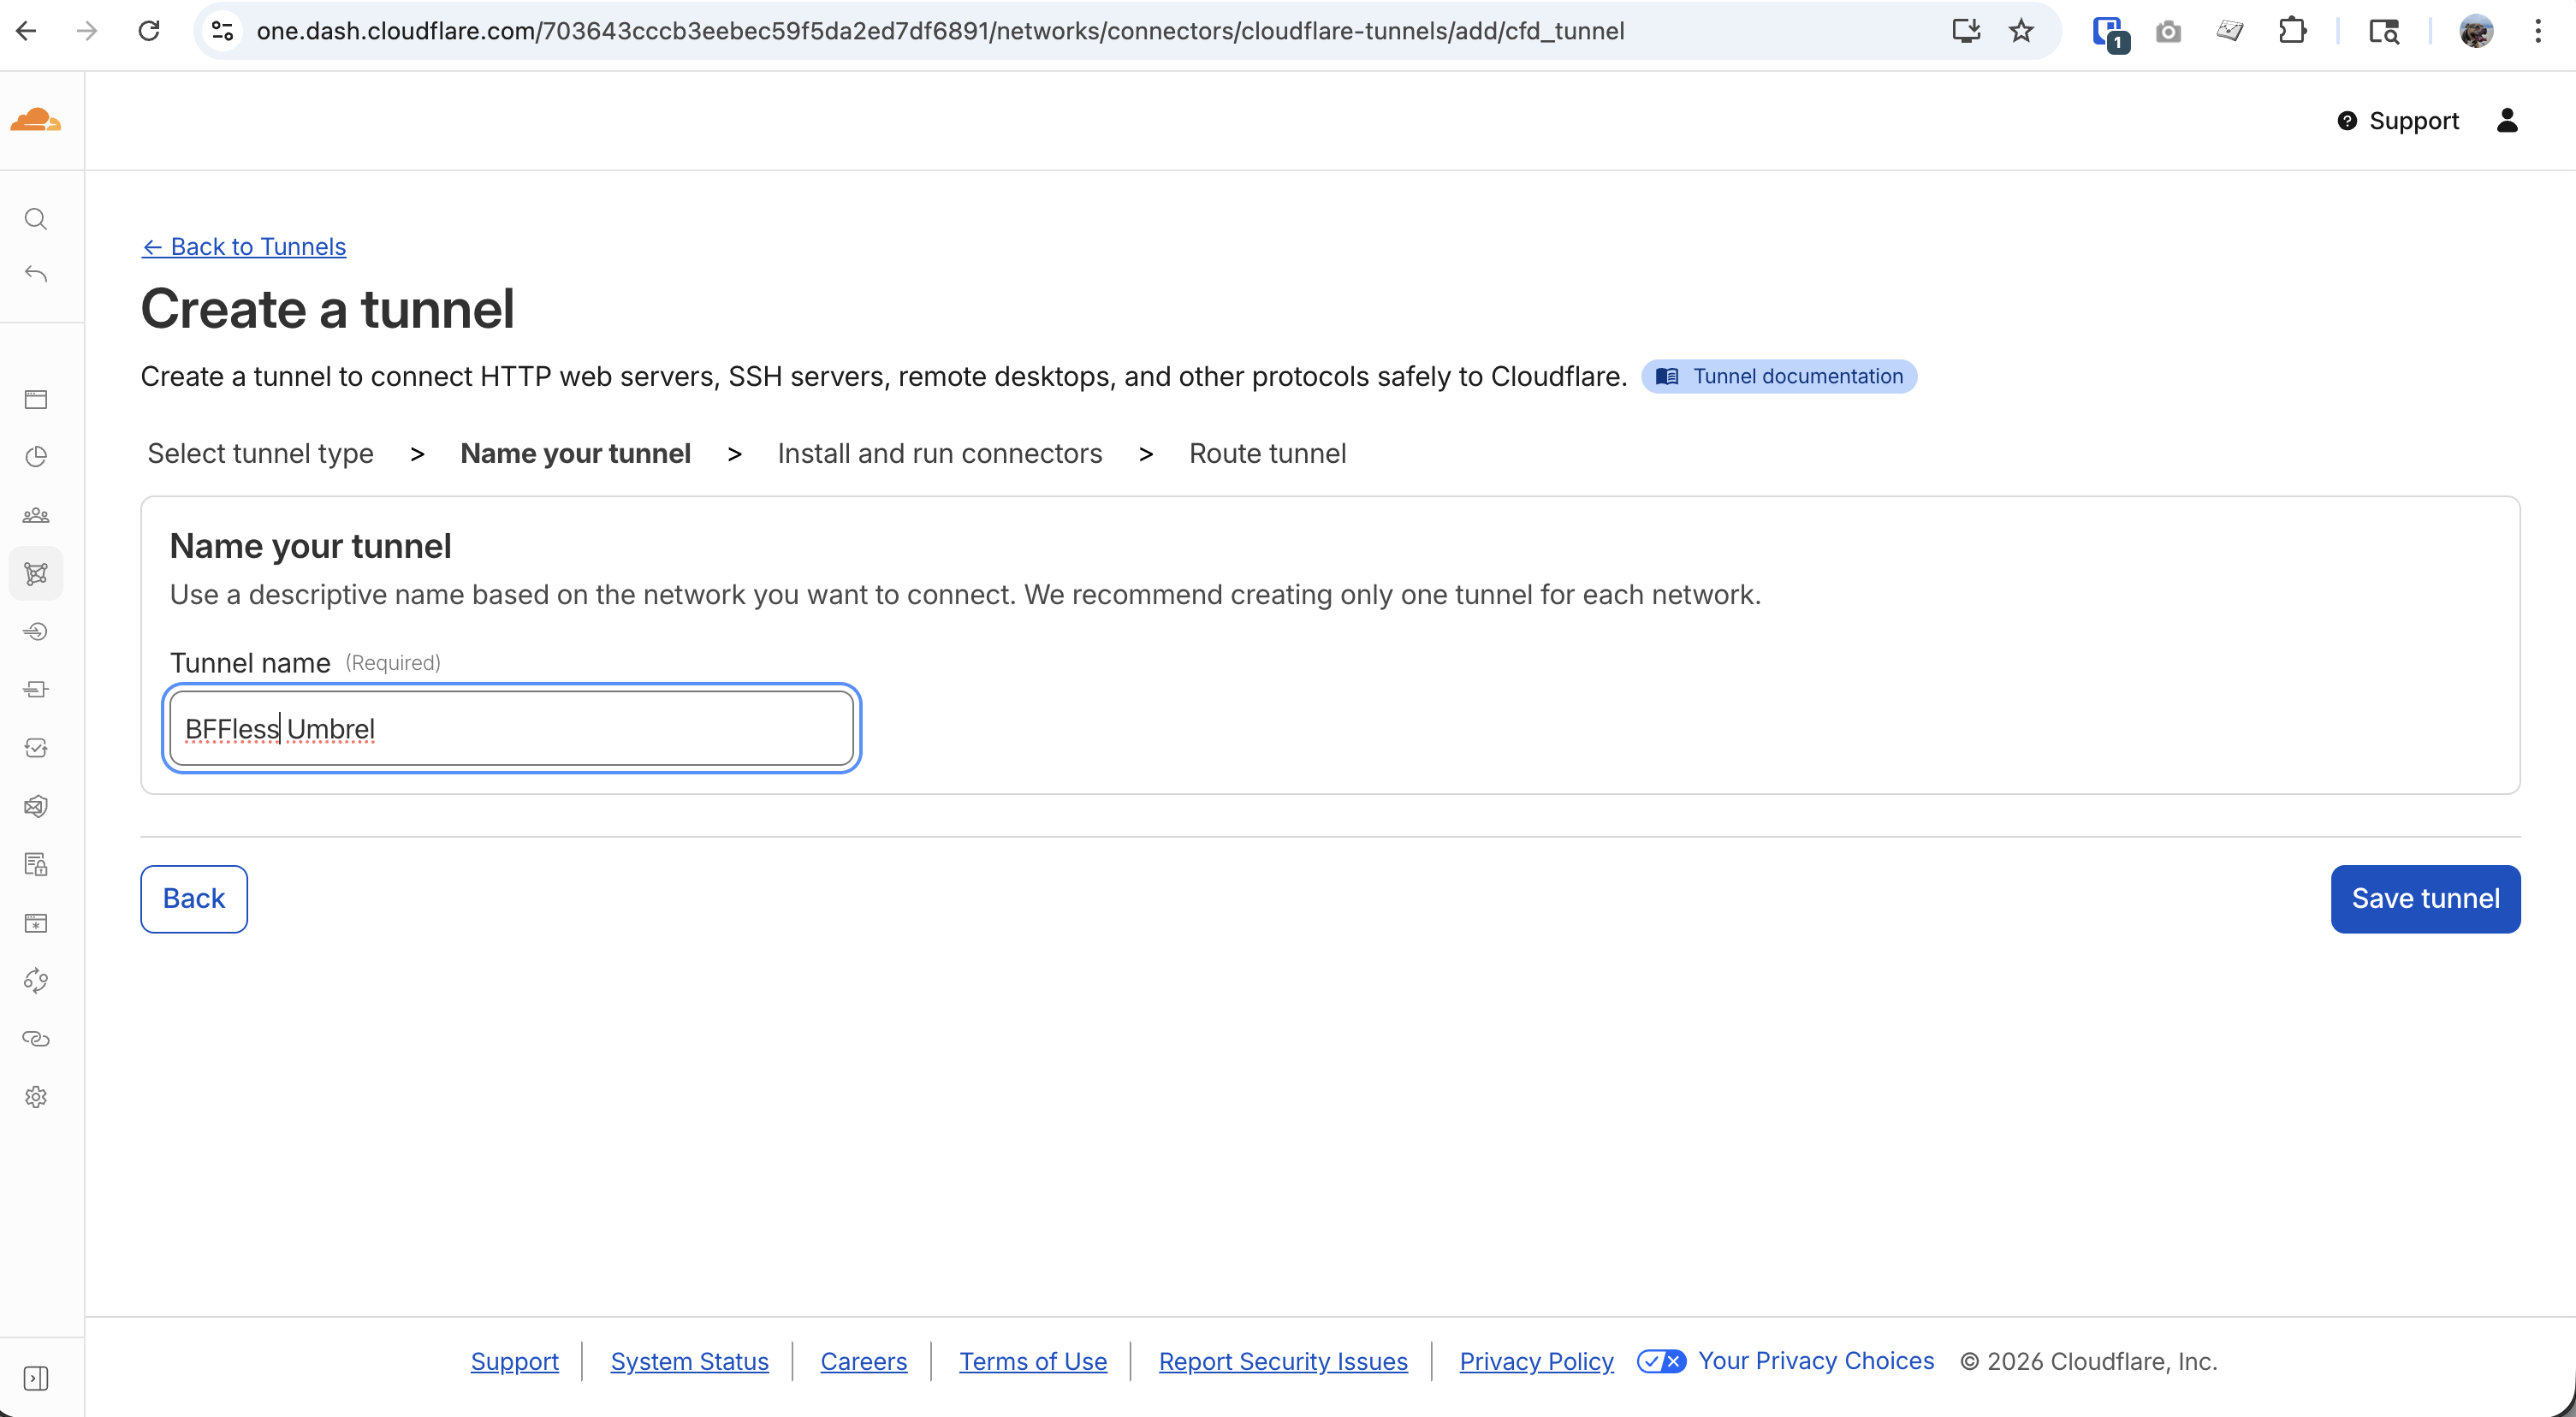
- On the Install and run connectors step, copy the token from the install command (the
eyJh...part)
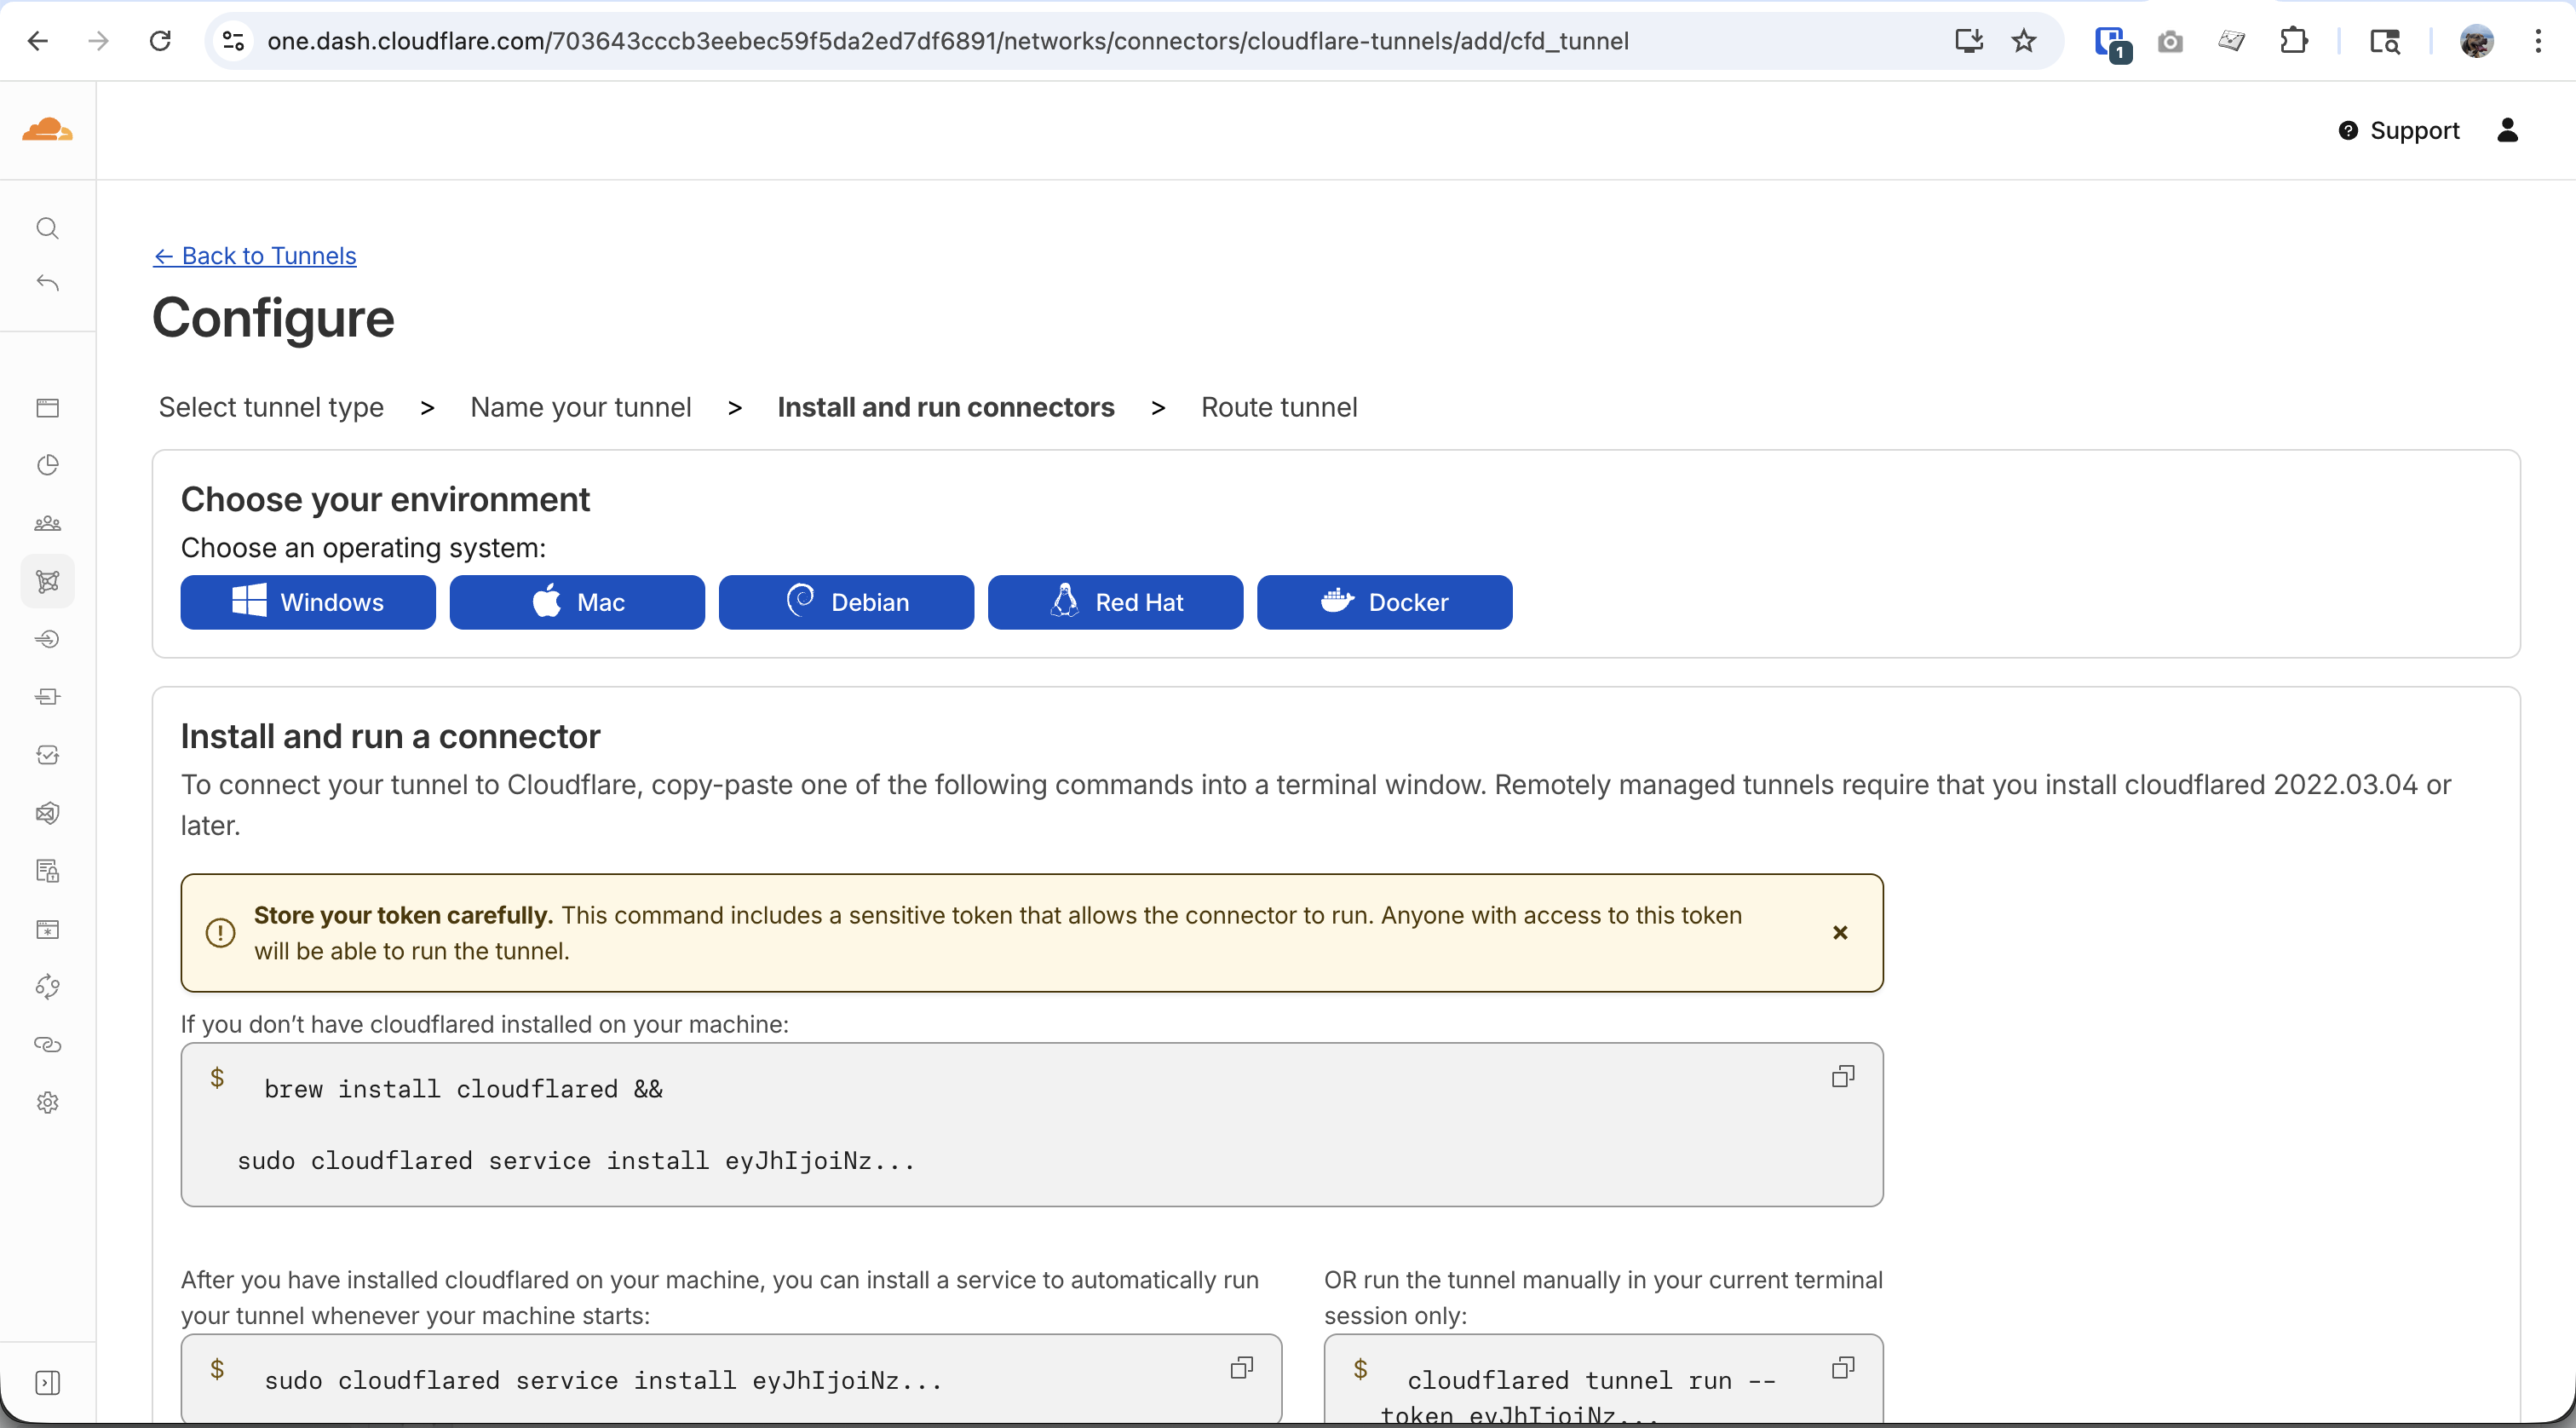
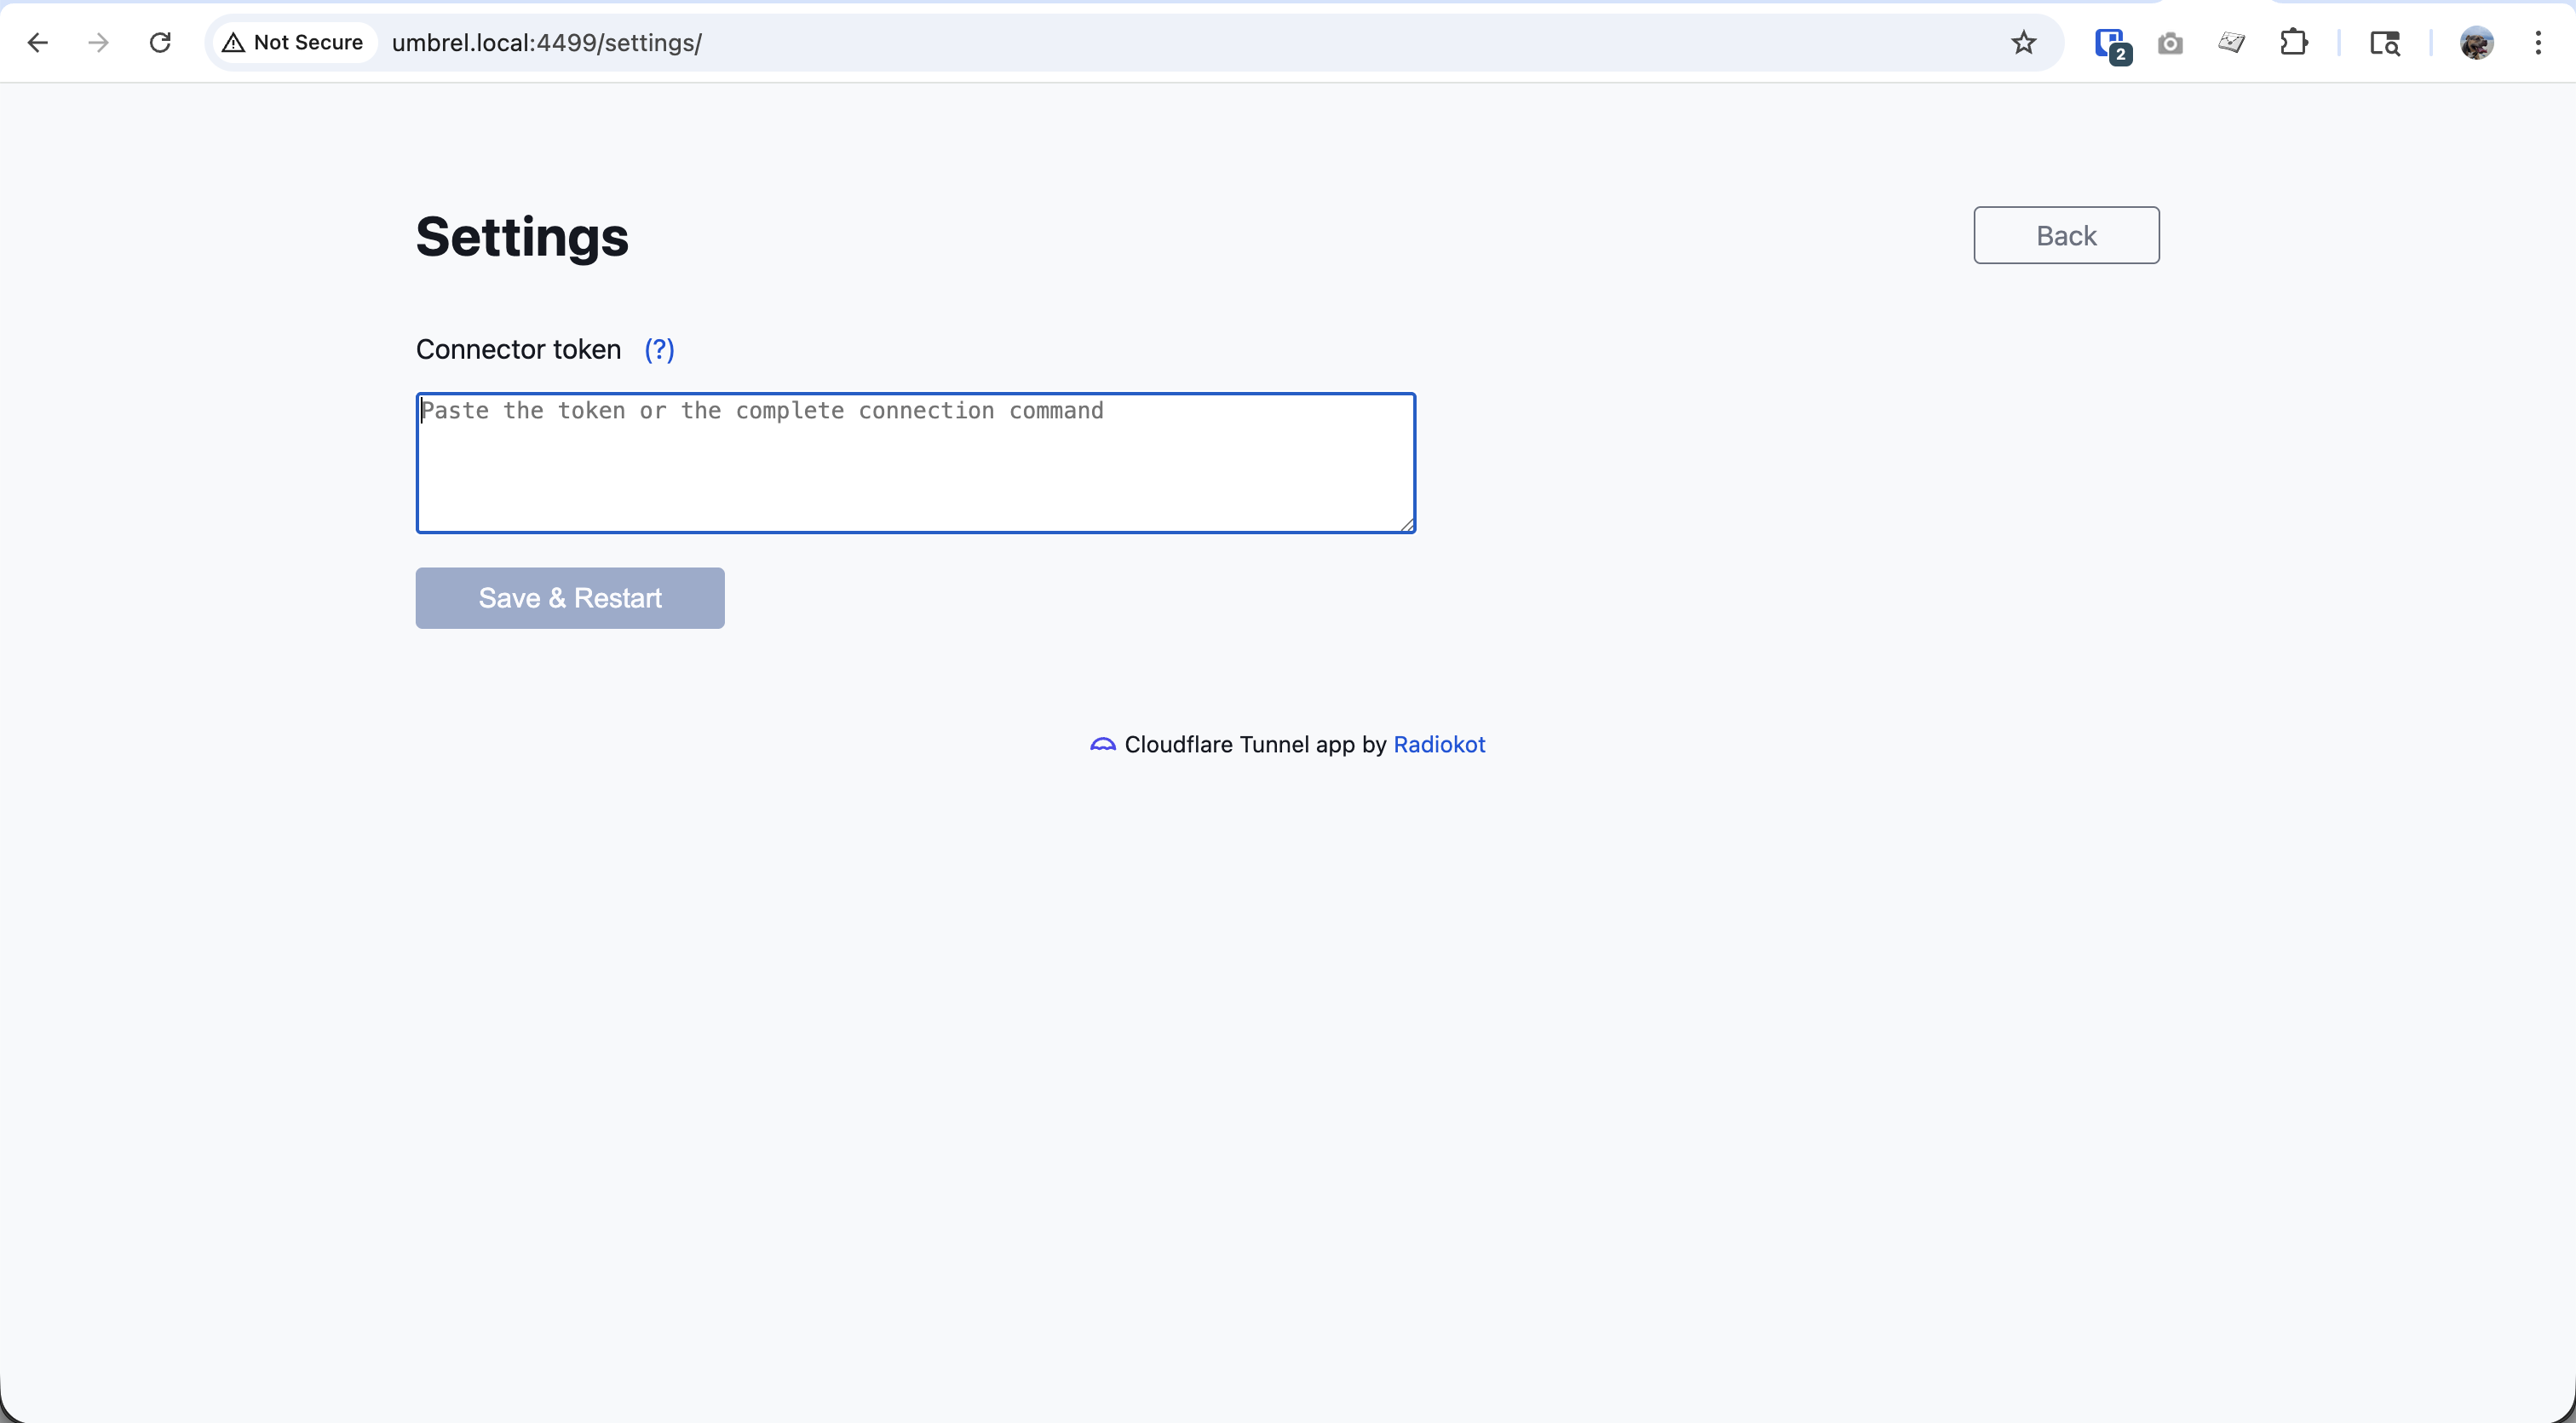
- Open the Cloudflare Tunnel app in Umbrel and paste the token into the settings, then click Save & Restart
Once connected, you'll see your tunnel with a HEALTHY status:

Step 4: Add Routes to the BFFless App
- In the Cloudflare Zero Trust dashboard, go to Networks → Connectors
- Click on your tunnel name (e.g., "Umbrel")
- Go to the Published application routes tab
- Click Add a published application route and create the following 3 routes:
| Subdomain | Domain | Service |
|---|---|---|
admin | yourdomain.com | http://umbrel.local:5537 |
* | yourdomain.com | http://umbrel.local:5537 |
www | yourdomain.com | http://umbrel.local:5537 |
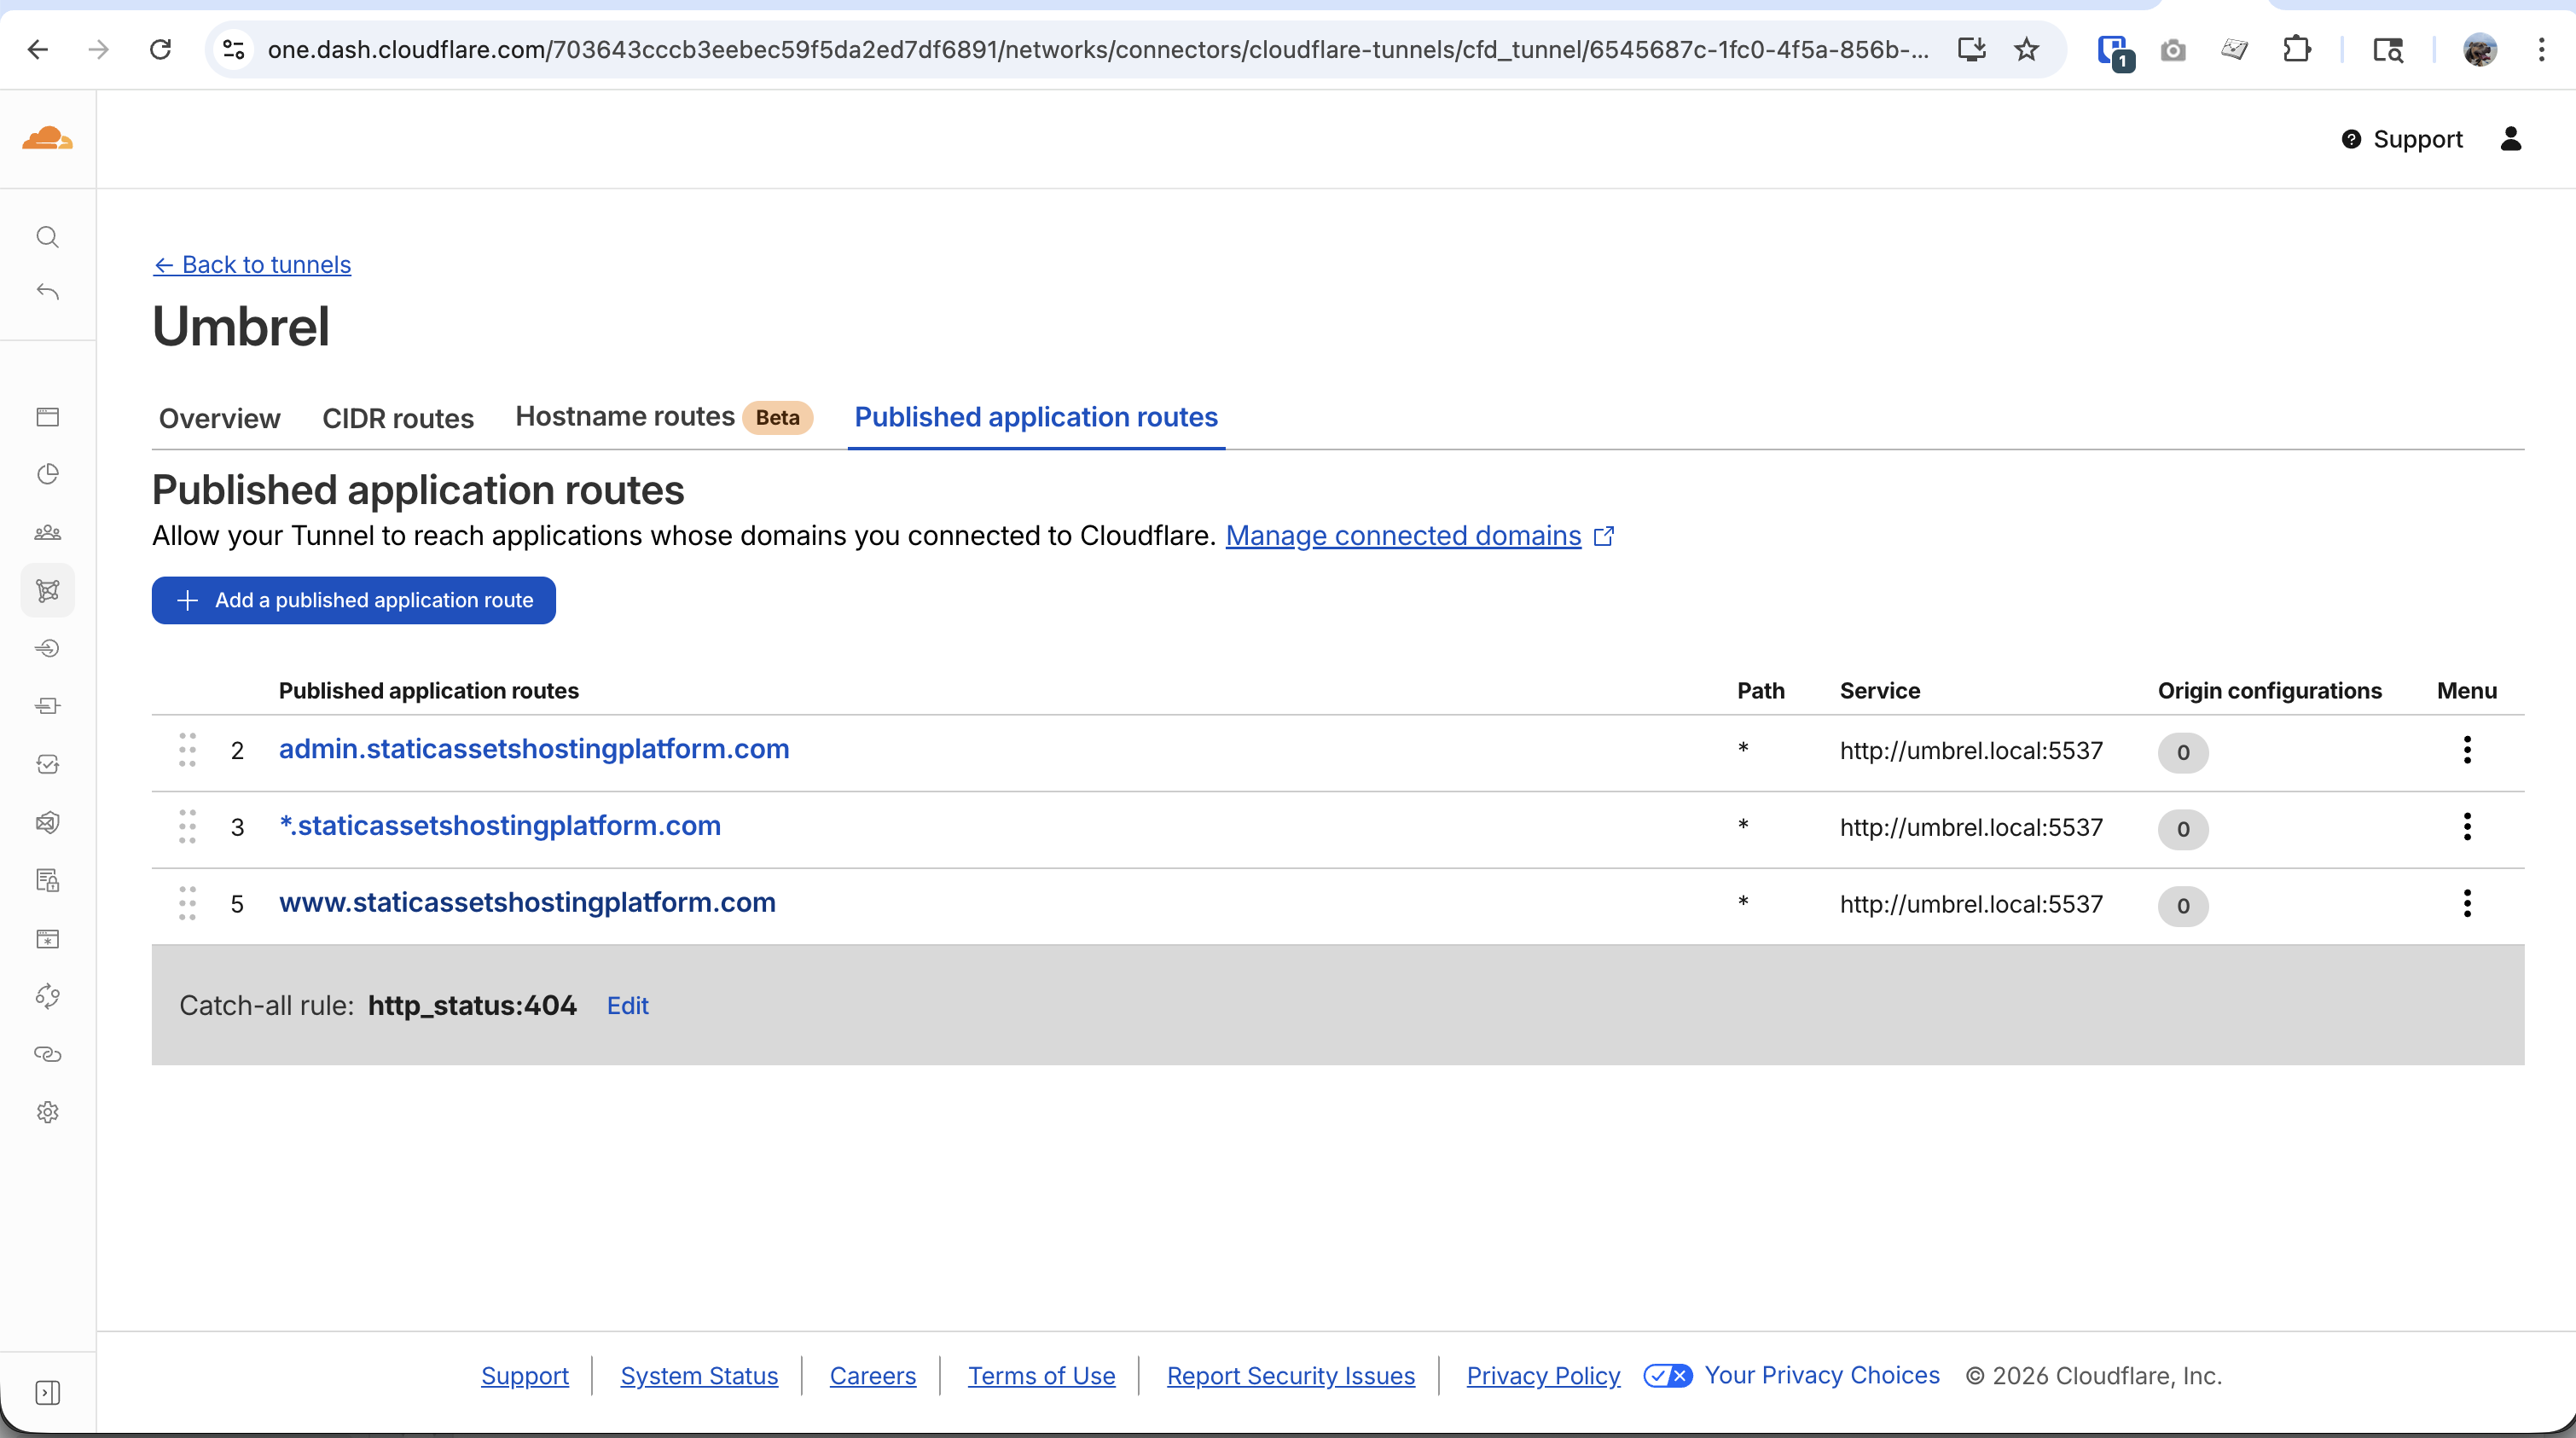
Using * as the subdomain allows BFFless to host sites on any subdomain (e.g., mysite.yourdomain.com, blog.yourdomain.com). This is recommended for maximum flexibility.
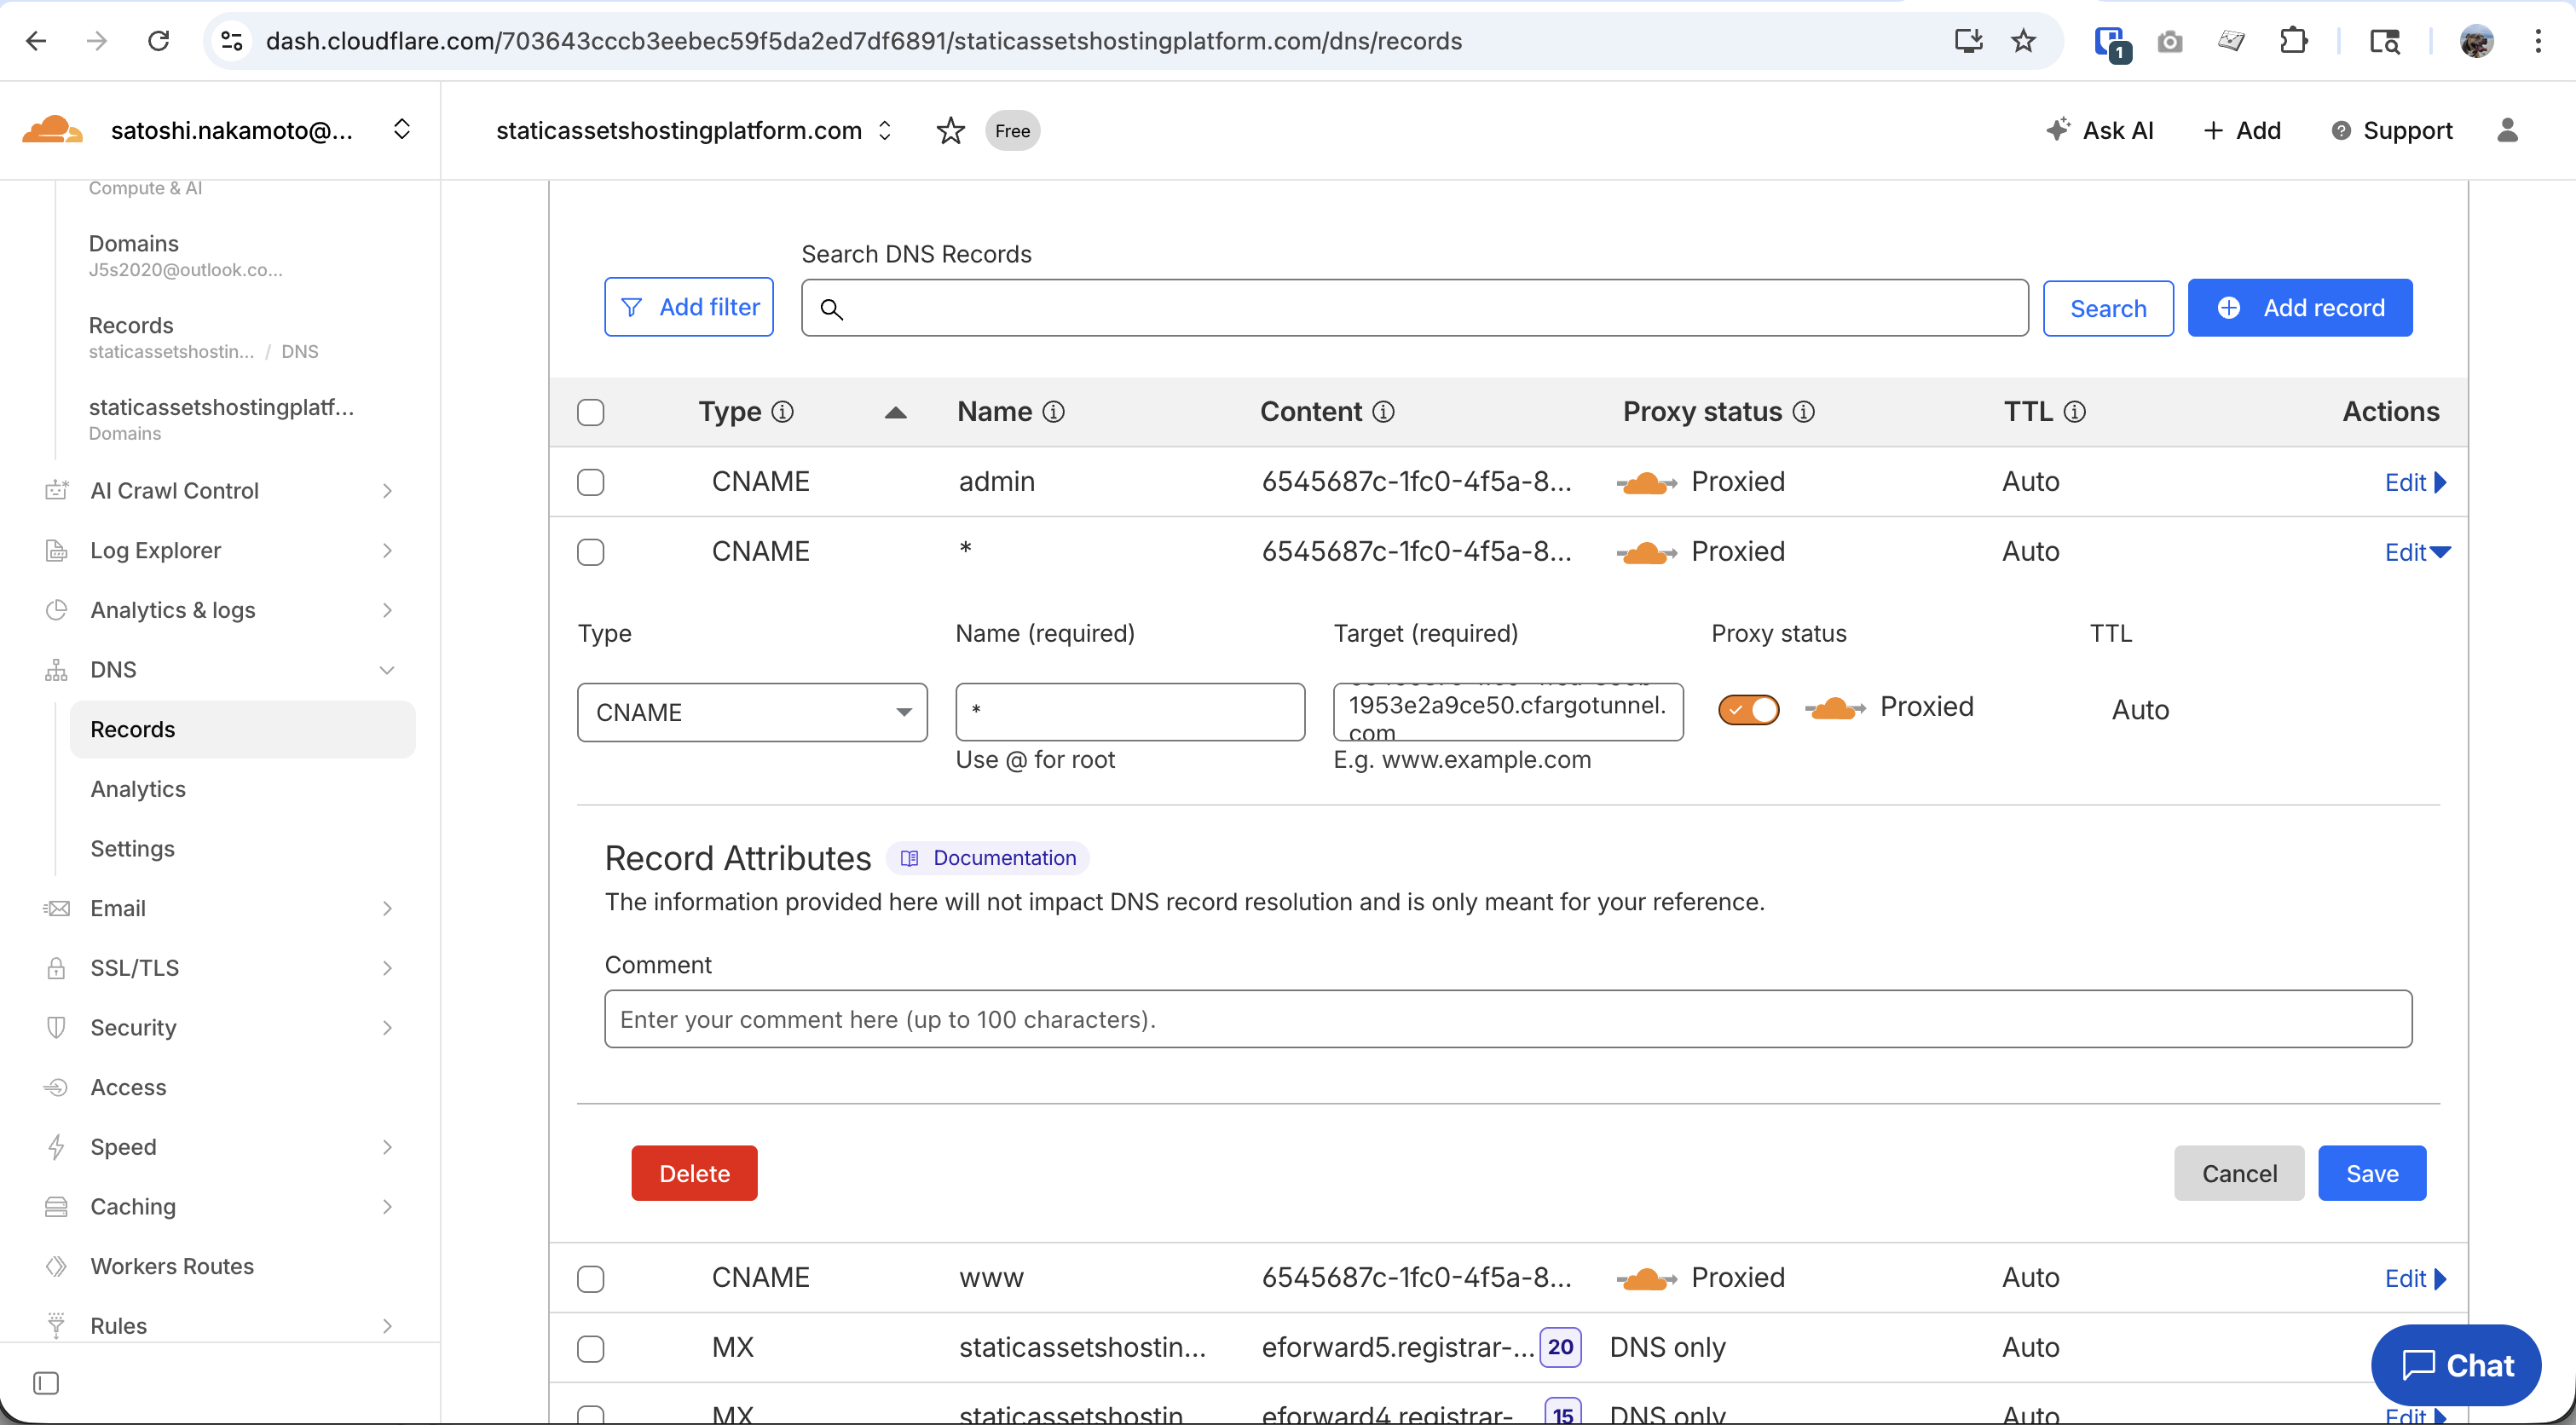
Step 5: Configure Wildcard DNS
Cloudflare doesn't automatically create DNS records for wildcard routes, so you need to add one manually:
- Go to your domain's DNS settings in Cloudflare (not Zero Trust)
- Click Add record
- Configure:
| Field | Value |
|---|---|
| Type | CNAME |
| Name | * |
| Target | <tunnel-id>.cfargotunnel.com |
| Proxy status | Proxied (orange cloud) |
The admin and www routes from Step 4 automatically created CNAME records. You can copy the target value (e.g., abc123.cfargotunnel.com) from one of those DNS records.
Configure Your Domain
Step 6: Set Your Domain
SSH into your Umbrel and create the domain configuration file:
ssh umbrel@umbrel.local
Create the domain file:
echo "yourdomain.com" > ~/umbrel/app-data/bffless/data/config/domain.txt
Replace yourdomain.com with your actual domain.
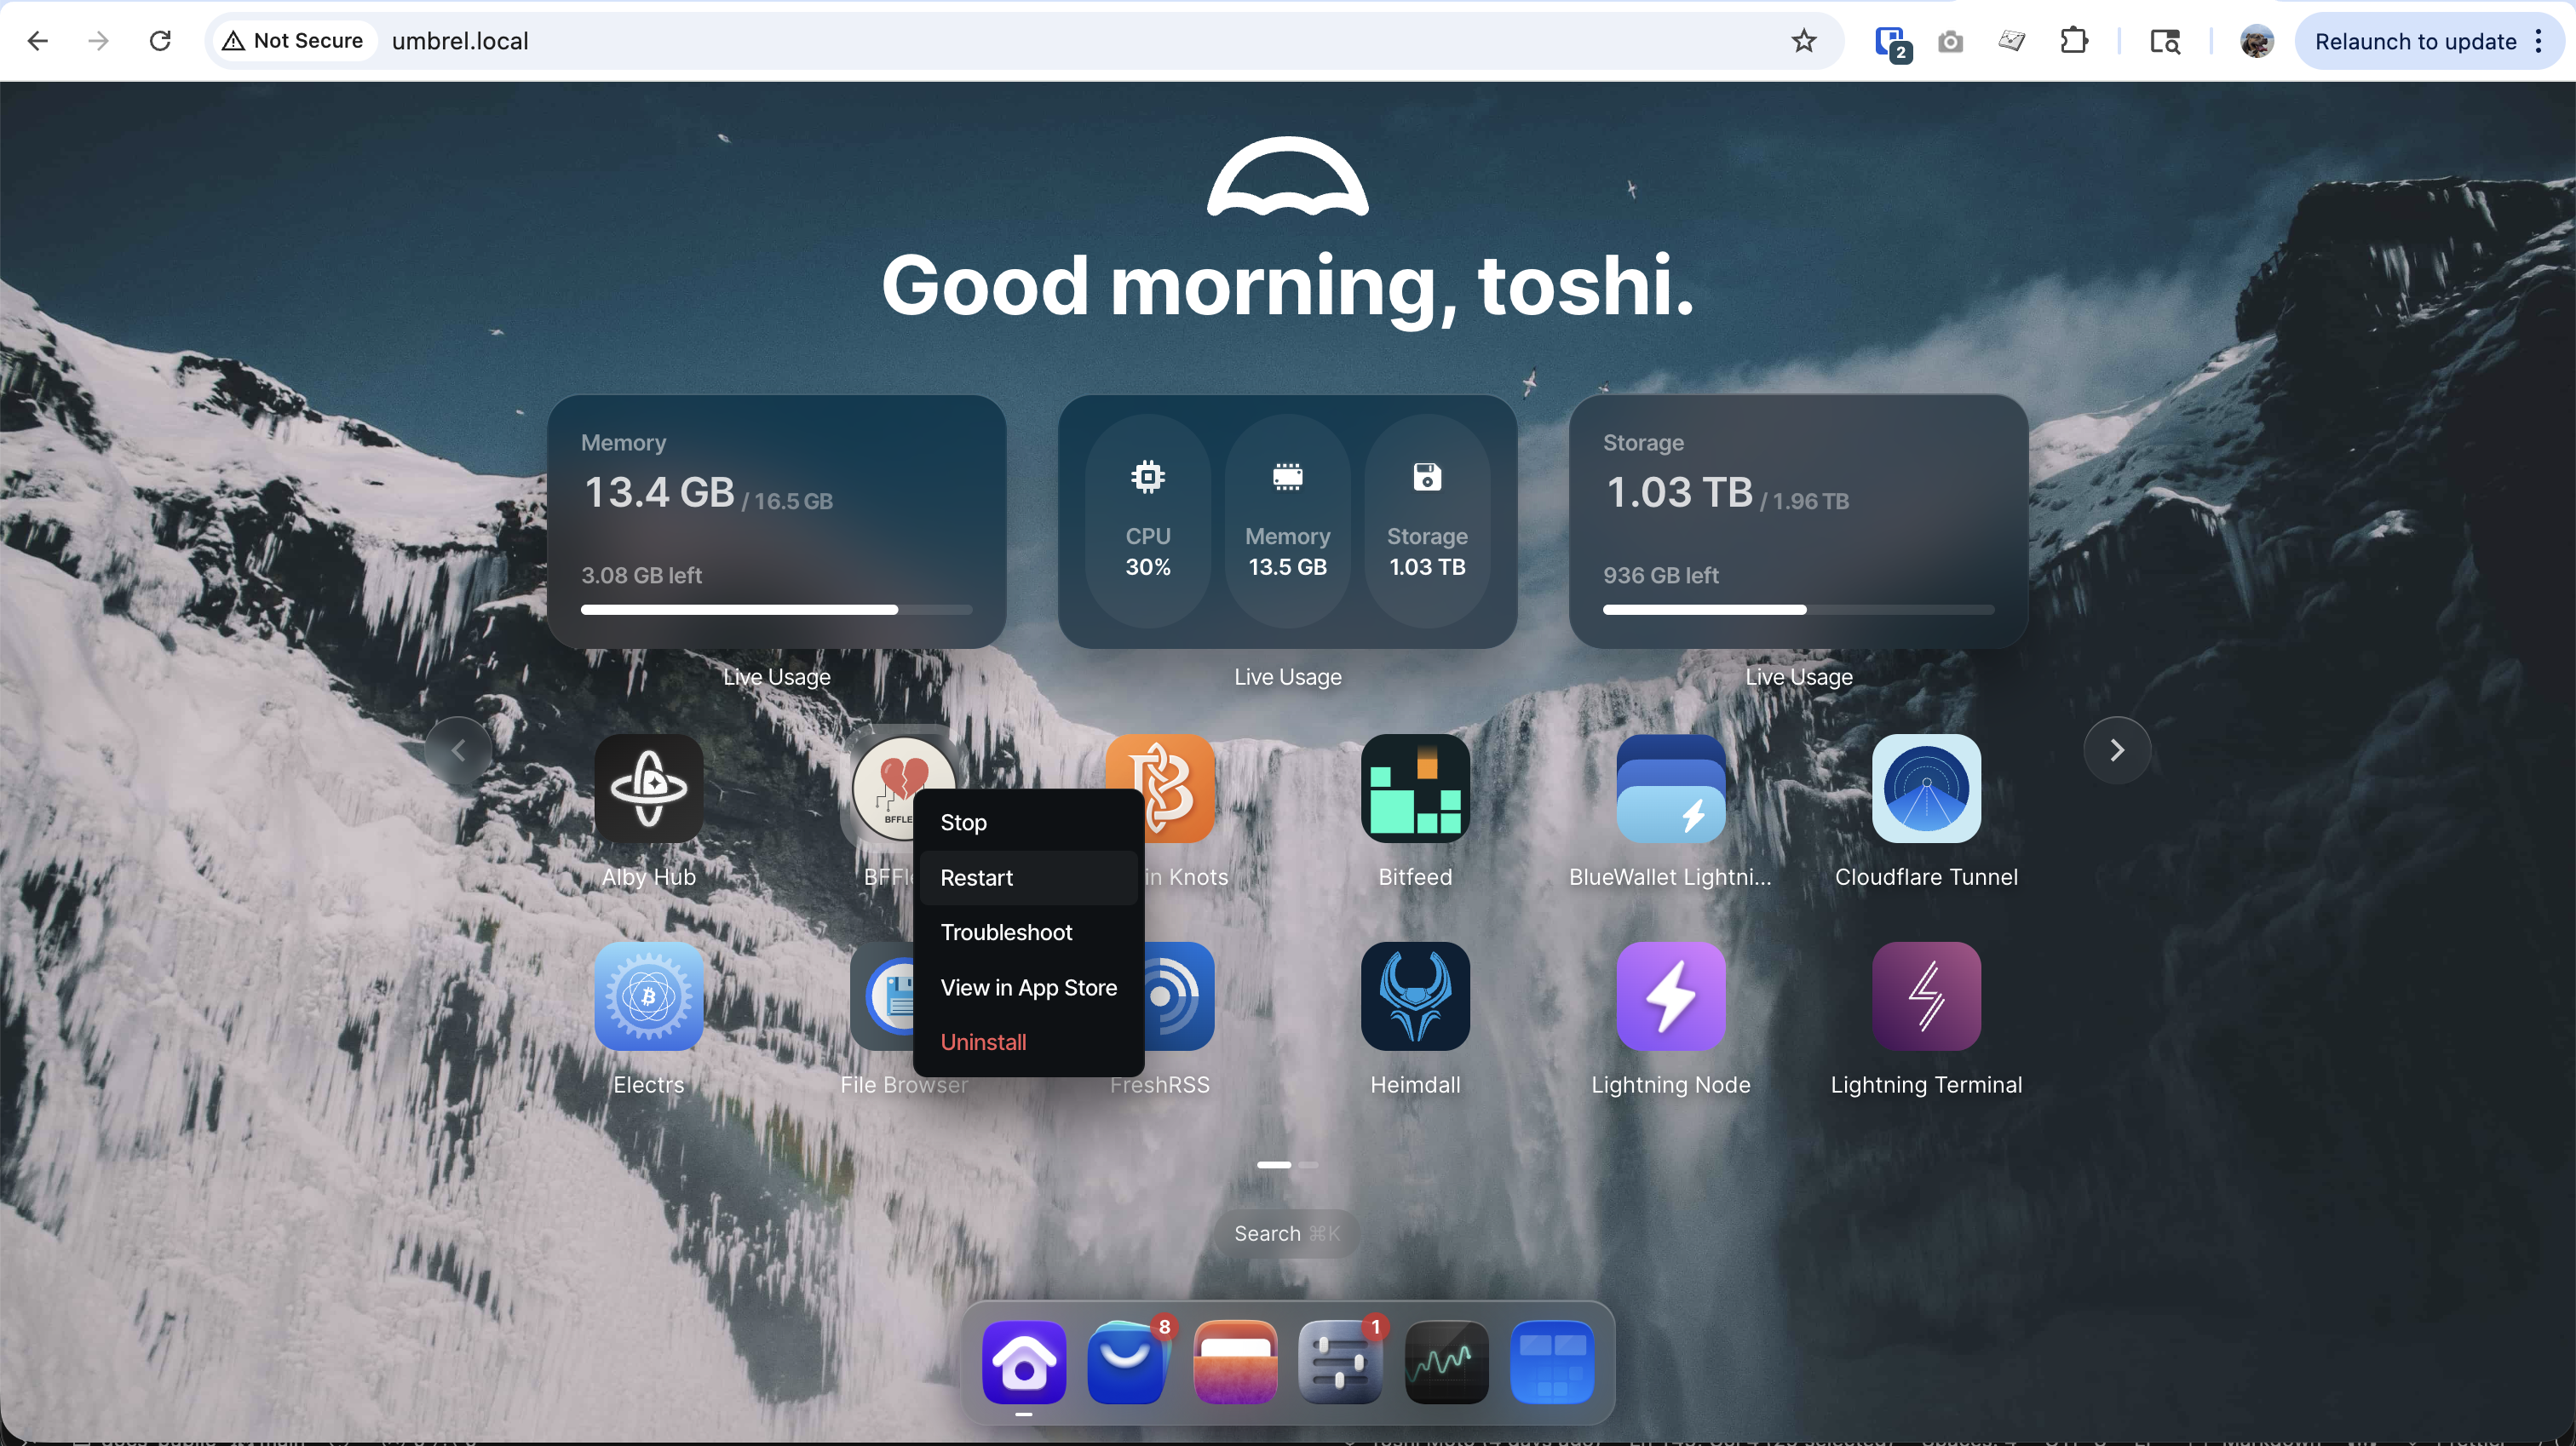
Step 7: Restart BFFless App
Restart the app to apply the domain configuration:
- Go to your Umbrel dashboard
- Find the BFFless app
- Right-click (or ctrl+click) on the app icon
- Select Restart
Access Your App
Visit your admin subdomain (e.g., https://admin.yourdomain.com) to access BFFless and complete the setup wizard.
Troubleshooting
"Cloudflare Tunnel Required" Page
If you see this page when accessing via your domain:
- Verify your Cloudflare Tunnel route is correctly configured
- Check that the tunnel is showing "HEALTHY" status
- Ensure DNS is properly pointing to the tunnel
502 Bad Gateway
- Make sure BFFless is running in Umbrel
- Check that the route URL is
umbrel.local:5537(notlocalhost) - Verify the tunnel connector is online
Cookies Not Working
If you can't stay logged in:
- Make sure
domain.txtcontains just your domain (e.g.,yourdomain.com), not the full URL - Restart BFFless after creating/modifying
domain.txt
View Logs
To debug issues, view the BFFless logs:
ssh umbrel@umbrel.local
sudo docker logs bffless_backend_1 --tail 100
Custom Domains
BFFless supports custom domains for your deployed sites. When you add a custom domain through the admin panel:
- Add the domain in BFFless - Go to your deployment settings and add the custom domain
- Configure DNS - Point your custom domain to your Cloudflare Tunnel (CNAME to
<tunnel-id>.cfargotunnel.com) - Add a route in Cloudflare Tunnel - Create a route for the custom domain pointing to
umbrel.local:5537 - Restart BFFless - After adding custom domains, restart the app from the Umbrel dashboard to apply the nginx configuration
Unlike the standard CE deployment, Umbrel requires a manual app restart after adding custom domains. This is because the containerized environment doesn't allow automatic nginx reloads.
Next Steps
Once BFFless is running:
- Upload your first site
- Set up GitHub Actions for CI/CD deployments