Setup Wizard
Watch the walkthrough (jumps to the "Onboarding setup" section):
After installing BFFless, you'll complete a setup wizard to configure your instance. This guide walks you through each step.
Accessing the Setup Wizard
Once the installer finishes and you run ./start.sh, visit:
https://admin.yourdomain.com
You'll be automatically redirected to the setup wizard.
Step 1: Create Admin Account
Create your administrator account to manage the platform.
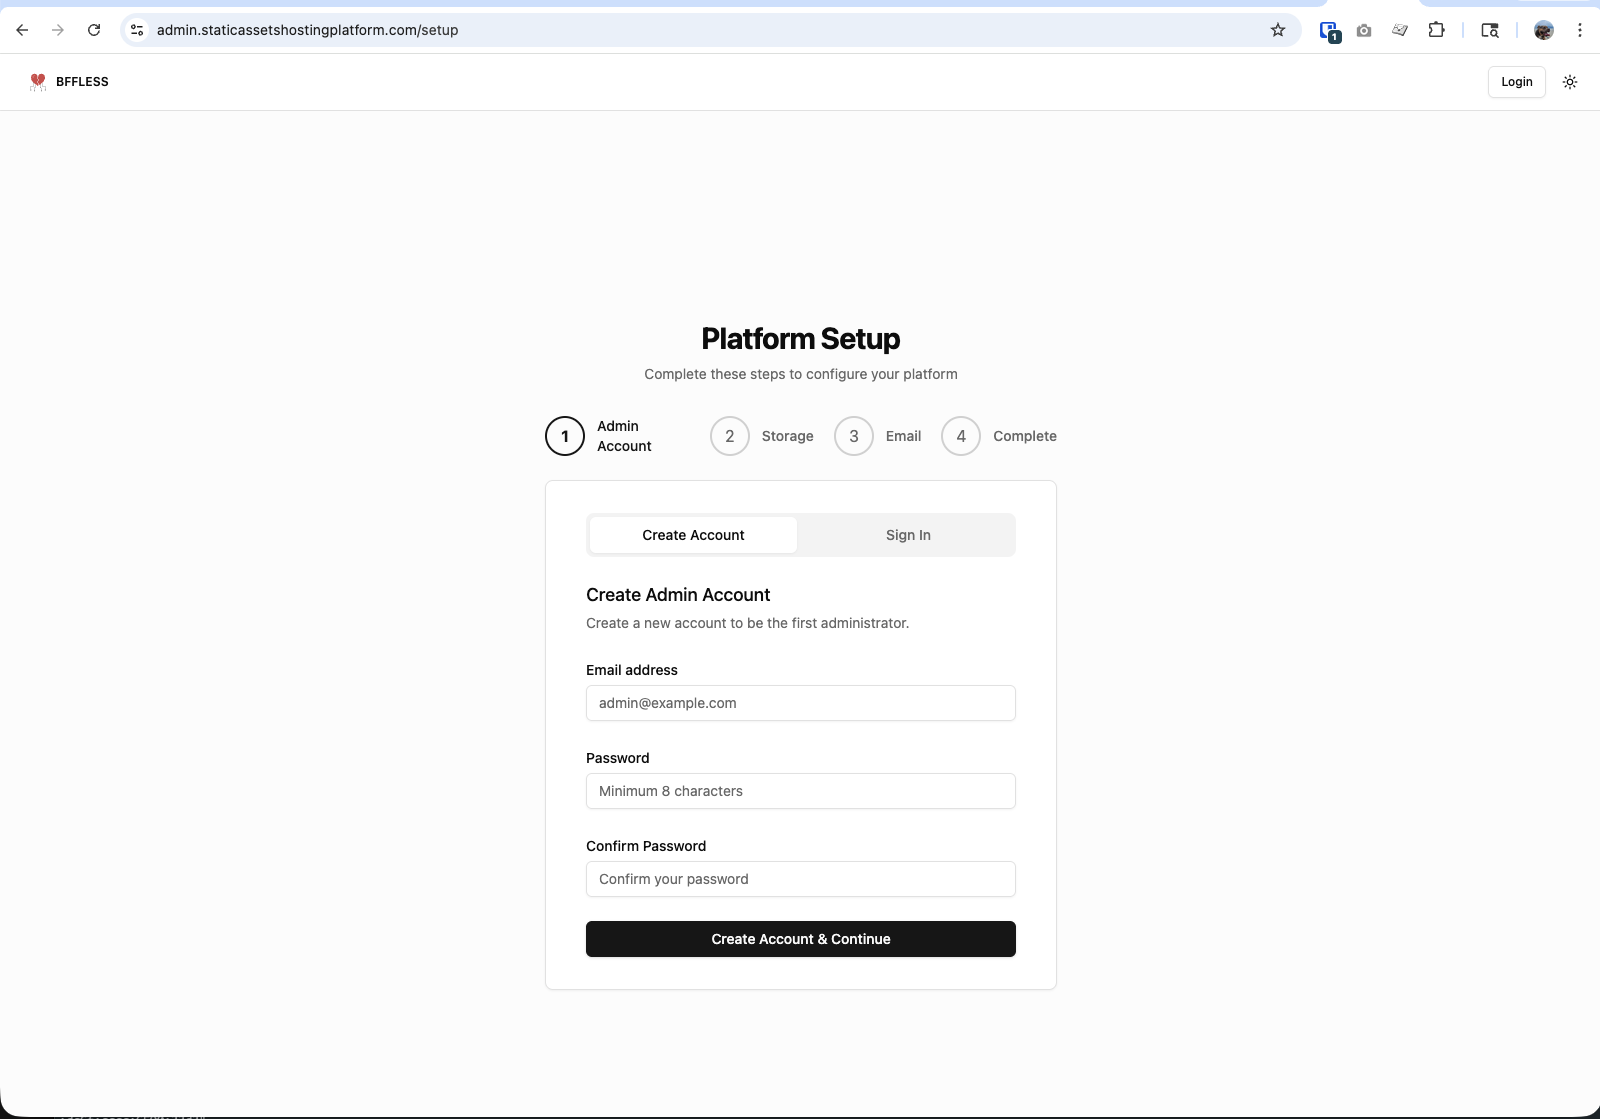
Enter your email address and choose a strong password (minimum 8 characters). This account will have full administrative access to your BFFless instance.
Click Create Account & Continue to proceed to storage configuration.
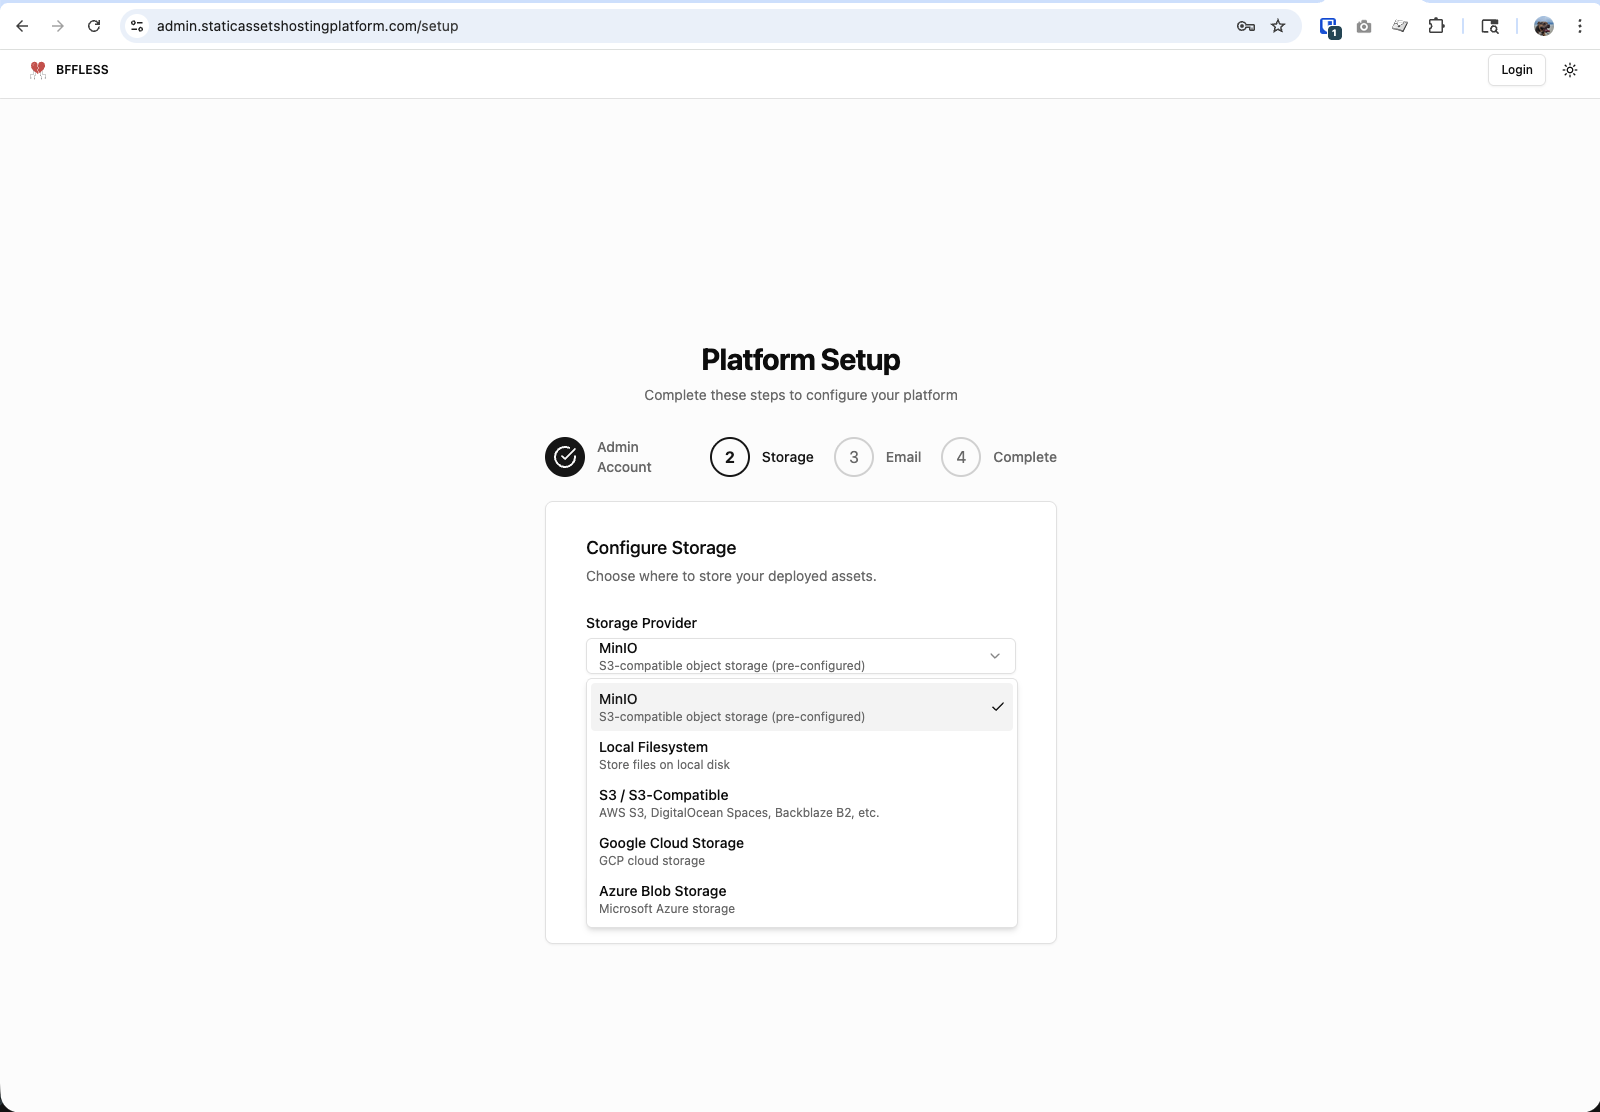
Step 2: Configure Storage
Choose where your deployed assets will be stored.
Local Filesystem is the simplest and fastest option for testing. It requires no additional services and uses fewer resources. However, it has filesystem limitations and is not intended for large amounts of uploads. For production or large-scale deployments, use S3, Google Cloud Storage, or Azure Blob Storage.
Local Filesystem
Best for testing and small deployments:
- Select Local Filesystem from the dropdown
- Keep the default path or specify a custom directory
- Click Test Connection to verify
- Click Continue
MinIO (Pre-configured)
MinIO is an S3-compatible object storage that runs alongside your BFFless instance:
- Select MinIO from the dropdown
- The connection details are pre-filled from your installation
- Click Test Connection to verify
- Click Continue
S3 / S3-Compatible Storage
Use this for AWS S3, DigitalOcean Spaces, Backblaze B2, or other S3-compatible services:
| Field | Description |
|---|---|
| Region | AWS region (e.g., us-east-1) |
| Access Key ID | Your AWS access key |
| Secret Access Key | Your AWS secret key |
| Bucket | S3 bucket name |
| Endpoint | Custom endpoint for S3-compatible services |
Google Cloud Storage
| Field | Description |
|---|---|
| Project ID | Your GCP project ID |
| Bucket | GCS bucket name |
| Service Account | JSON key file contents or path |
Azure Blob Storage
| Field | Description |
|---|---|
| Account Name | Azure storage account name |
| Container Name | Blob container name |
| Account Key | Storage account access key |
After selecting and configuring your provider, click Test Connection to verify it works, then click Continue.
Step 3: Configure Cache
Configure caching to improve performance and reduce storage costs.
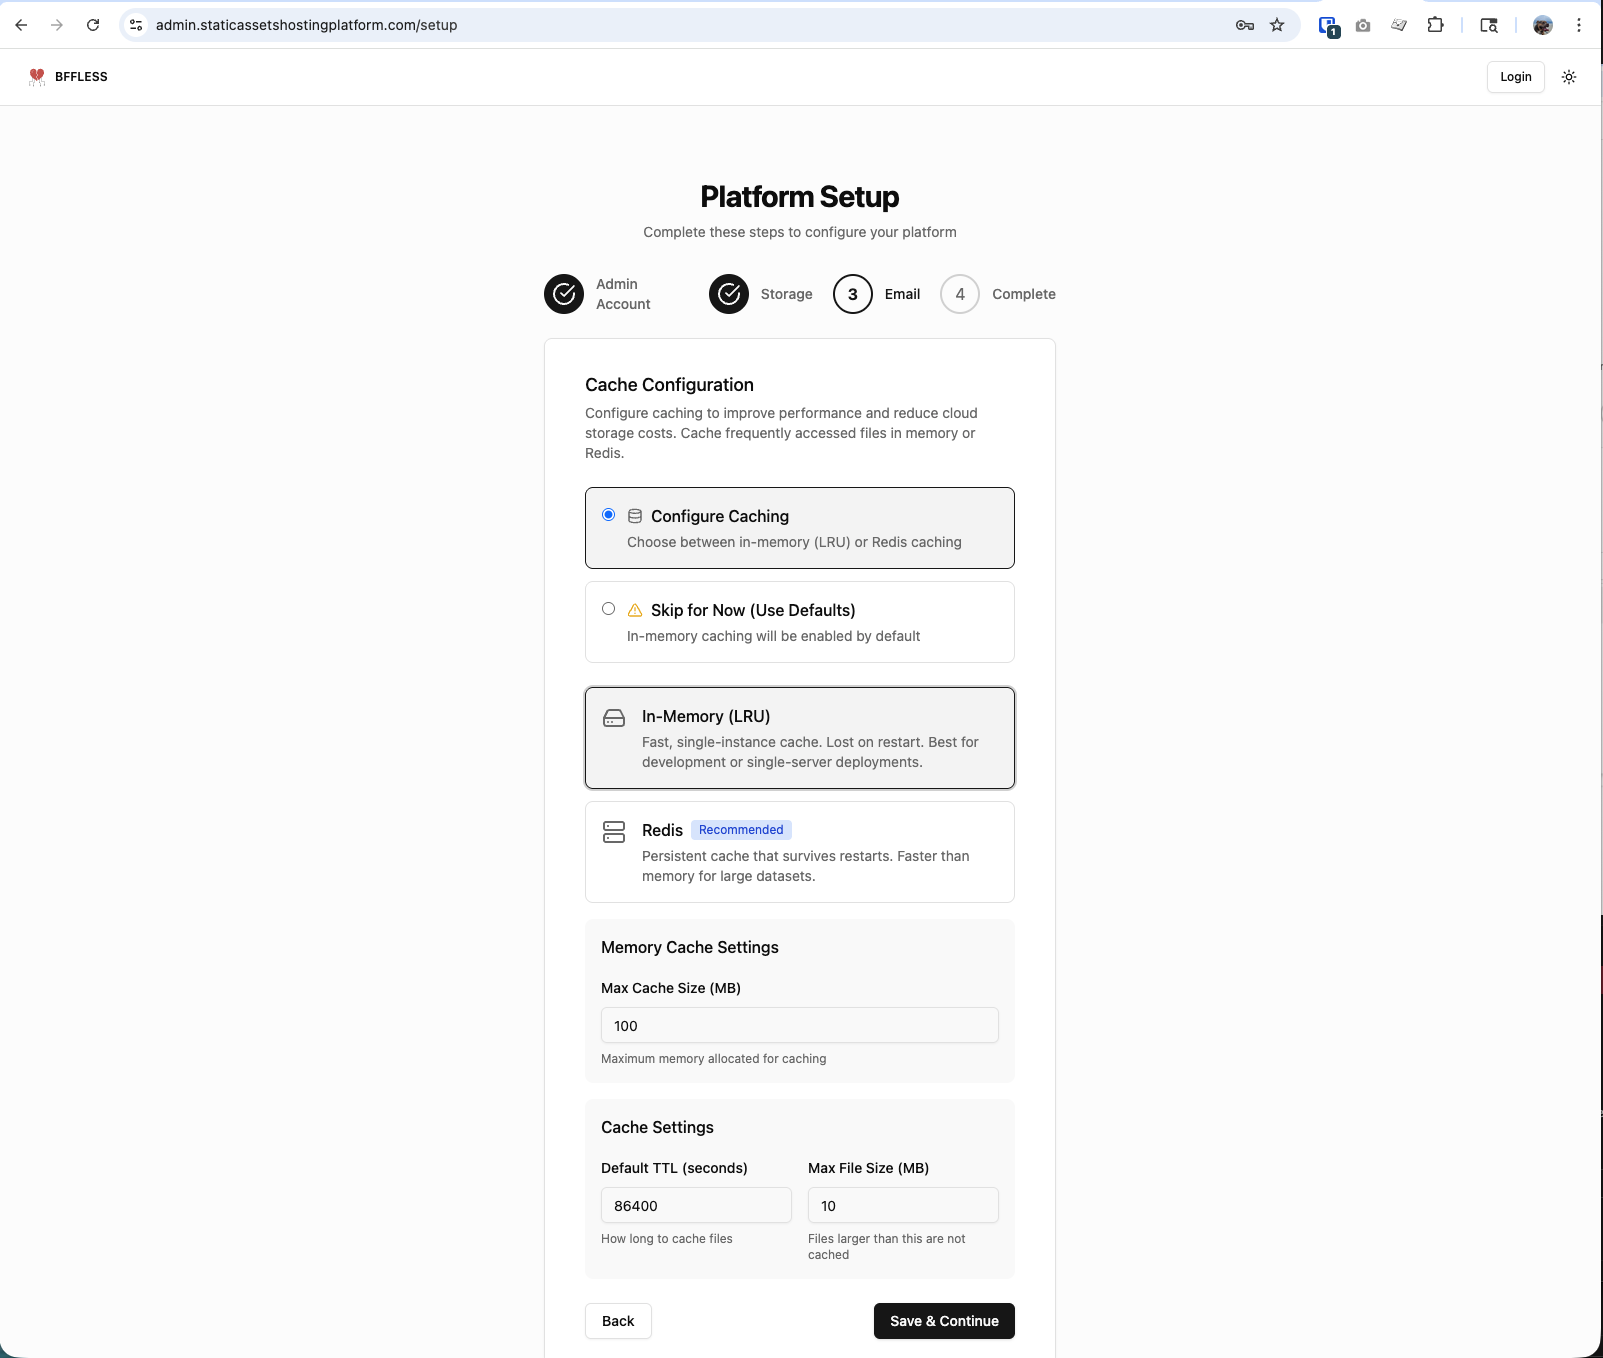
In-Memory (LRU) caching is recommended for most deployments. It's fast, simple, and requires no additional services. Redis is usually overkill unless you have multi-server deployments or need cache persistence across restarts.
In-Memory (LRU) - Recommended
Best for single-server deployments:
- Fast, single-instance cache
- No additional services required
- Cache is cleared on restart (usually fine)
Select In-Memory (LRU) and optionally adjust:
- Max Cache Size (MB): Default 100MB is good for most use cases
- Default TTL: How long to cache files (default: 86400 seconds / 24 hours)
- Max File Size (MB): Files larger than this won't be cached (default: 10MB)
Redis
Only needed for advanced scenarios:
- Multi-server deployments with shared cache
- Cache persistence across restarts
- Very large datasets
Click Save & Continue to proceed.
Step 4: Configure Email (Optional)
Email is primarily needed for password reset functionality.
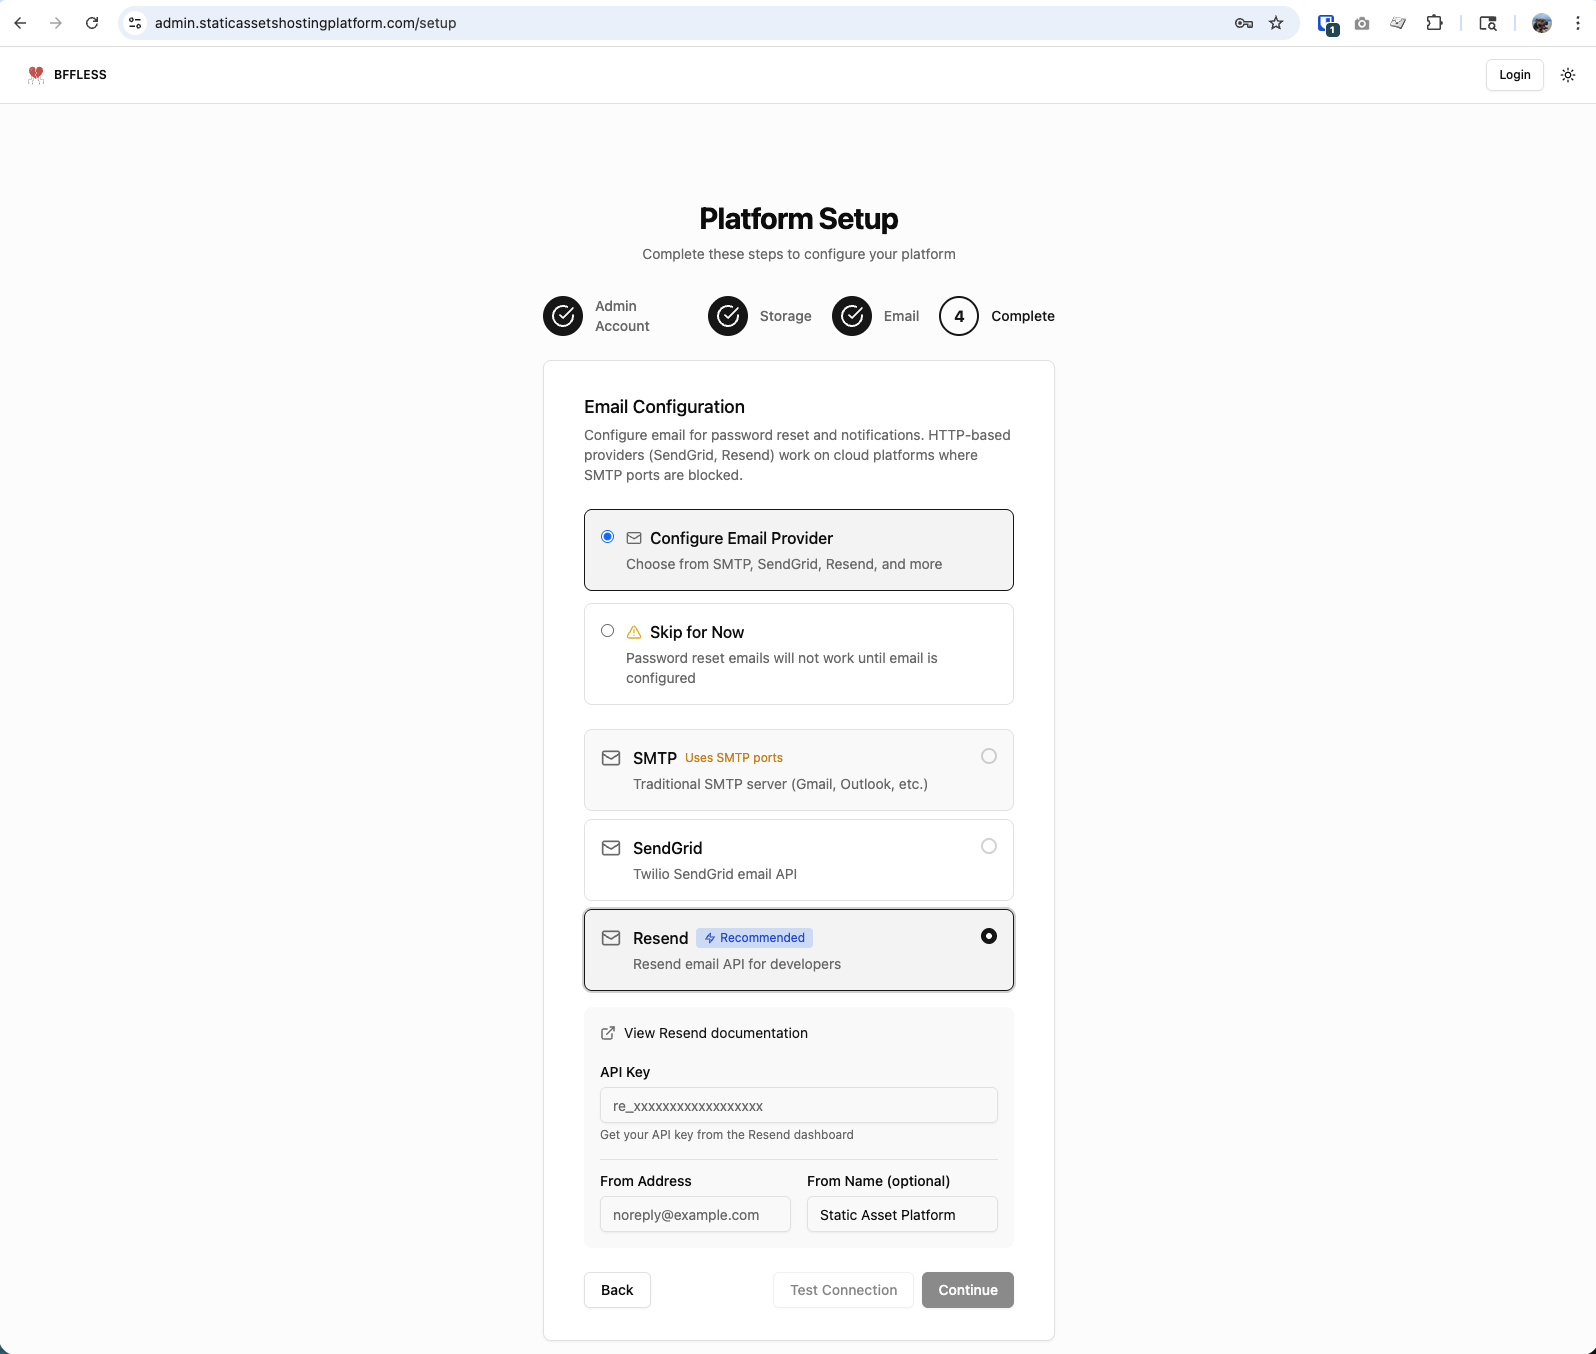
SMTP is often blocked by cloud hosting providers (DigitalOcean, AWS, etc.). We recommend either:
- Resend - Free tier available, works on all hosting providers
- Skip for Now - Configure later, password reset links will be logged instead
Resend (Recommended)
- Sign up for a free account at resend.com
- Create an API key in your Resend dashboard
- Select Resend and enter your API key
- Set your From Address (must be verified in Resend)
Skip for Now
If you skip email configuration, password reset won't send emails. Instead, reset links are logged to the console. You can view them with:
docker compose logs -f
Look for lines containing the password reset URL when a user requests a reset.
SMTP
Traditional SMTP usually doesn't work on cloud providers due to port blocking. If you have a working SMTP server:
| Field | Description |
|---|---|
| Host | SMTP server (e.g., smtp.gmail.com) |
| Port | SMTP port (587 for TLS, 465 for SSL) |
| Username | SMTP username |
| Password | SMTP password or app-specific password |
| From Address | Sender email (e.g., noreply@domain.com) |
Click Test Connection to verify, then click Continue.
Step 5: Complete Setup
Review your configuration and finalize the setup.
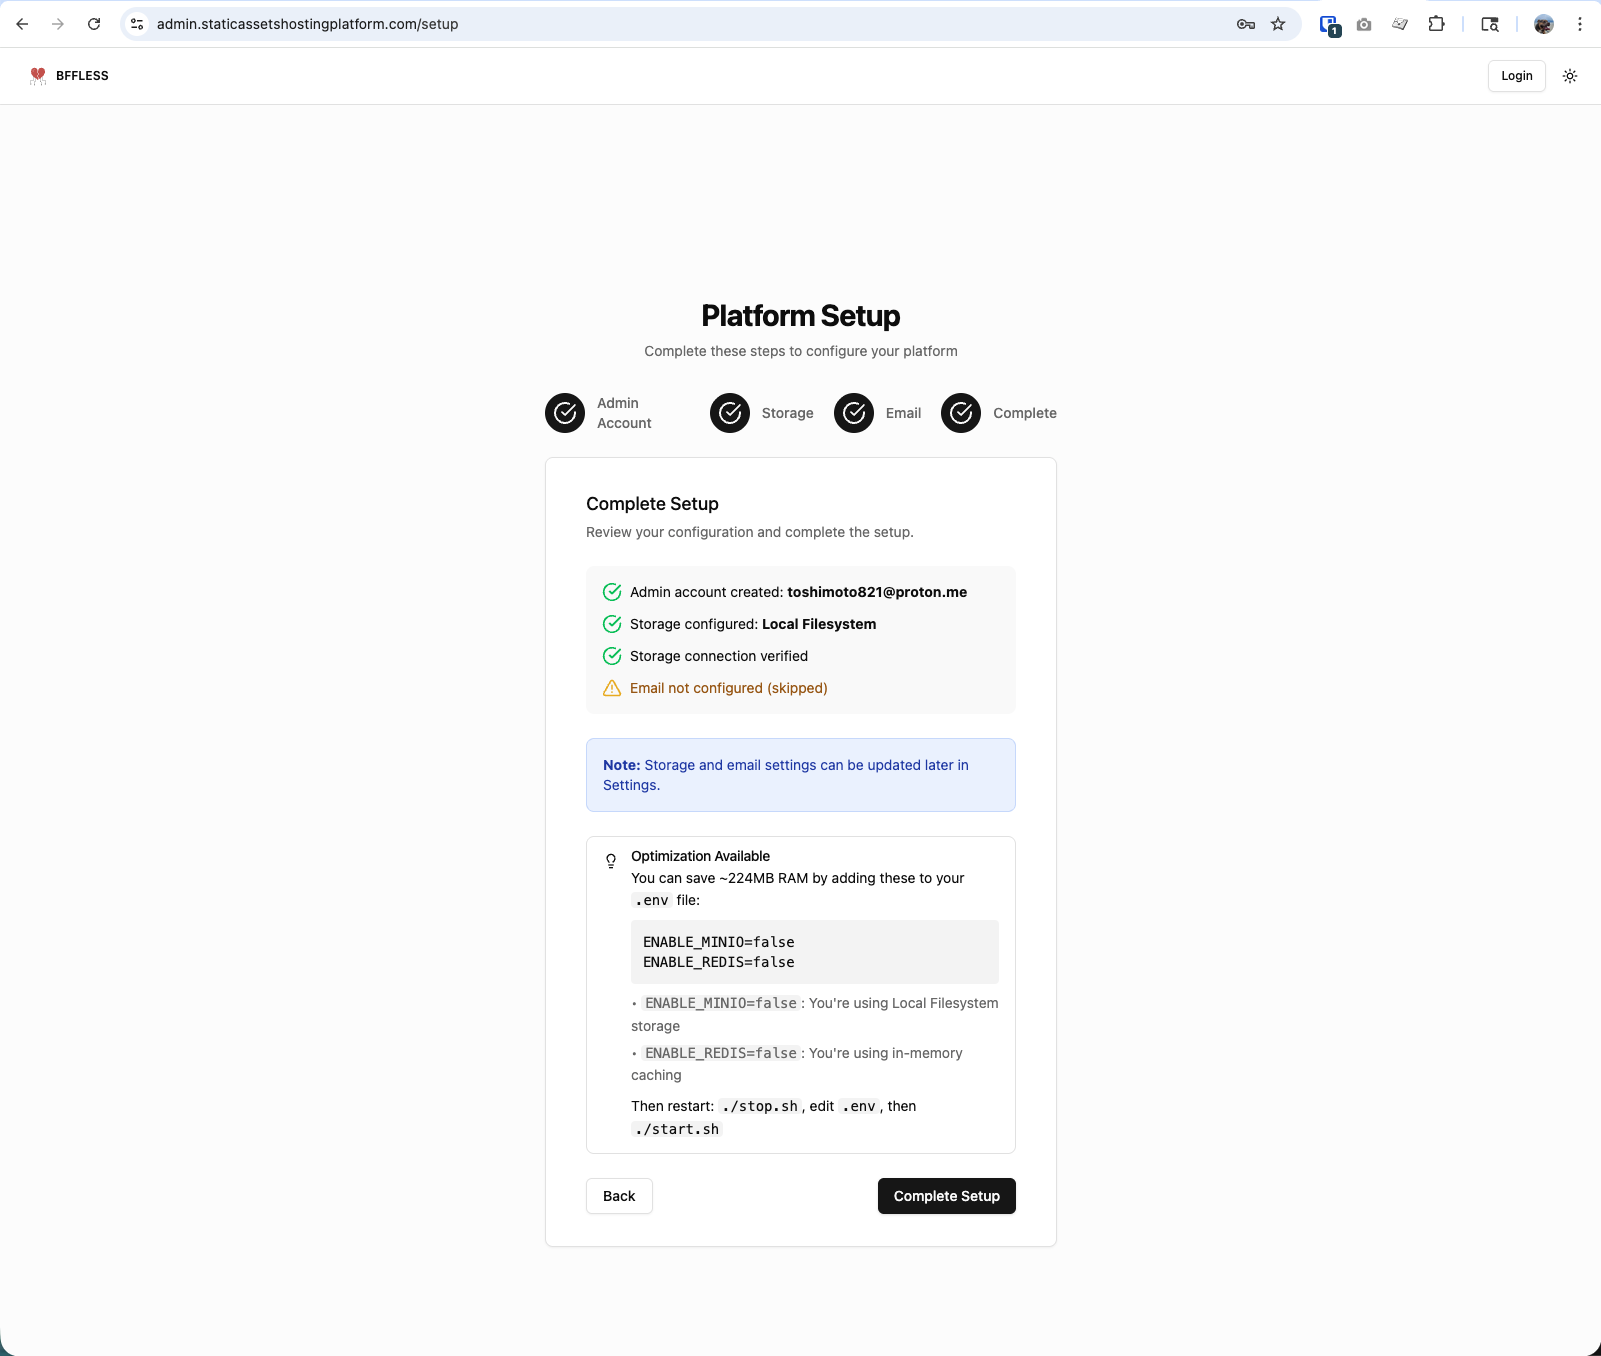
The summary shows your configured options. If you chose Local Filesystem storage and In-Memory caching, you'll see an optimization recommendation.
If your server has 2GB+ RAM, you can enable MinIO (S3-compatible object storage) and Redis (caching) for enhanced performance. Edit your .env file:
ENABLE_MINIO=true
ENABLE_REDIS=true
Then restart:
./stop.sh
./start.sh
By default, BFFless uses local filesystem storage and in-memory caching, which works well for most deployments.
Click Complete Setup to finish and access your dashboard.
What's Next?
You're now ready to deploy your first site!
👉 First Deployment Guide - Create a repository, generate an API key, and deploy
Troubleshooting
Can't Access Setup Wizard
If you see a login page instead of the setup wizard:
- The setup may already be complete
- Try logging in with the admin credentials you created
- Or reset the installation and start fresh
Storage Connection Failed
- MinIO: Ensure MinIO container is running (
docker compose ps) - S3: Verify IAM permissions include
s3:PutObject,s3:GetObject,s3:ListBucket - GCS: Check service account has Storage Admin role
Redis Connection Failed
- Verify Redis container is running:
docker compose ps - Check the password matches your
.envfile - For external Redis, ensure firewall allows connections
Email Test Failed
- SMTP: Gmail requires an "App Password" (not your regular password)
- API providers: Verify the from address is verified in your provider's dashboard
- Check firewall allows outbound connections on the SMTP port