Viewing Deployments
After your GitHub Action completes, your deployment will appear in BFFless. This guide covers how to browse deployments, set up aliases, and map domains to serve your content.
Repository Overview
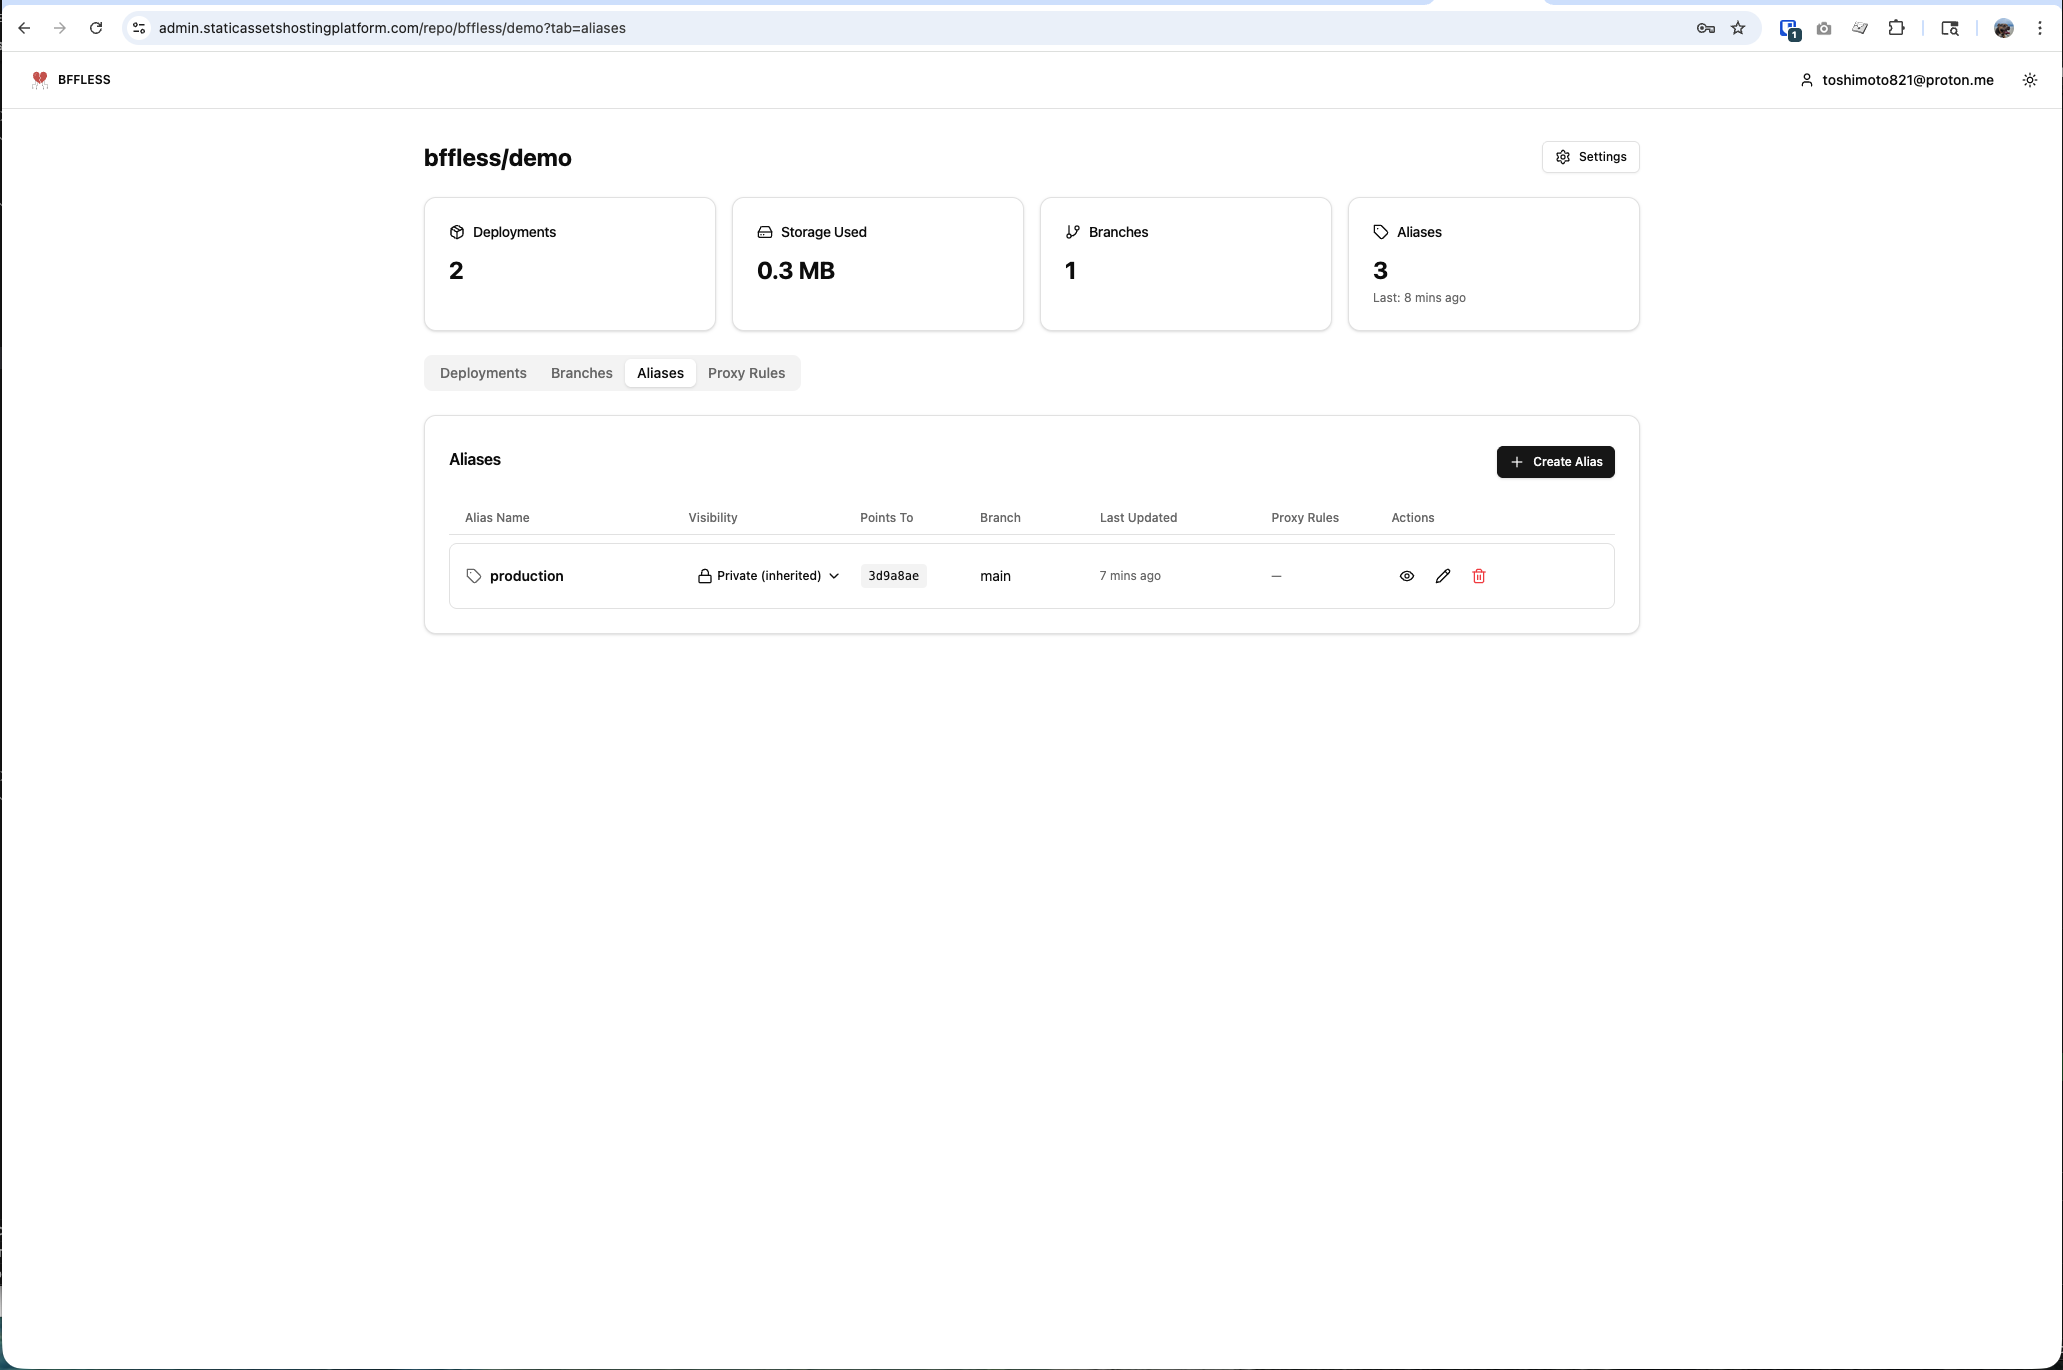
Navigate to your repository to see all deployments.
The repository page shows:
- Recent Deployments - Each commit that's been uploaded
- Aliases - Named pointers to specific deployments (e.g.,
production) - Storage Stats - How much storage the repository is using
Browsing Deployed Content
Click on any deployment to browse its contents:
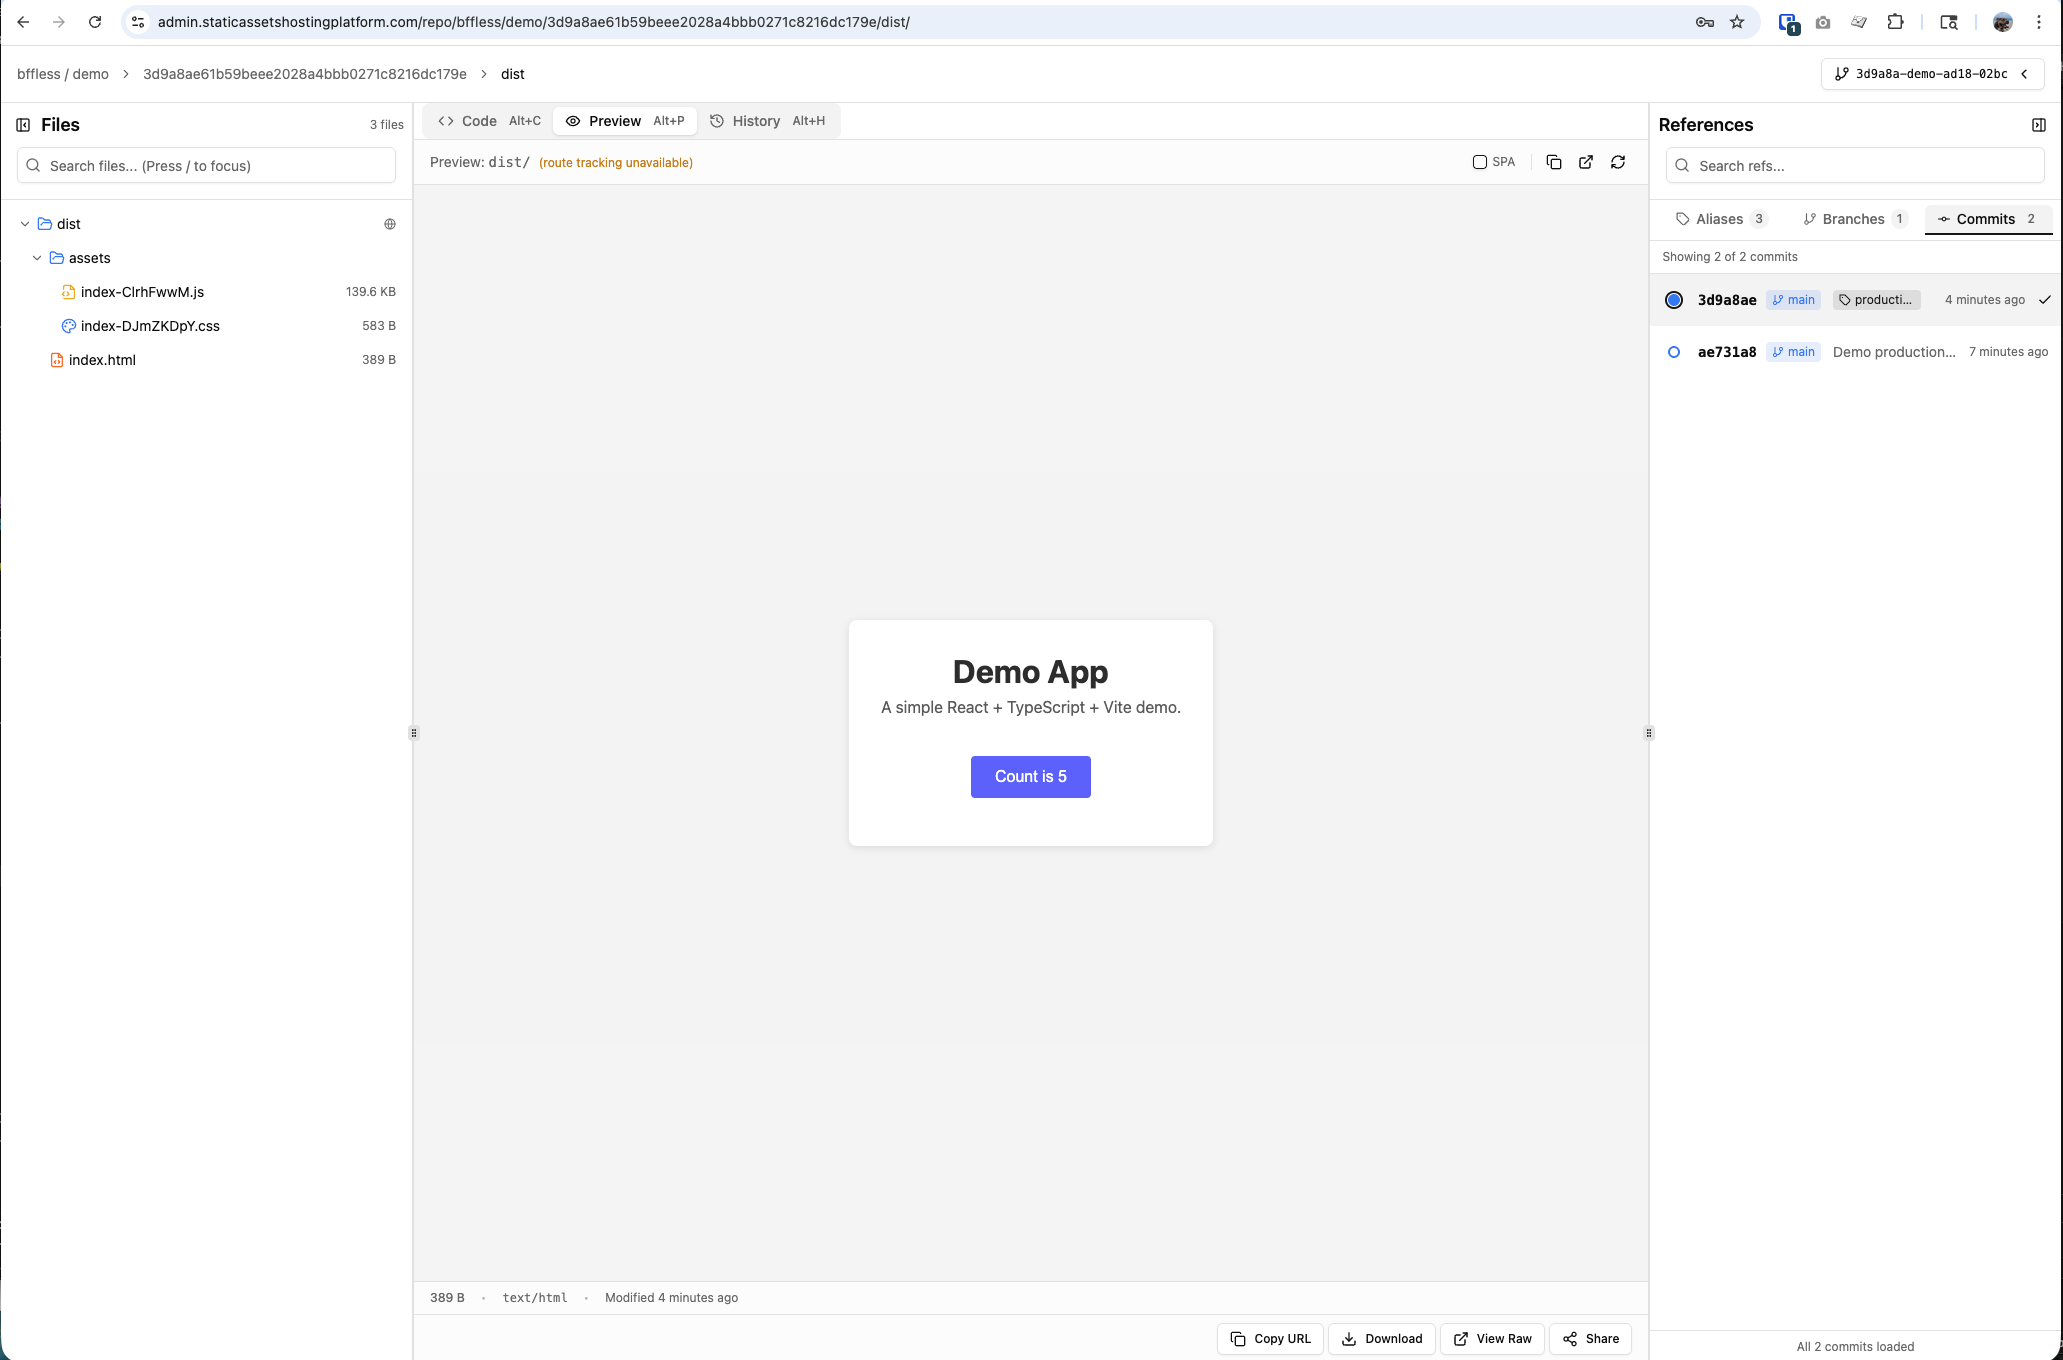
- File Browser - Navigate through your deployed files and folders
- Preview - View HTML pages, images, and other assets directly in the browser
- Deployment Info - Commit SHA, upload time, file count, and size
Click any HTML file to preview it directly. This is useful for reviewing changes before promoting to production.
Setting Up Aliases
Aliases provide stable URLs that point to specific deployments. Use them for:
- production - Your live site
- staging - Pre-production testing
- preview - Feature previews
If you followed the First Deployment guide, your GitHub Action already creates aliases automatically—production for the main branch and preview for feature branches.
Creating an Alias Manually
You can also create aliases manually:
- Go to your repository and click the Aliases tab
- Click Create Alias
- Enter a name (e.g.,
staging) - Select the deployment to point to
- Click Create
The alias URL will be:
https://admin.yourdomain.com/public/owner/repo/alias/production/
Updating Aliases
You can update an alias to point to a different commit at any time—useful for rollbacks or promoting a specific version.
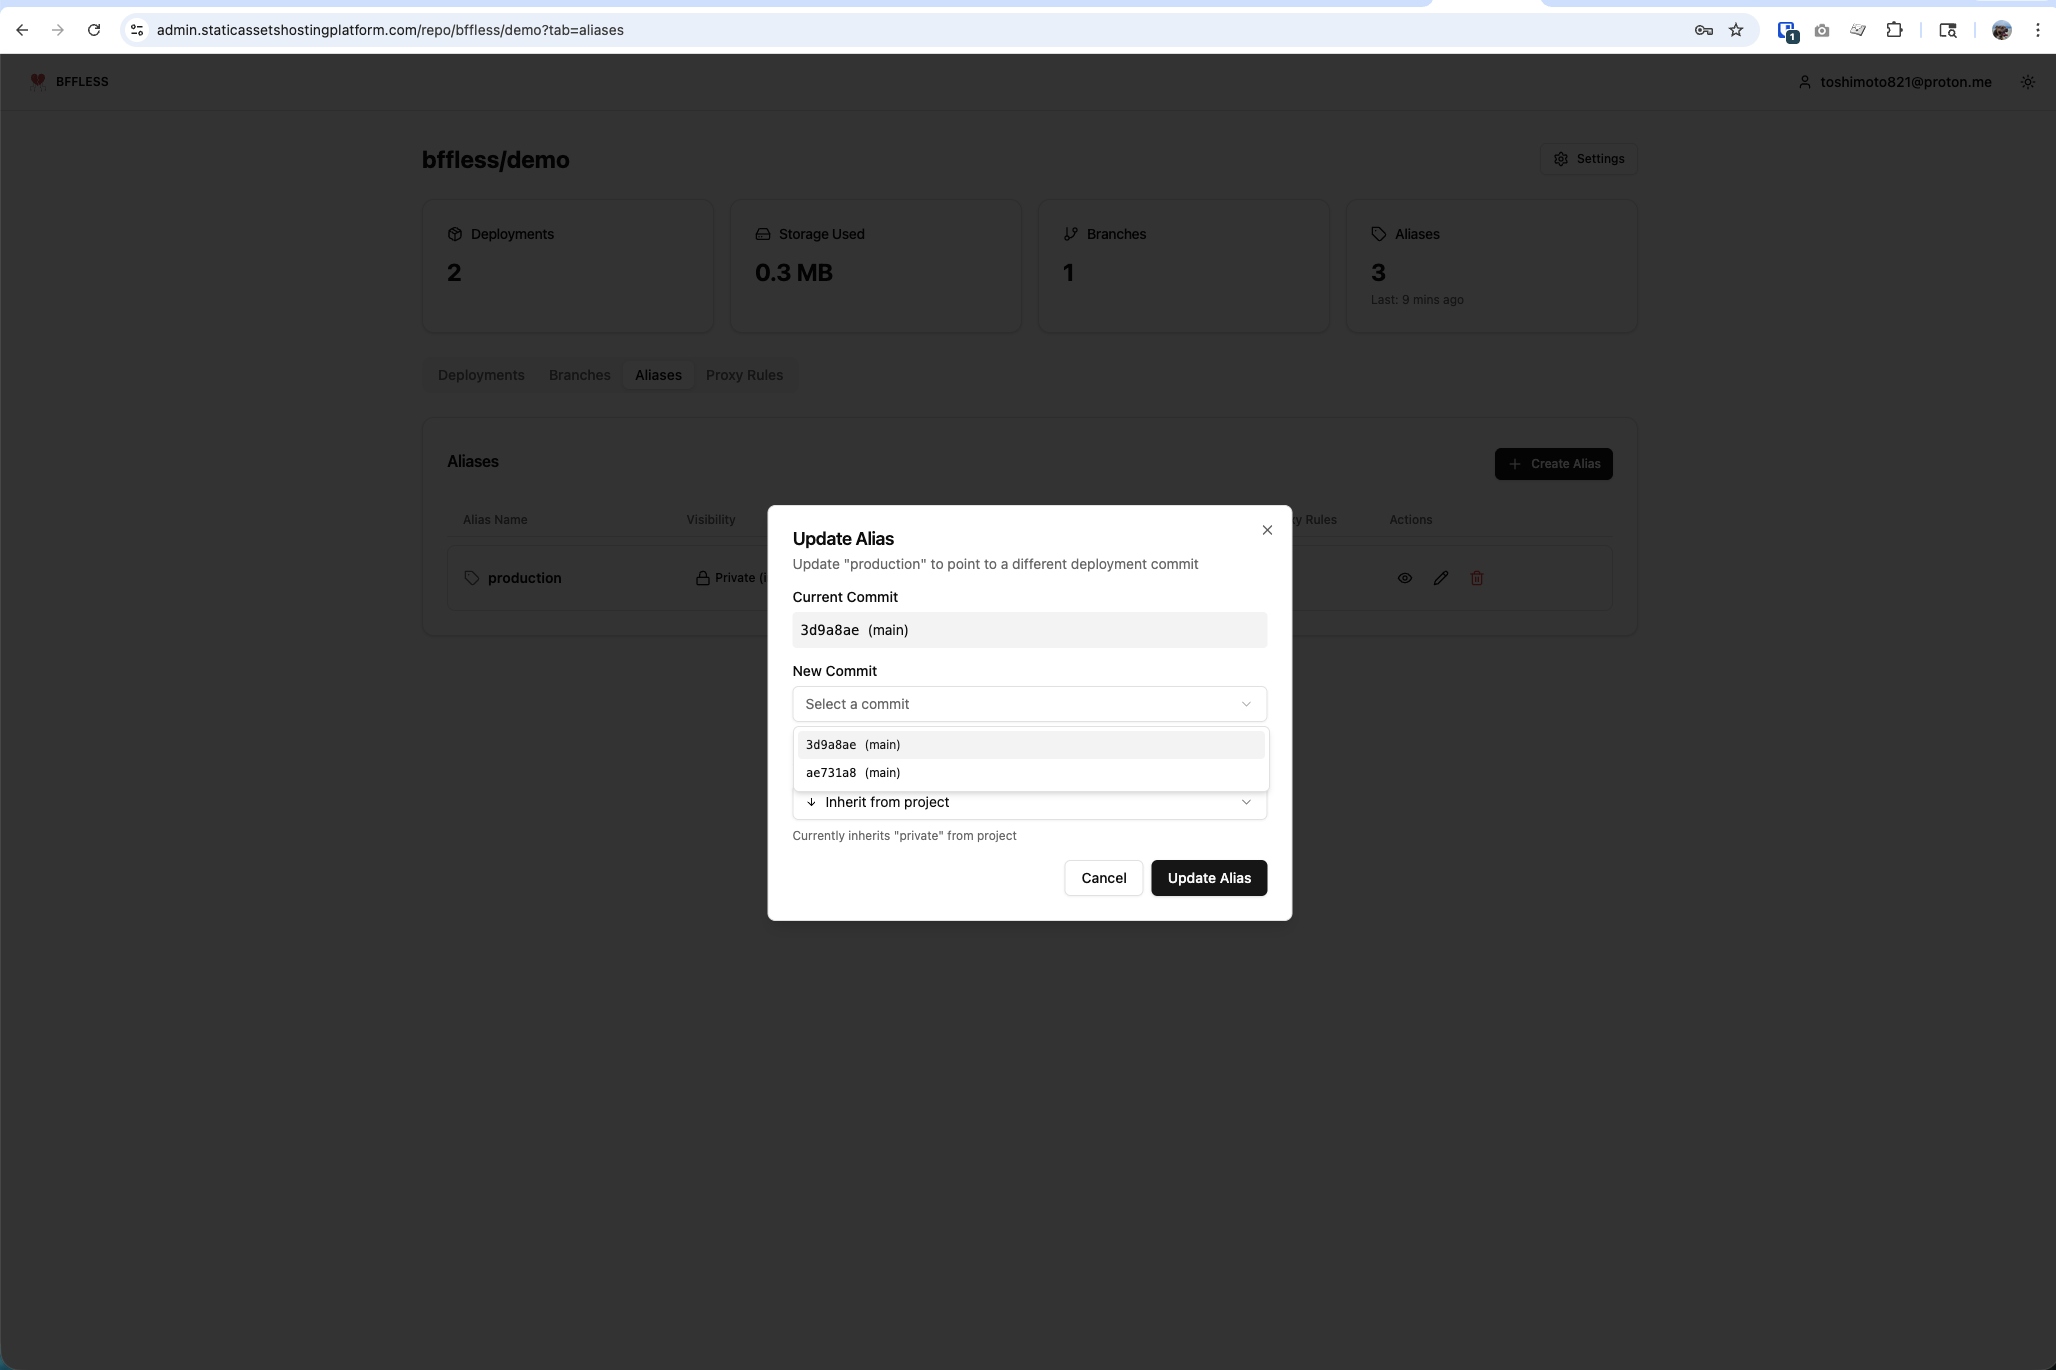
- Go to the Aliases tab
- Click the edit icon next to the alias you want to update
- Select a different commit from the dropdown
- Click Update Alias
This enables instant rollbacks—just point production to a previous commit.
Alias Visibility
Each alias can have its own visibility setting:
- Private - Requires authentication to access
- Public - Accessible to anyone with the URL
- Inherit from project - Uses the repository's default visibility
This lets you keep staging private while making production public.
Mapping Domains to Aliases
Connect your aliases to domains so users can access your deployments at friendly URLs like www.yourdomain.com or app.yourdomain.com.
Using Your Primary Domain
The simplest option is to serve content on your primary domain (the one you configured during setup).

- From the homepage, click Site Settings in the Admin section
- Enable Primary domain content
- Select your Repository (e.g.,
bffless/demo) - Select the Deployment Alias (e.g.,
production) - Optionally set a Path if your build outputs to a subdirectory (e.g.,
/dist) - Optionally enable Add www subdomain to support both
yourdomain.comandwww.yourdomain.com - Enable Single Page Application (SPA) if using React, Vue, or Angular with client-side routing
- Click Save Changes
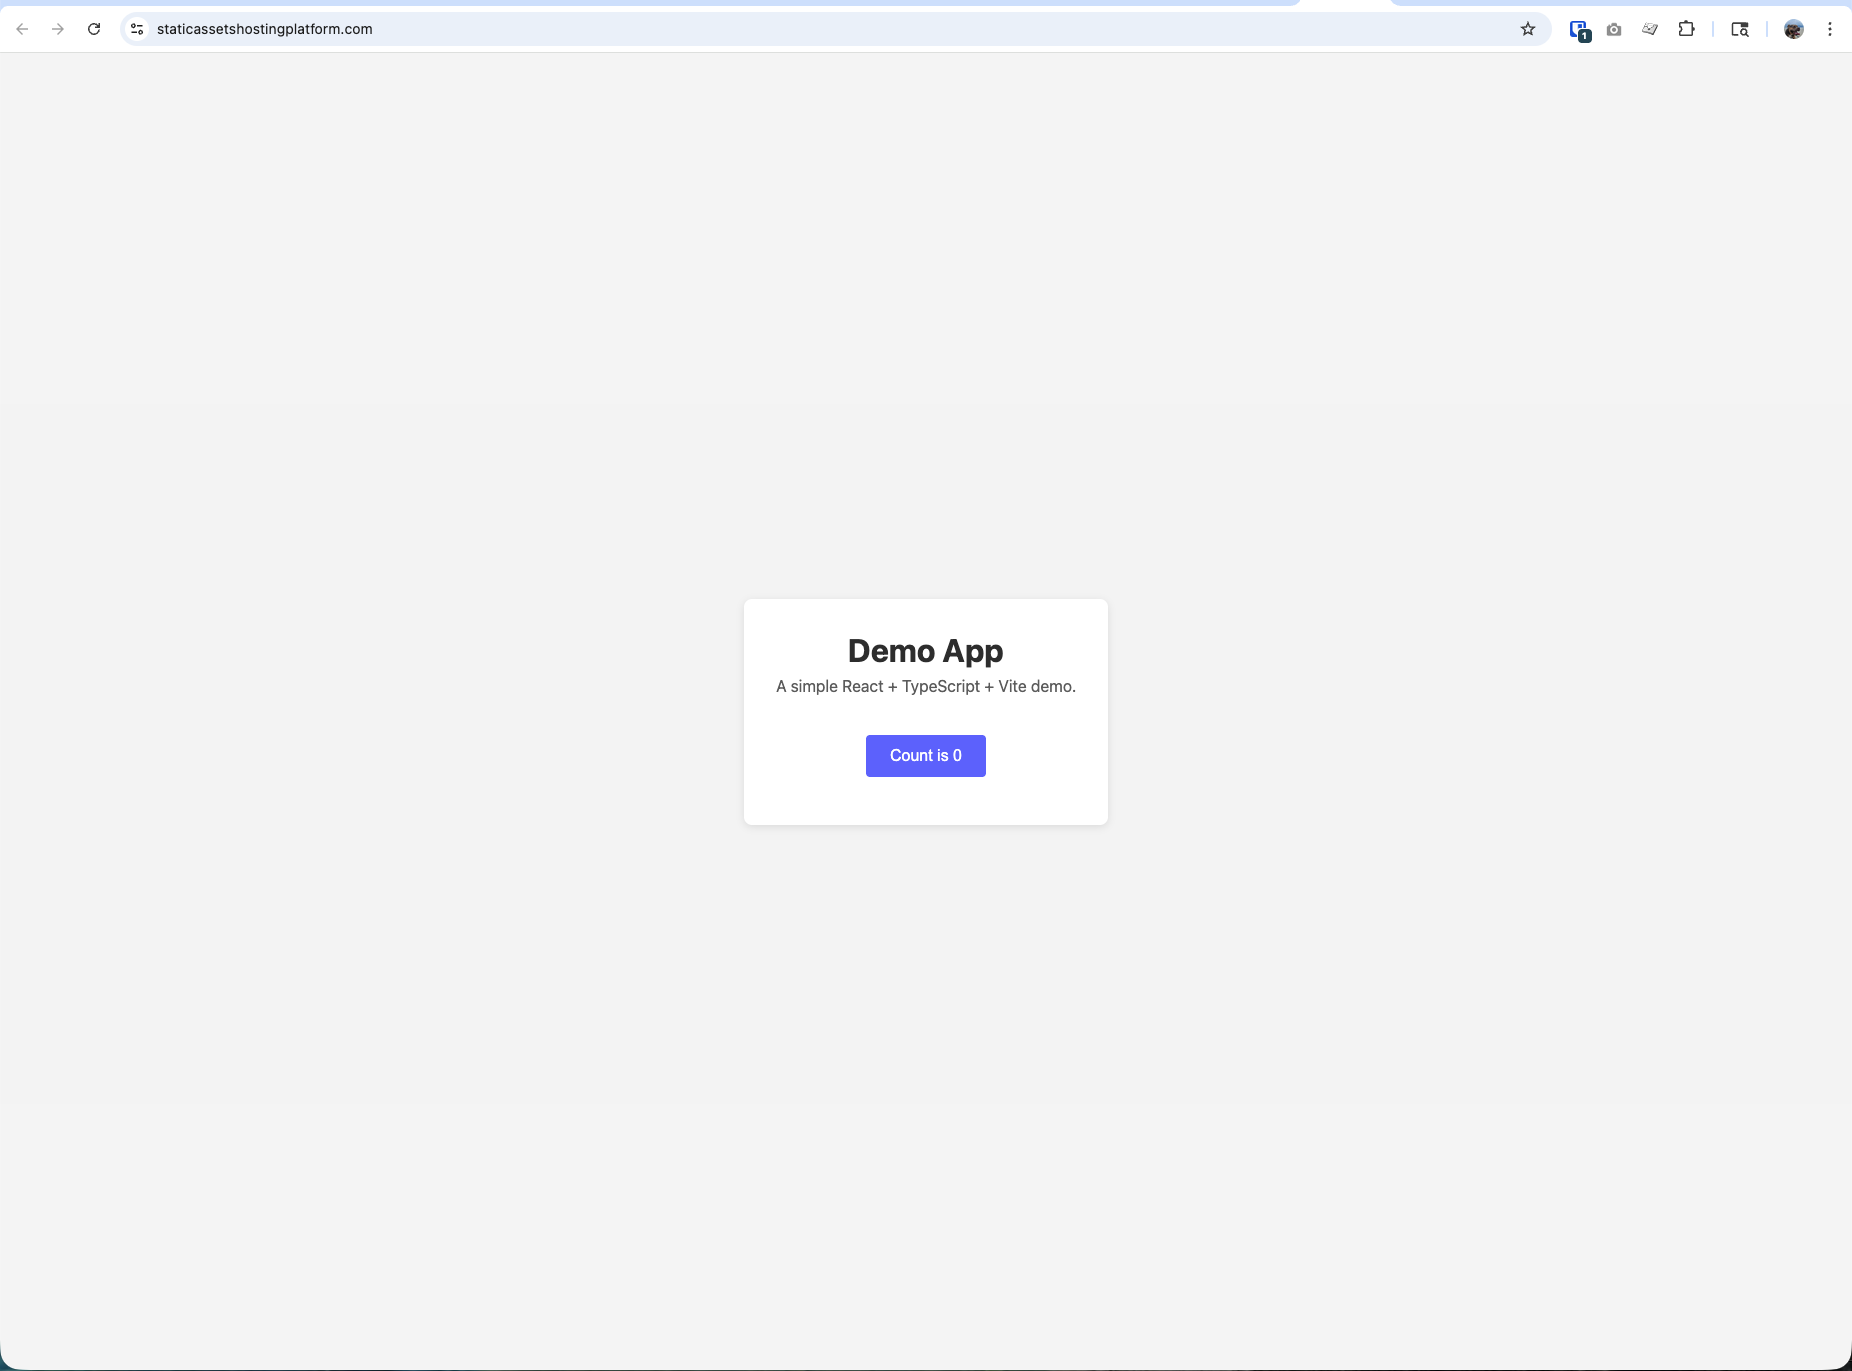
Your app is now live on your primary domain!
Mapping Custom Subdomains
For additional deployments, you can map custom subdomains to serve content at URLs like demo.docs.bffless.app ↗ or staging.docs.yourdomain.com.
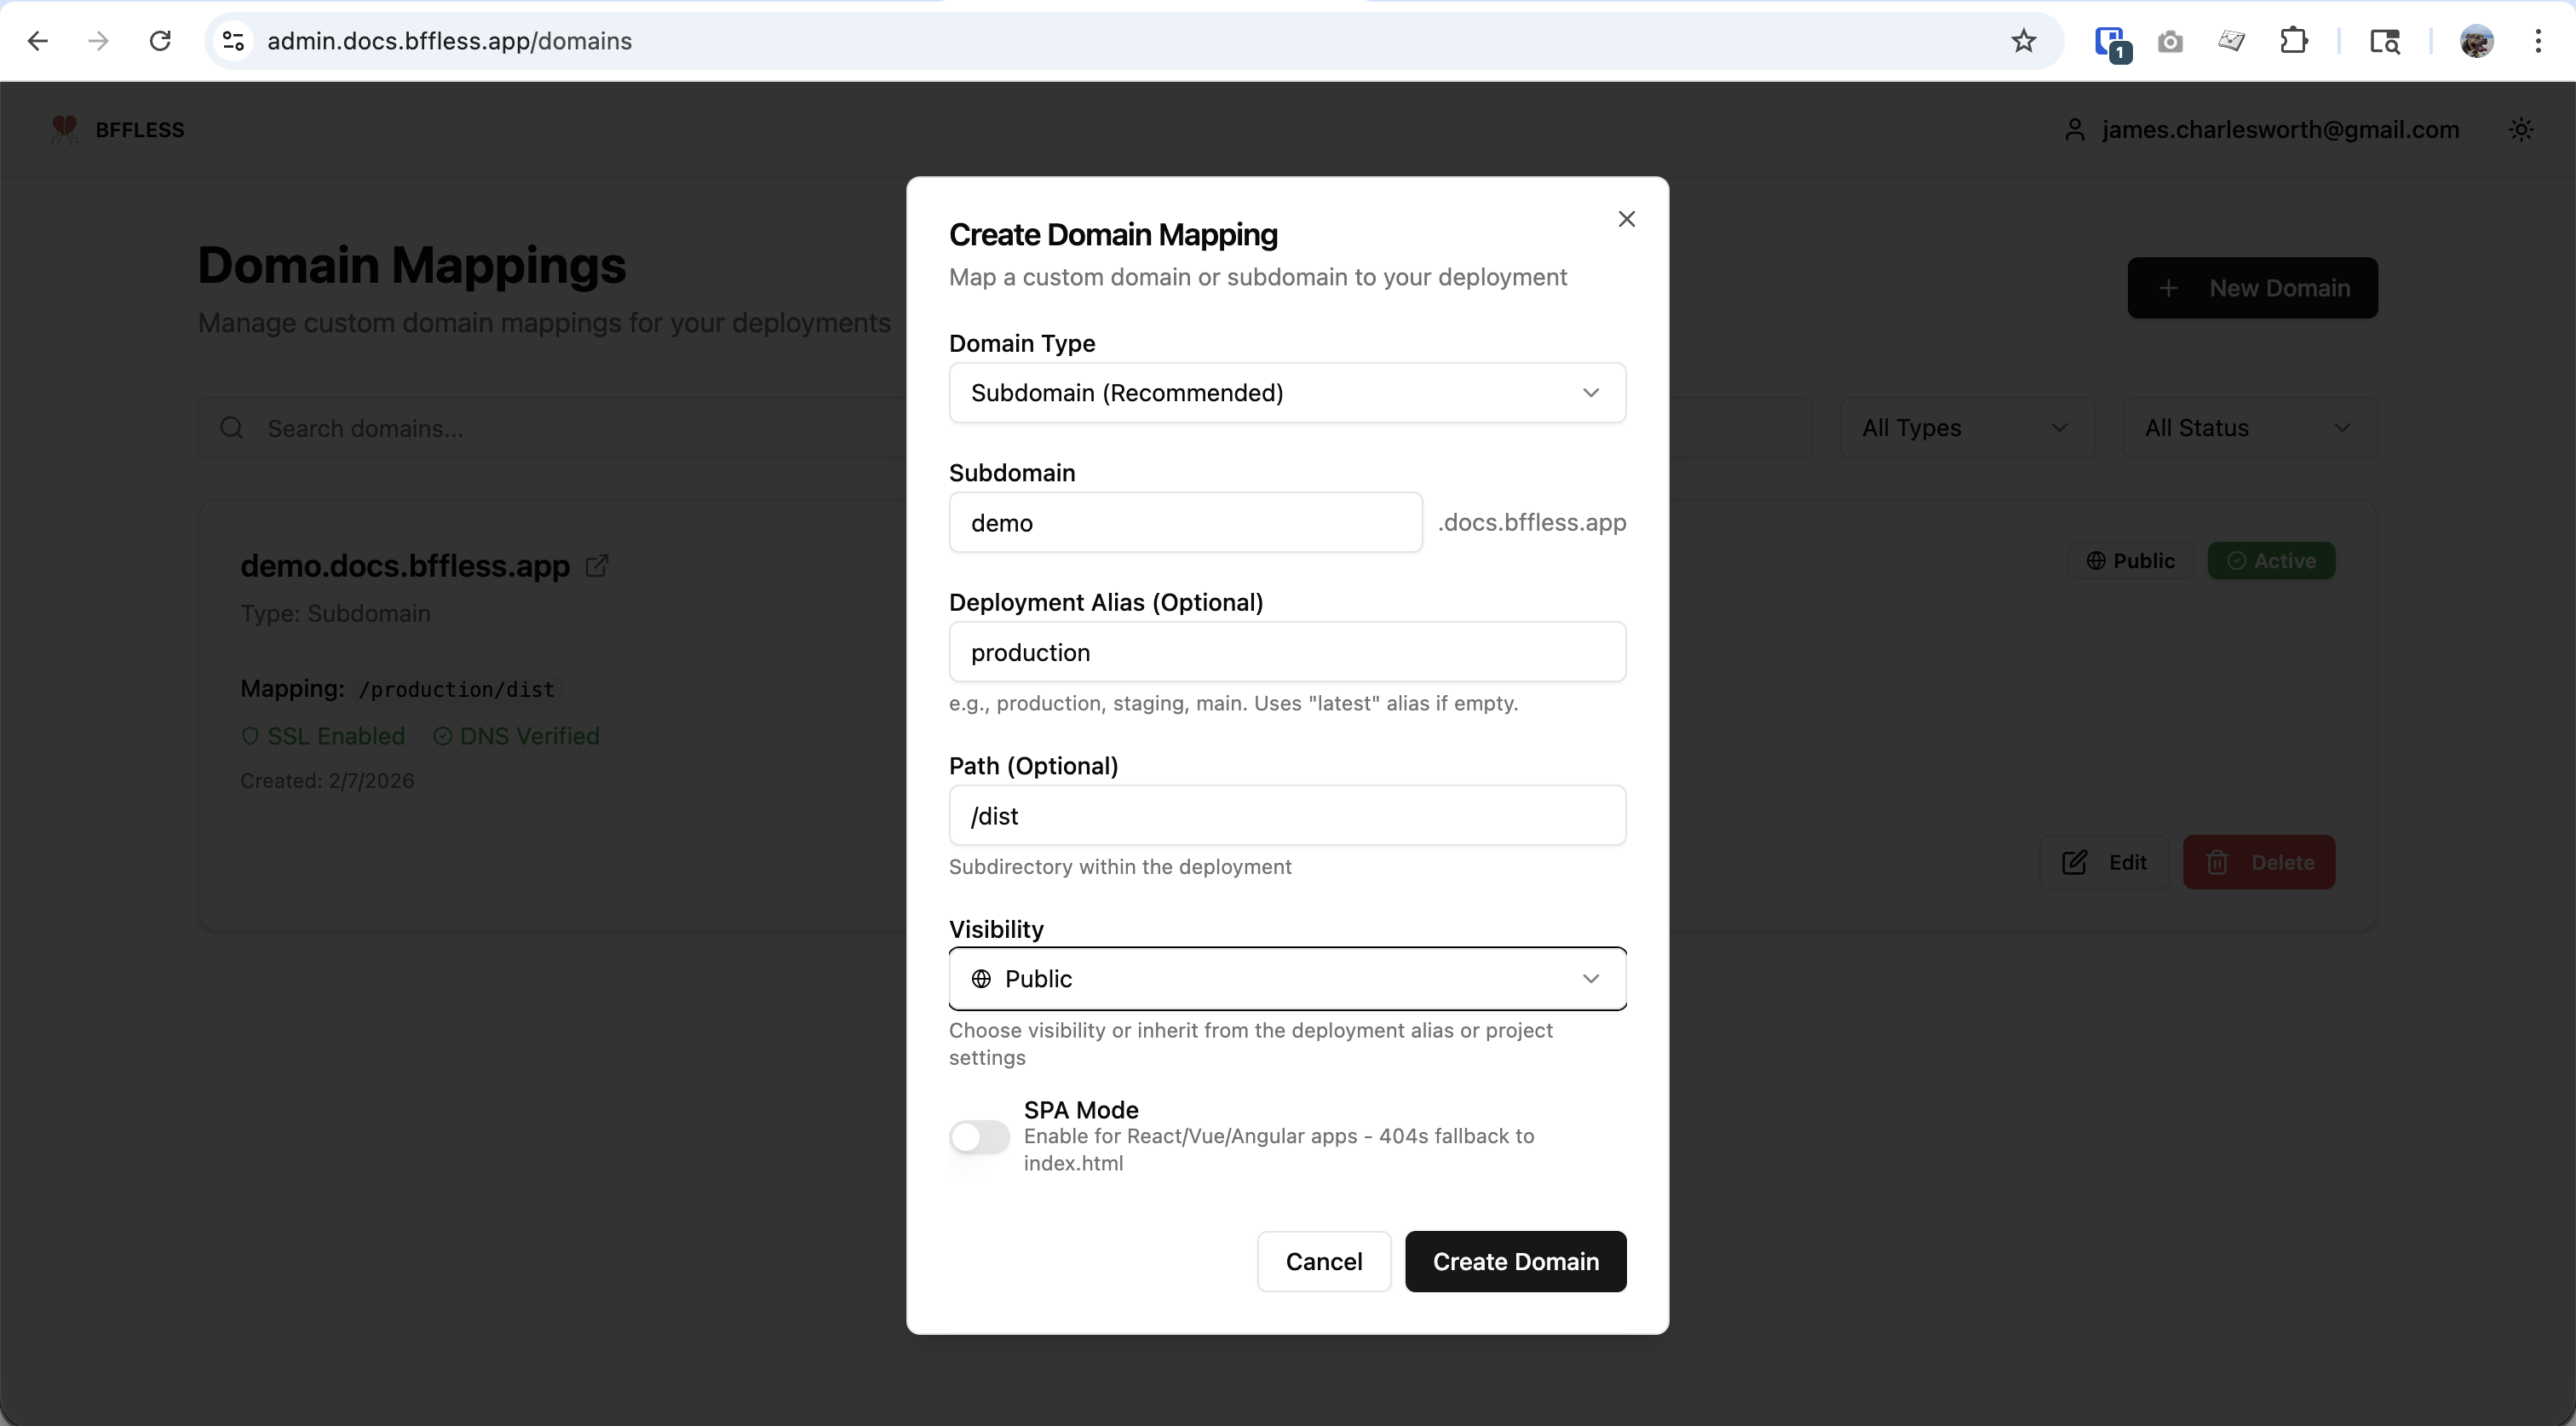
- Click Domains in the sidebar navigation
- Click + New Domain
- Select Subdomain (Recommended) as the Domain Type
- Enter your Subdomain prefix (e.g.,
demo) - Optionally set a Deployment Alias (e.g.,
production,staging) — defaults tolatestif empty - Optionally set a Path if your build outputs to a subdirectory (e.g.,
/dist) - Choose the Visibility setting (Public, Private, or inherit from project)
- Enable SPA Mode if using React, Vue, or Angular with client-side routing
- Click Create Domain
Once created, SSL certificates are automatically provisioned and DNS is verified. The domain card will show:
- SSL Enabled - HTTPS is active
- DNS Verified - Domain is properly configured
- Mapping - Shows the alias and path (e.g.,
/production/dist)
You can create as many subdomains as you need — perfect for staging environments, feature previews, or serving multiple projects from the same workspace.
Mapping Custom Domains
You can also map fully custom domains (like www.example.com or docs.mycompany.io) to your deployments. This is useful when you want to serve content on a domain that isn't a subdomain of your primary domain.
- Click Domains in the sidebar navigation
- Click + New Domain
- Select Custom Domain as the Domain Type
- Enter the full domain name (e.g.,
www.staticassetshostingplatform.com) - Configure the deployment alias, path, and visibility settings
- Click Create Domain
After creating the domain, you'll see DNS configuration instructions:
- A Record - Point your domain to your server's IP address
- www behavior - Optionally configure redirects between
wwwand non-www versions
Click Verify DNS once you've configured your DNS records. The verification checks that the domain resolves correctly.
Custom domains are always public — authentication cookies don't work across different domains. If you need private content, use subdomains instead.
Custom Domains with Cloudflare
If your custom domain is also managed through Cloudflare (separate from your primary domain), there are special considerations:
DNS Verification
When a custom domain uses Cloudflare's proxy (orange cloud), DNS lookups return Cloudflare's edge IPs instead of your server IP. BFFless automatically detects Cloudflare IPs and accepts them as valid during DNS verification.
SSL Configuration
Cloudflare Origin Certificates are domain-specific — a certificate for j5s.dev won't work for staticassetshostingplatform.com. You have two options:
| Option | Cloudflare SSL Mode | Setup |
|---|---|---|
| Simple (Recommended) | Full | Set SSL mode to "Full" in Cloudflare. This accepts any valid certificate from your origin. |
| Strict | Full (Strict) | Generate a separate Origin Certificate for each custom domain in its Cloudflare zone. |
To configure SSL mode for your custom domain:
- Log into Cloudflare for your custom domain's zone
- Go to SSL/TLS > Overview
- Set encryption mode to Full (not Full Strict)
This allows Cloudflare to connect securely to your origin using the existing certificate, even though the hostname doesn't match.
Your primary domain (configured during setup) can use Full (Strict) with its Origin Certificate. Each Cloudflare zone has independent SSL settings, so custom domains can use Full mode while your primary domain stays on Full (Strict).
Non-Cloudflare Custom Domains
If your custom domain doesn't use Cloudflare:
- Point DNS directly to your server's IP address (shown in the DNS instructions)
- BFFless will verify the domain via HTTP health check
- For SSL, you can use Let's Encrypt or configure your own certificate
Next Steps
- Traffic Splitting - A/B test between deployments
- Share Links - Create personalized preview links
- Proxy Rules - Forward API requests to backend services