Deploying Handoff: A BFFless File-Sharing App with Claude
Handoff is a new Dropbox-like file-sharing application built on top of BFFless. It lets you share files with other people — and even with Claude on VPS servers — through a clean web interface with folder management, drag-and-drop uploads, share links, and role-based access control. In this post, we'll walk through the entire process of deploying Handoff from scratch: forking the repo, configuring GitHub secrets, migrating storage to AWS S3, wiring up the MCP server so Claude can manage BFFless, and then letting Claude deploy the whole application to production.
Handoff is one of several apps in the BFFless apps repository — a collection of ready-to-deploy applications that sit on top of a BFFless instance. Another example is Studio, a post-production video editing tool. The idea is that with a little help from Claude (or by reading the instructions yourself), you can deploy any of these apps on top of your own BFFless server.
Forking the Repo and Setting GitHub Secrets
The starting point is a fresh, empty BFFless server. Three things need to happen before we can deploy anything: set up GitHub environment variables, configure an MCP server for Claude, and migrate storage to AWS S3.
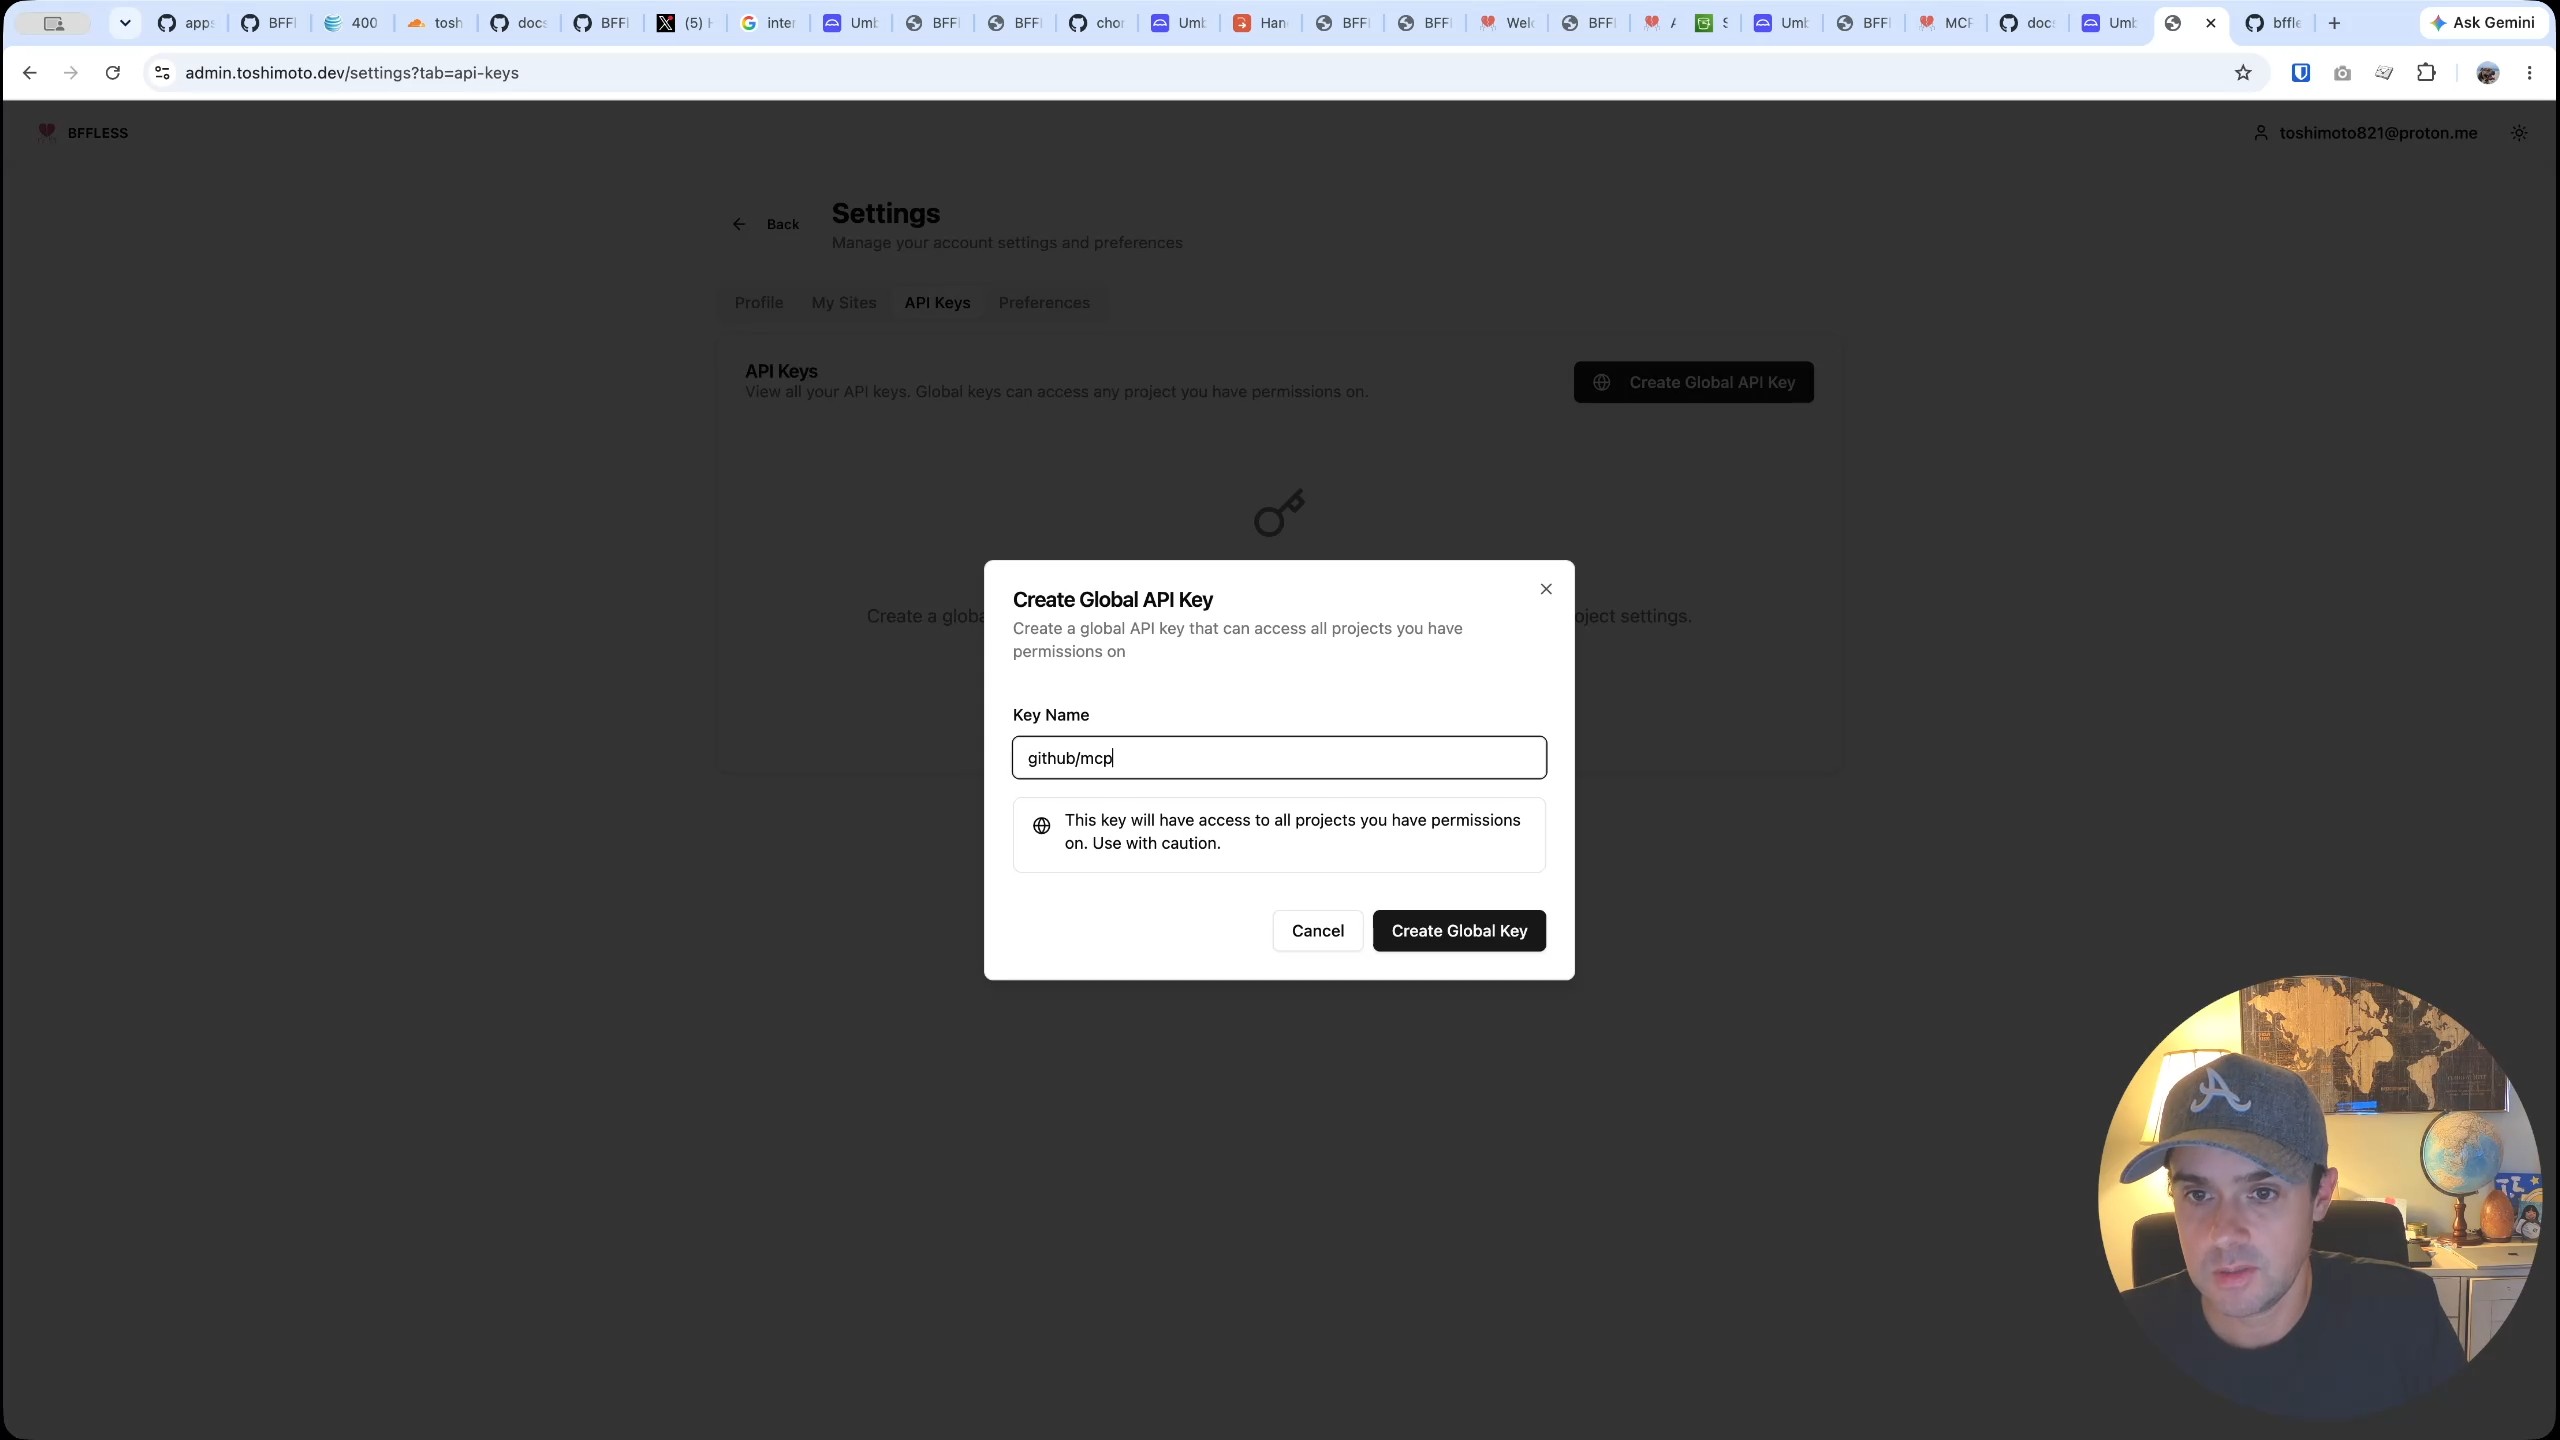
The first step is to generate a global API key inside the BFFless admin dashboard. This key is named GitHub/MCP since it will be used both by the GitHub Actions pipeline and by the MCP server. After copying the key, the next step is to fork the BFFless apps repository on GitHub.
With the fork created, two pieces of configuration go into the GitHub repository settings:
- A repository secret called
BFFLESS_API_KEY, containing the API key generated above. - A repository variable called
BFFLESS_URL, set to the URL of the BFFless backend (in this case,https://admin.toshimoto.dev).
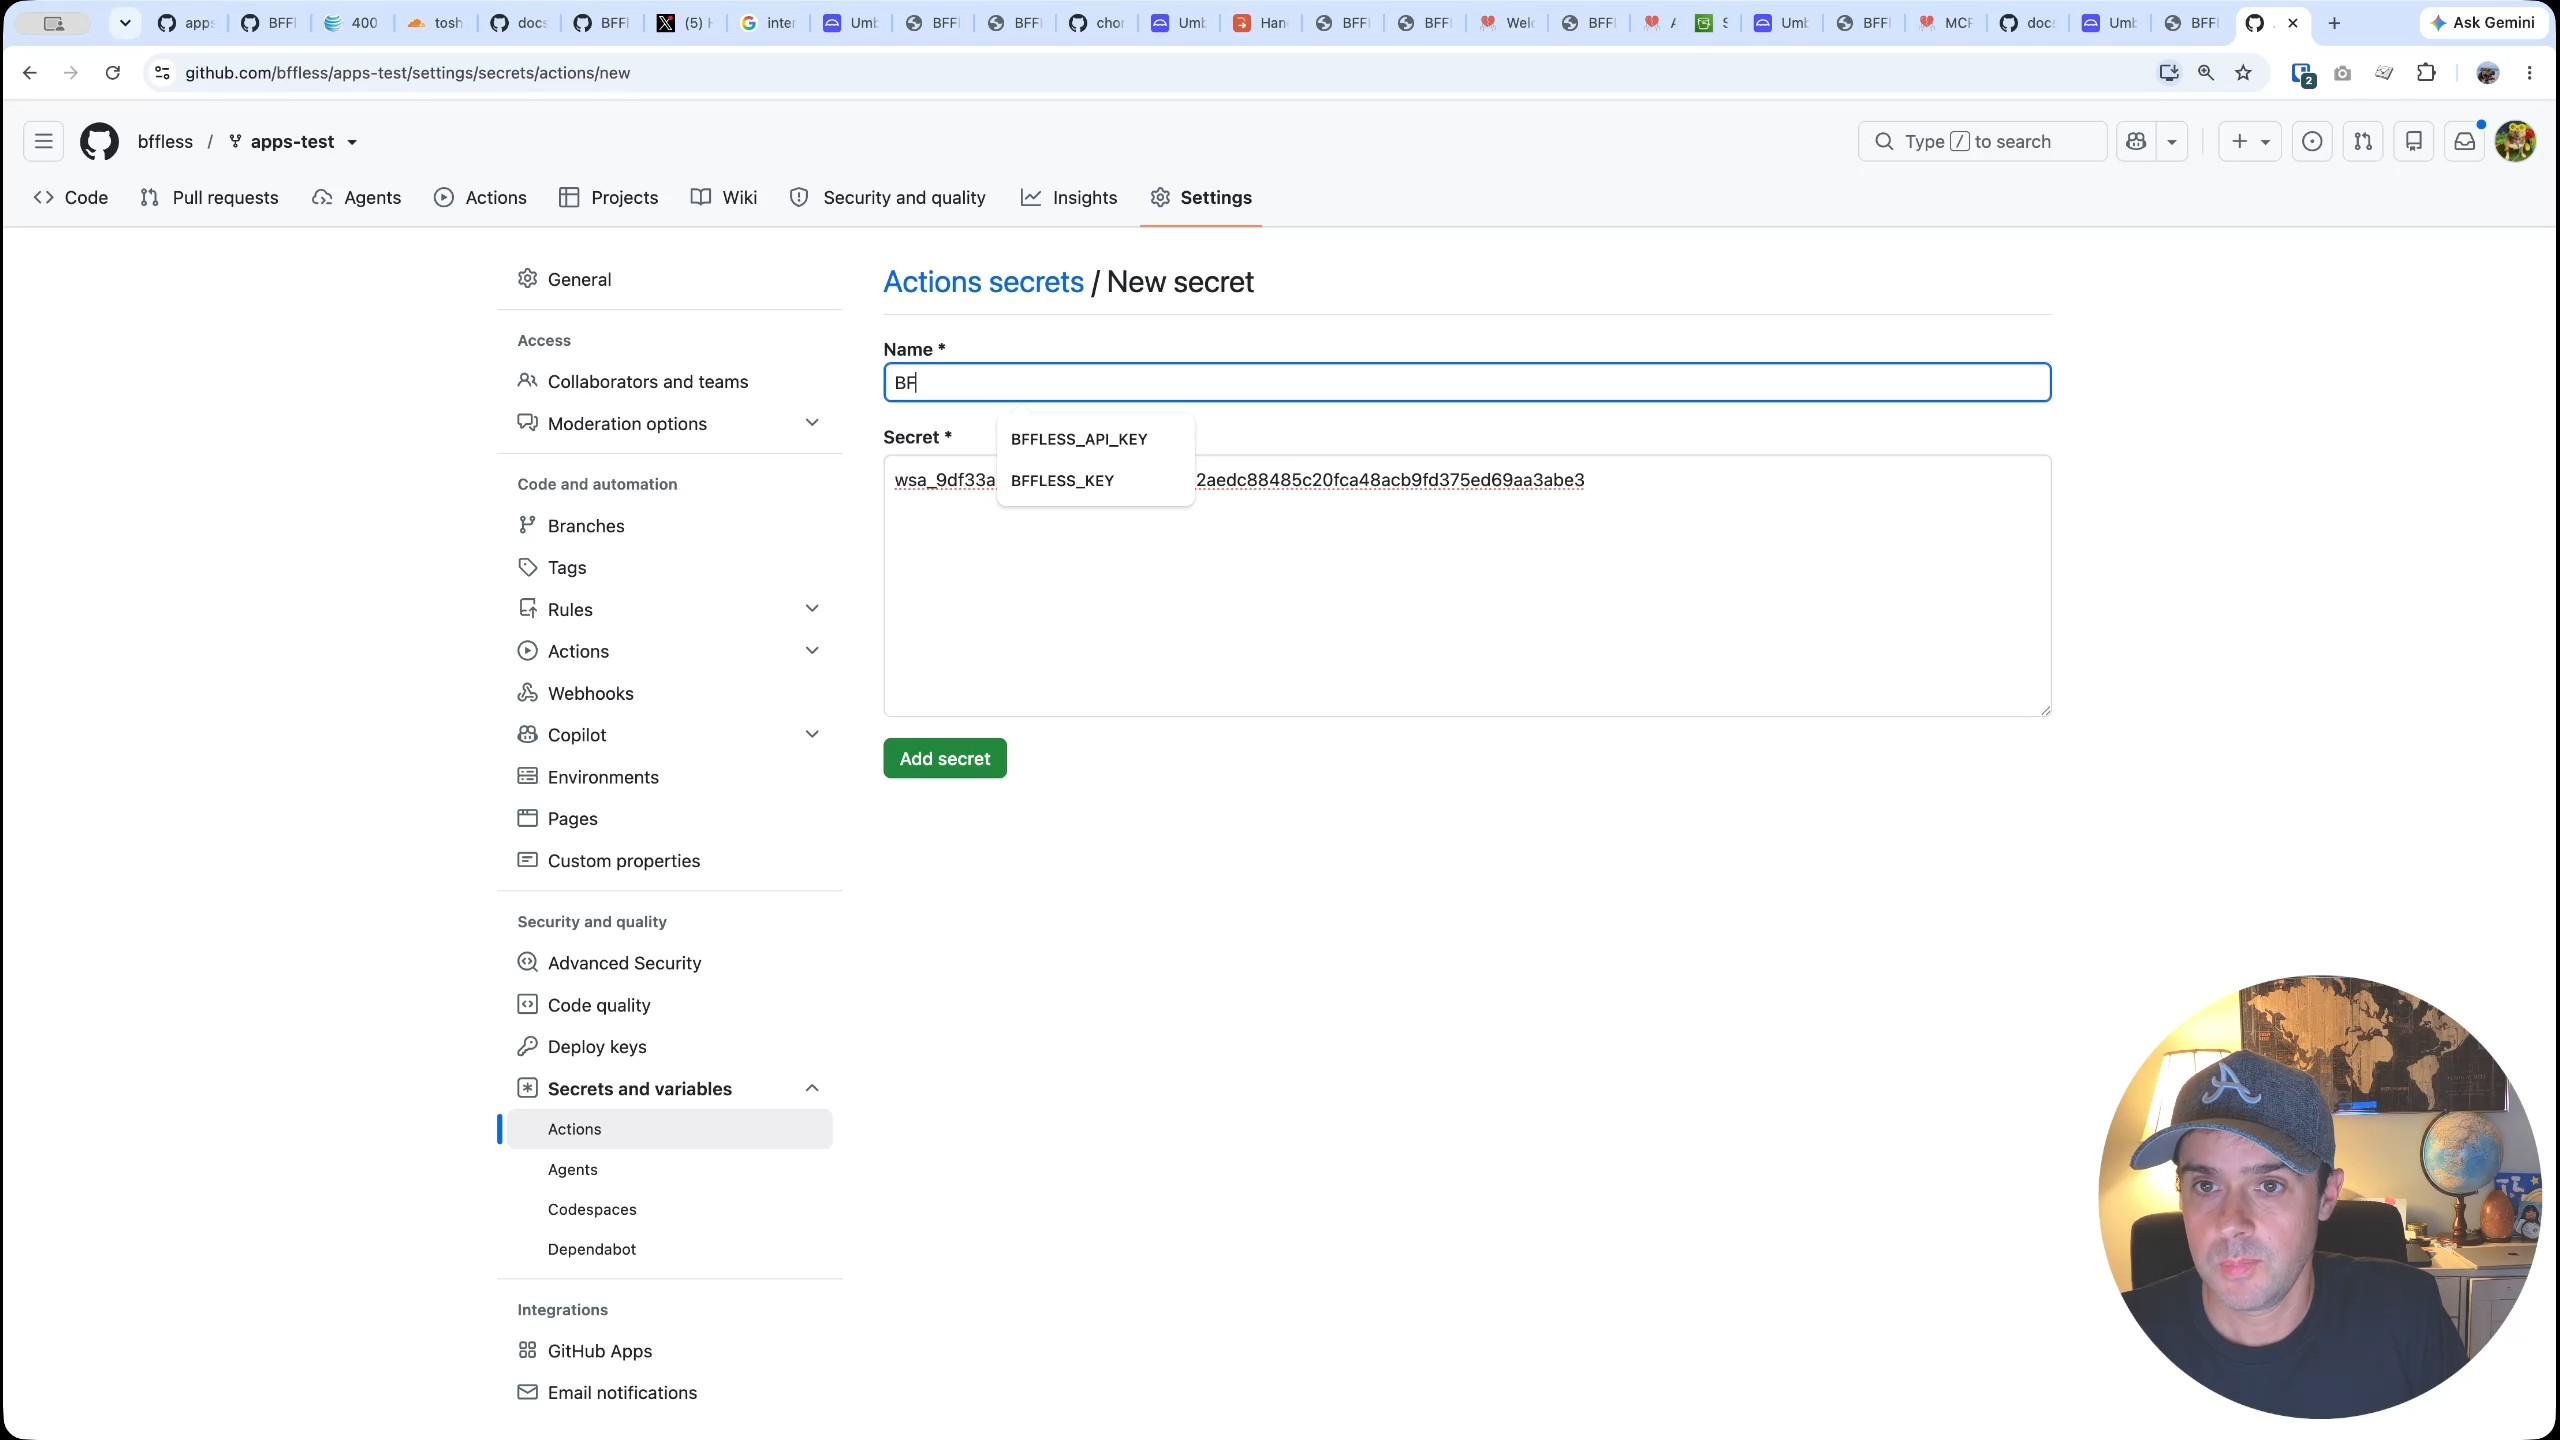
These values allow the GitHub Actions pipeline to authenticate against the BFFless instance and know where to deploy.
Configuring the MCP Server for Claude
The MCP server is what gives Claude direct access to the BFFless API — letting it list projects, create proxy rules, manage data tables, and more. The setup involves grabbing the MCP server configuration snippet from the BFFless docs, pasting it into VS Code, and updating two values: the domain (e.g., toshimoto.dev) and the API key.
Once the configuration file is saved, the next step is to clone the forked repository locally and navigate into the project directory. This is an important detail: the MCP configuration file needs to be in the correct directory so that when Claude Code starts, it picks up the connection. Running claude mcp from the project root confirms the connection — in this case, 63 tools are loaded, meaning Claude has full access to the BFFless API.
A quick sanity check — asking Claude "what projects do you see set up on BFFless via MCP?" — confirms the connection is working. The response comes back with no projects, which is expected since this is a fresh instance.
Migrating Storage to AWS S3
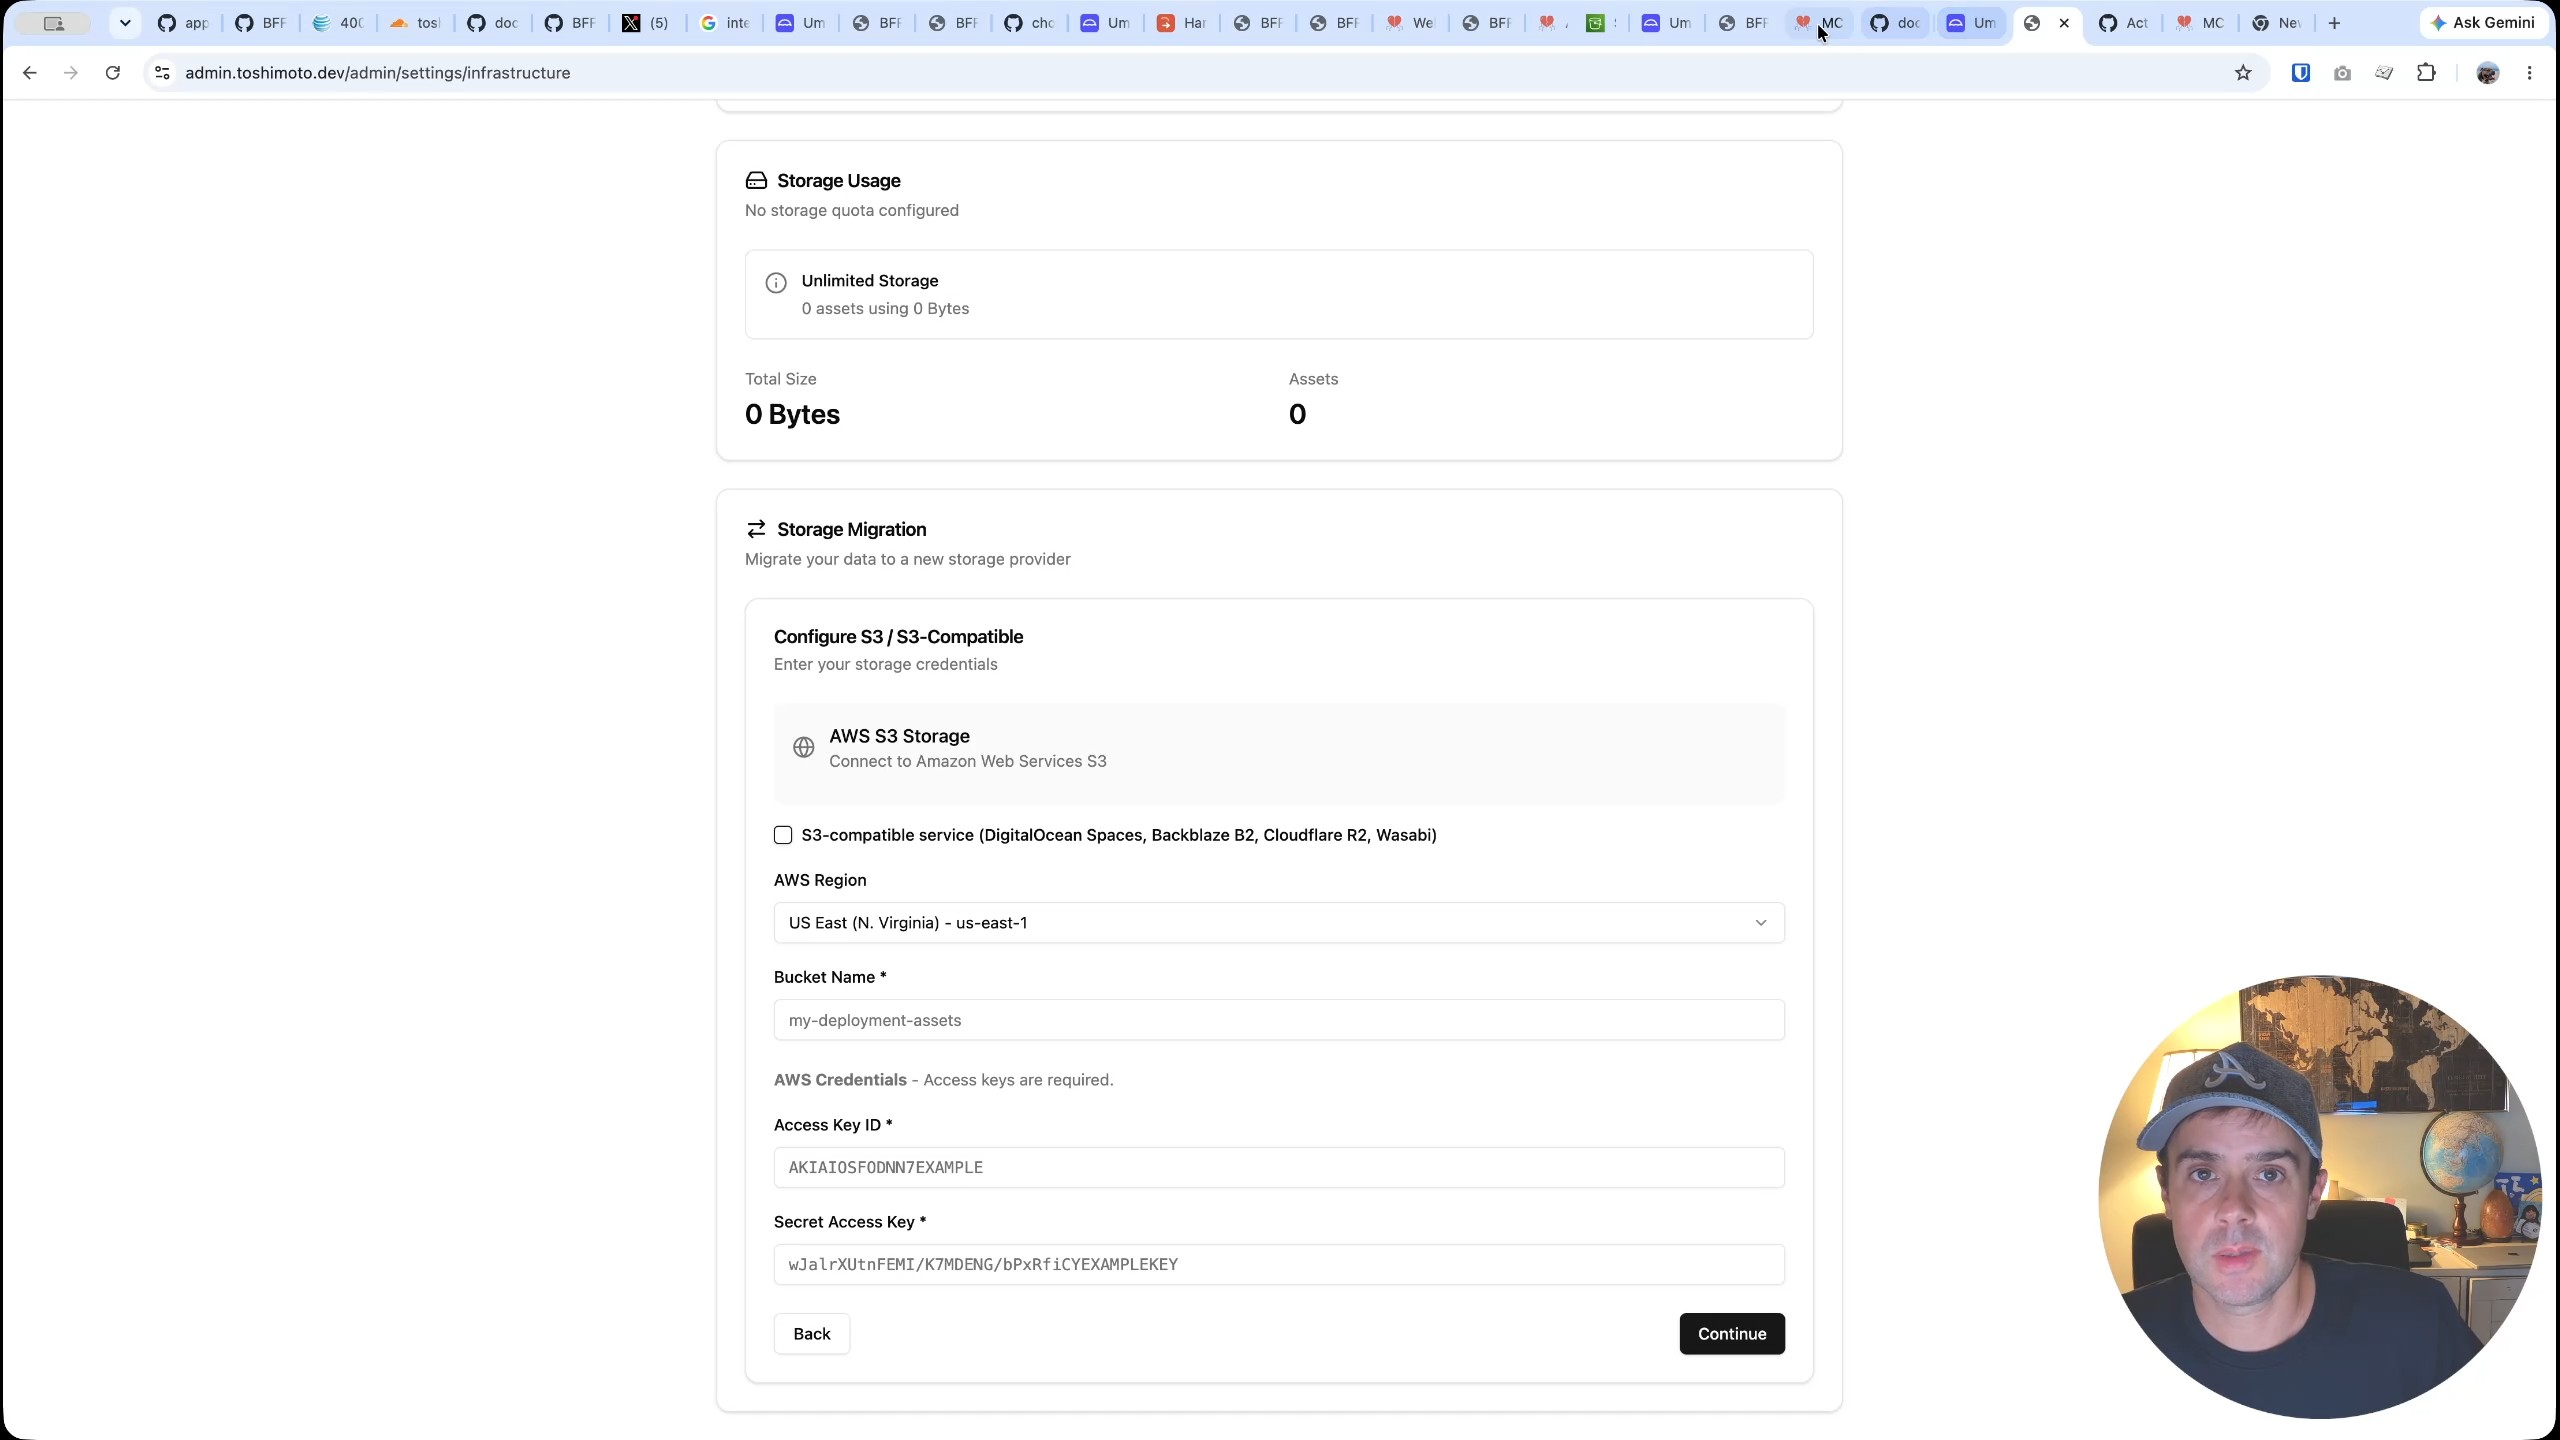
By default, BFFless uses local file system storage. For a file-sharing app like Handoff, that's not ideal — you want scalable cloud storage so you can upload as many files as you want without worrying about disk space. The BFFless admin dashboard makes this migration straightforward.
Navigating to Admin → Site Settings → Infrastructure shows the current storage provider as "Local File System." Clicking Migrate Storage opens a form where you configure AWS S3 as the new backend. The BFFless docs have detailed instructions on the S3 setup, but here's the high-level process:
- Create an S3 bucket in the AWS console. A regional namespace works fine — the bucket name ends up being something like
toshimoto-handoff-<timestamp>. - Create an IAM user (e.g.,
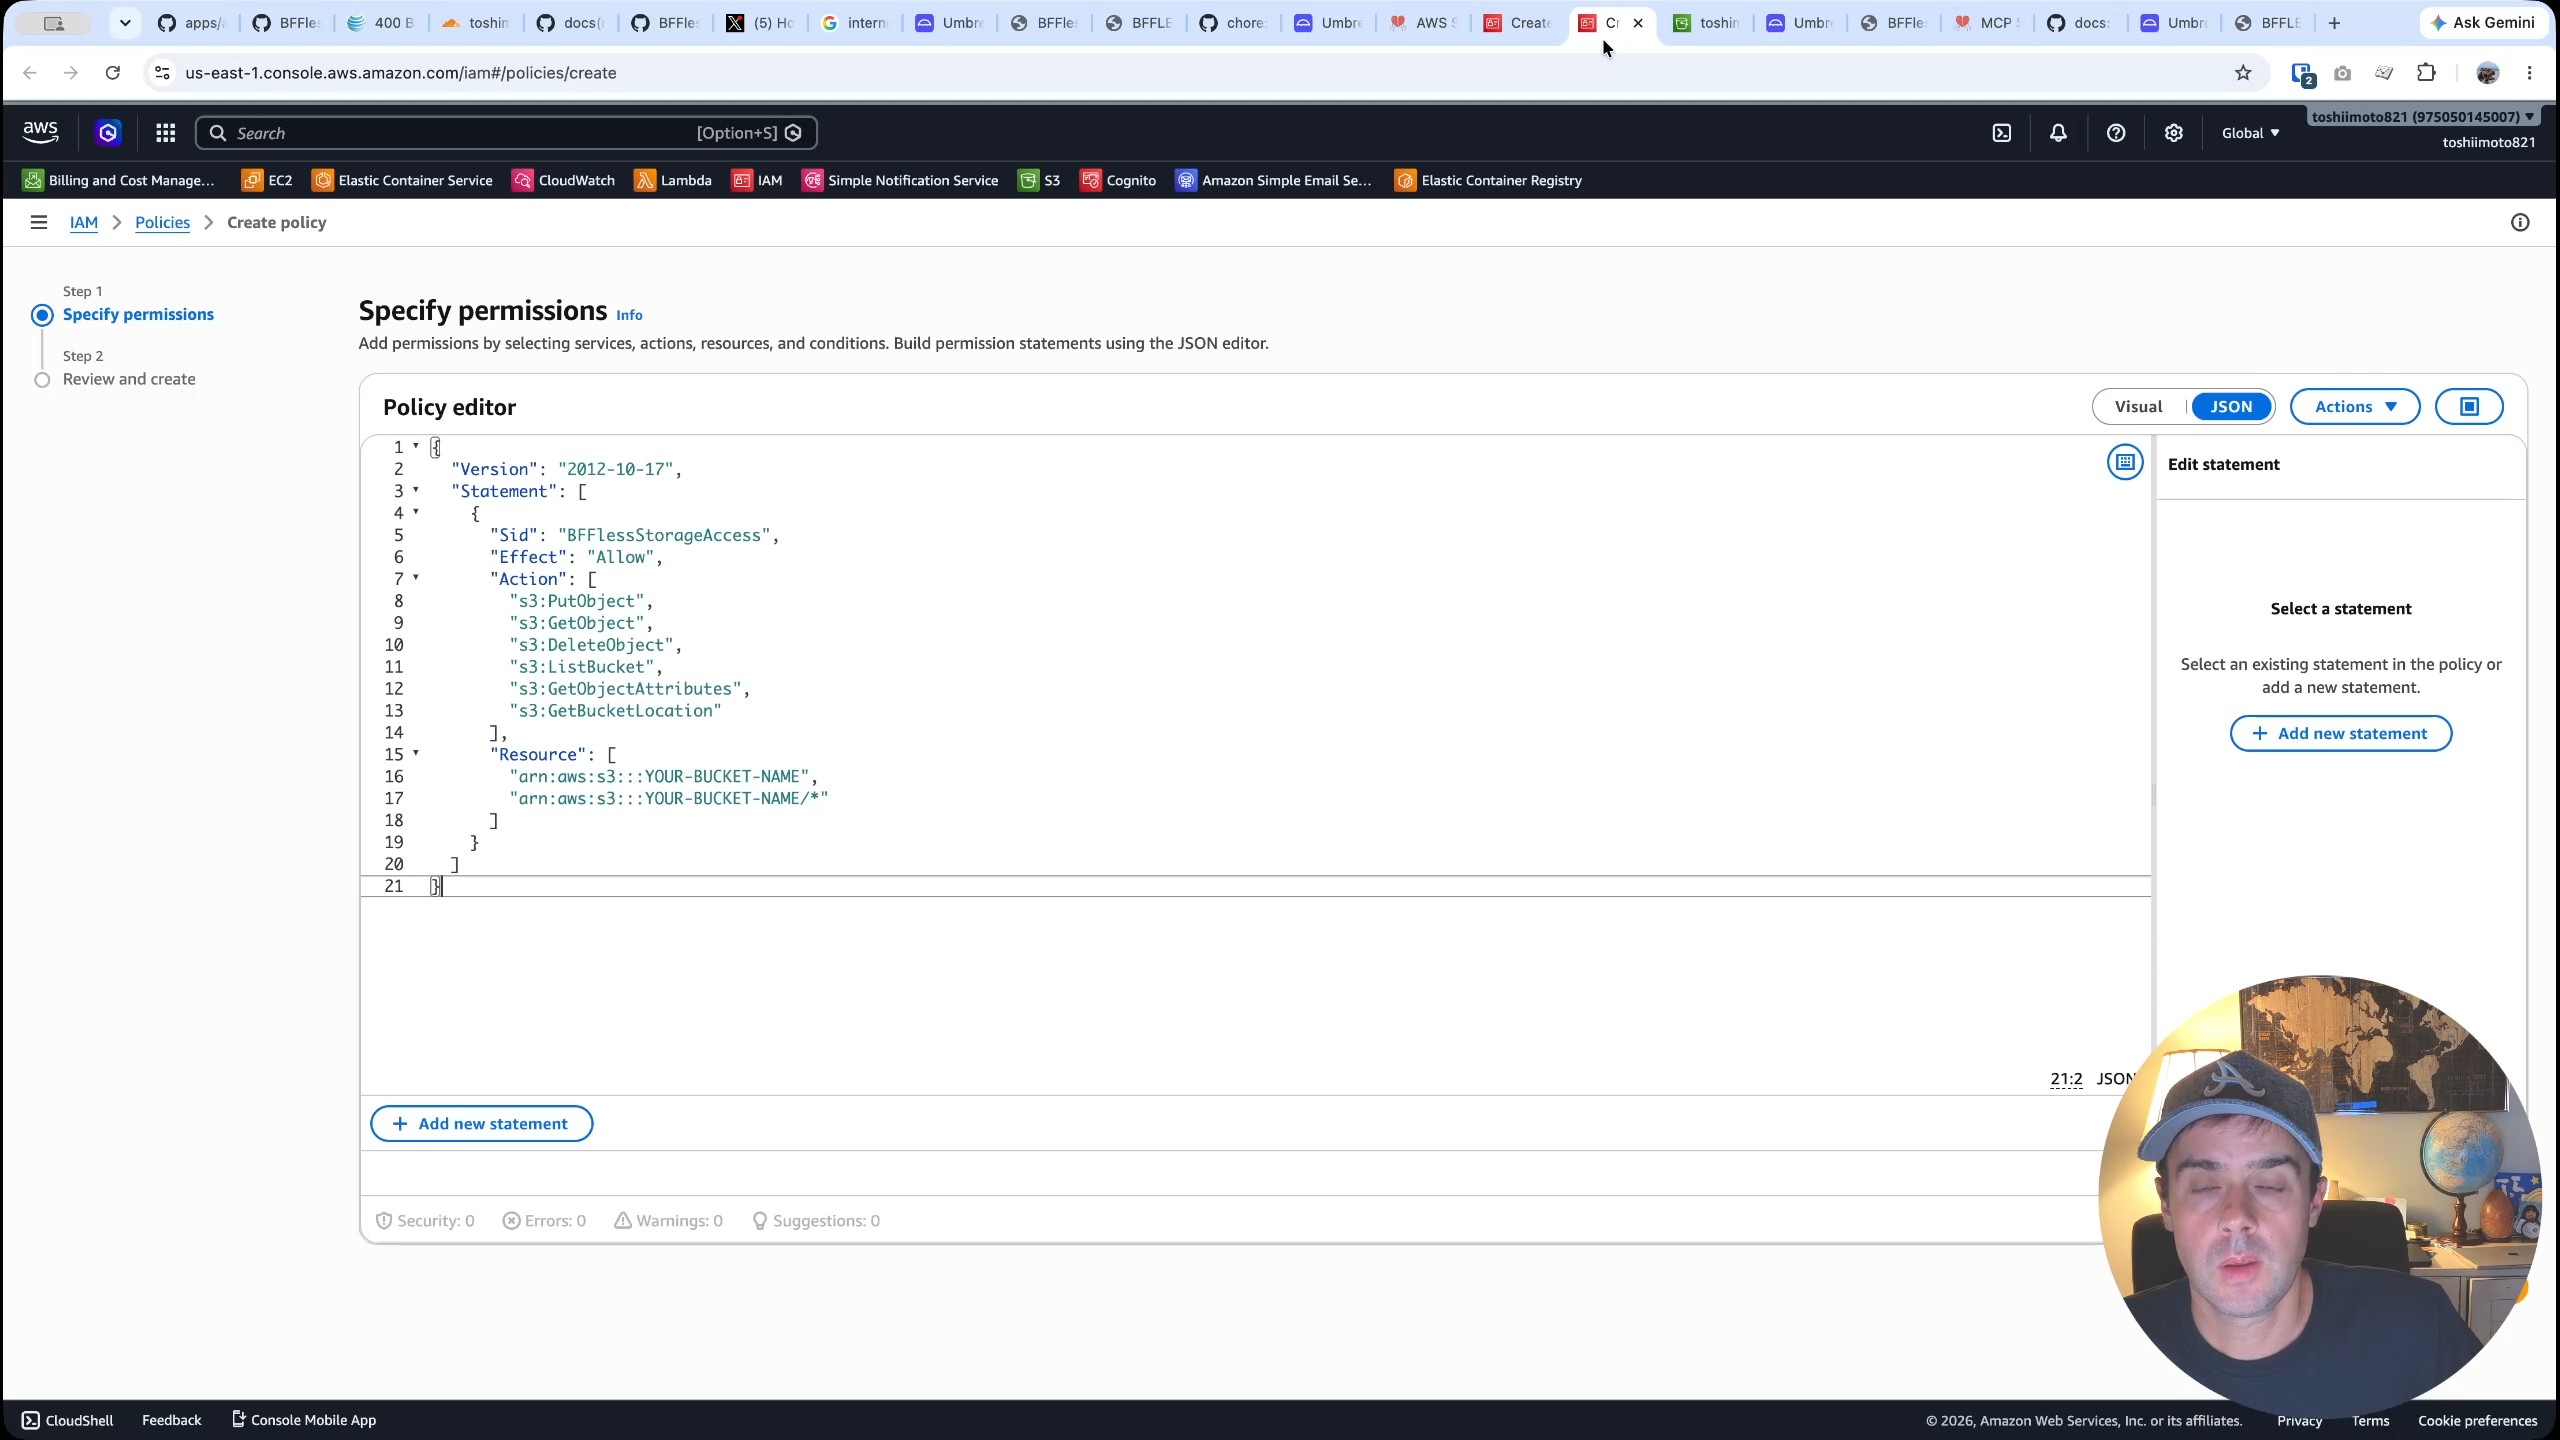
toshi-handoff-bucket-writer) that will have programmatic access to the bucket. - Create and attach an IAM policy granting the user the necessary S3 permissions. The BFFless docs provide a JSON policy template — you just need to replace the bucket name in the
Resourcefield. - Generate access keys for the IAM user by going to the user's Security Credentials tab and creating an access key for an application running outside of AWS.
- Paste the access key ID and secret back into the BFFless storage migration form and start the migration.
Once the migration completes, the storage provider switches to AWS. Everything uploaded from this point forward goes straight into the S3 bucket instead of the local file server.
Deploying the App with Claude
With the MCP server connected, the GitHub secrets configured, and AWS S3 storage in place, it's time to let Claude do the heavy lifting. The prompt is straightforward:
This repo is a BFFless apps repo. I want you to explore it and create a handoff app on toshimoto.dev. I've already configured your MCP connection, so you should be able to access all the project rules and all the information. I've set up the AWS bucket and I've set up the GitHub repo variable and secret, so the pipeline should be able to deploy to BFFless as well. Do some exploring and ask me any follow-up questions you have, and then I want you to deploy this new app — handoff app — to production on handoff.toshimoto.dev.
Claude gets to work immediately. It invokes the "install app" skill that comes bundled with the repo — this skill contains instructions on how to install each app. It then lists the MCP connections, reads the getting-started documentation, and scans through the proxy rules that are part of the Handoff repo.
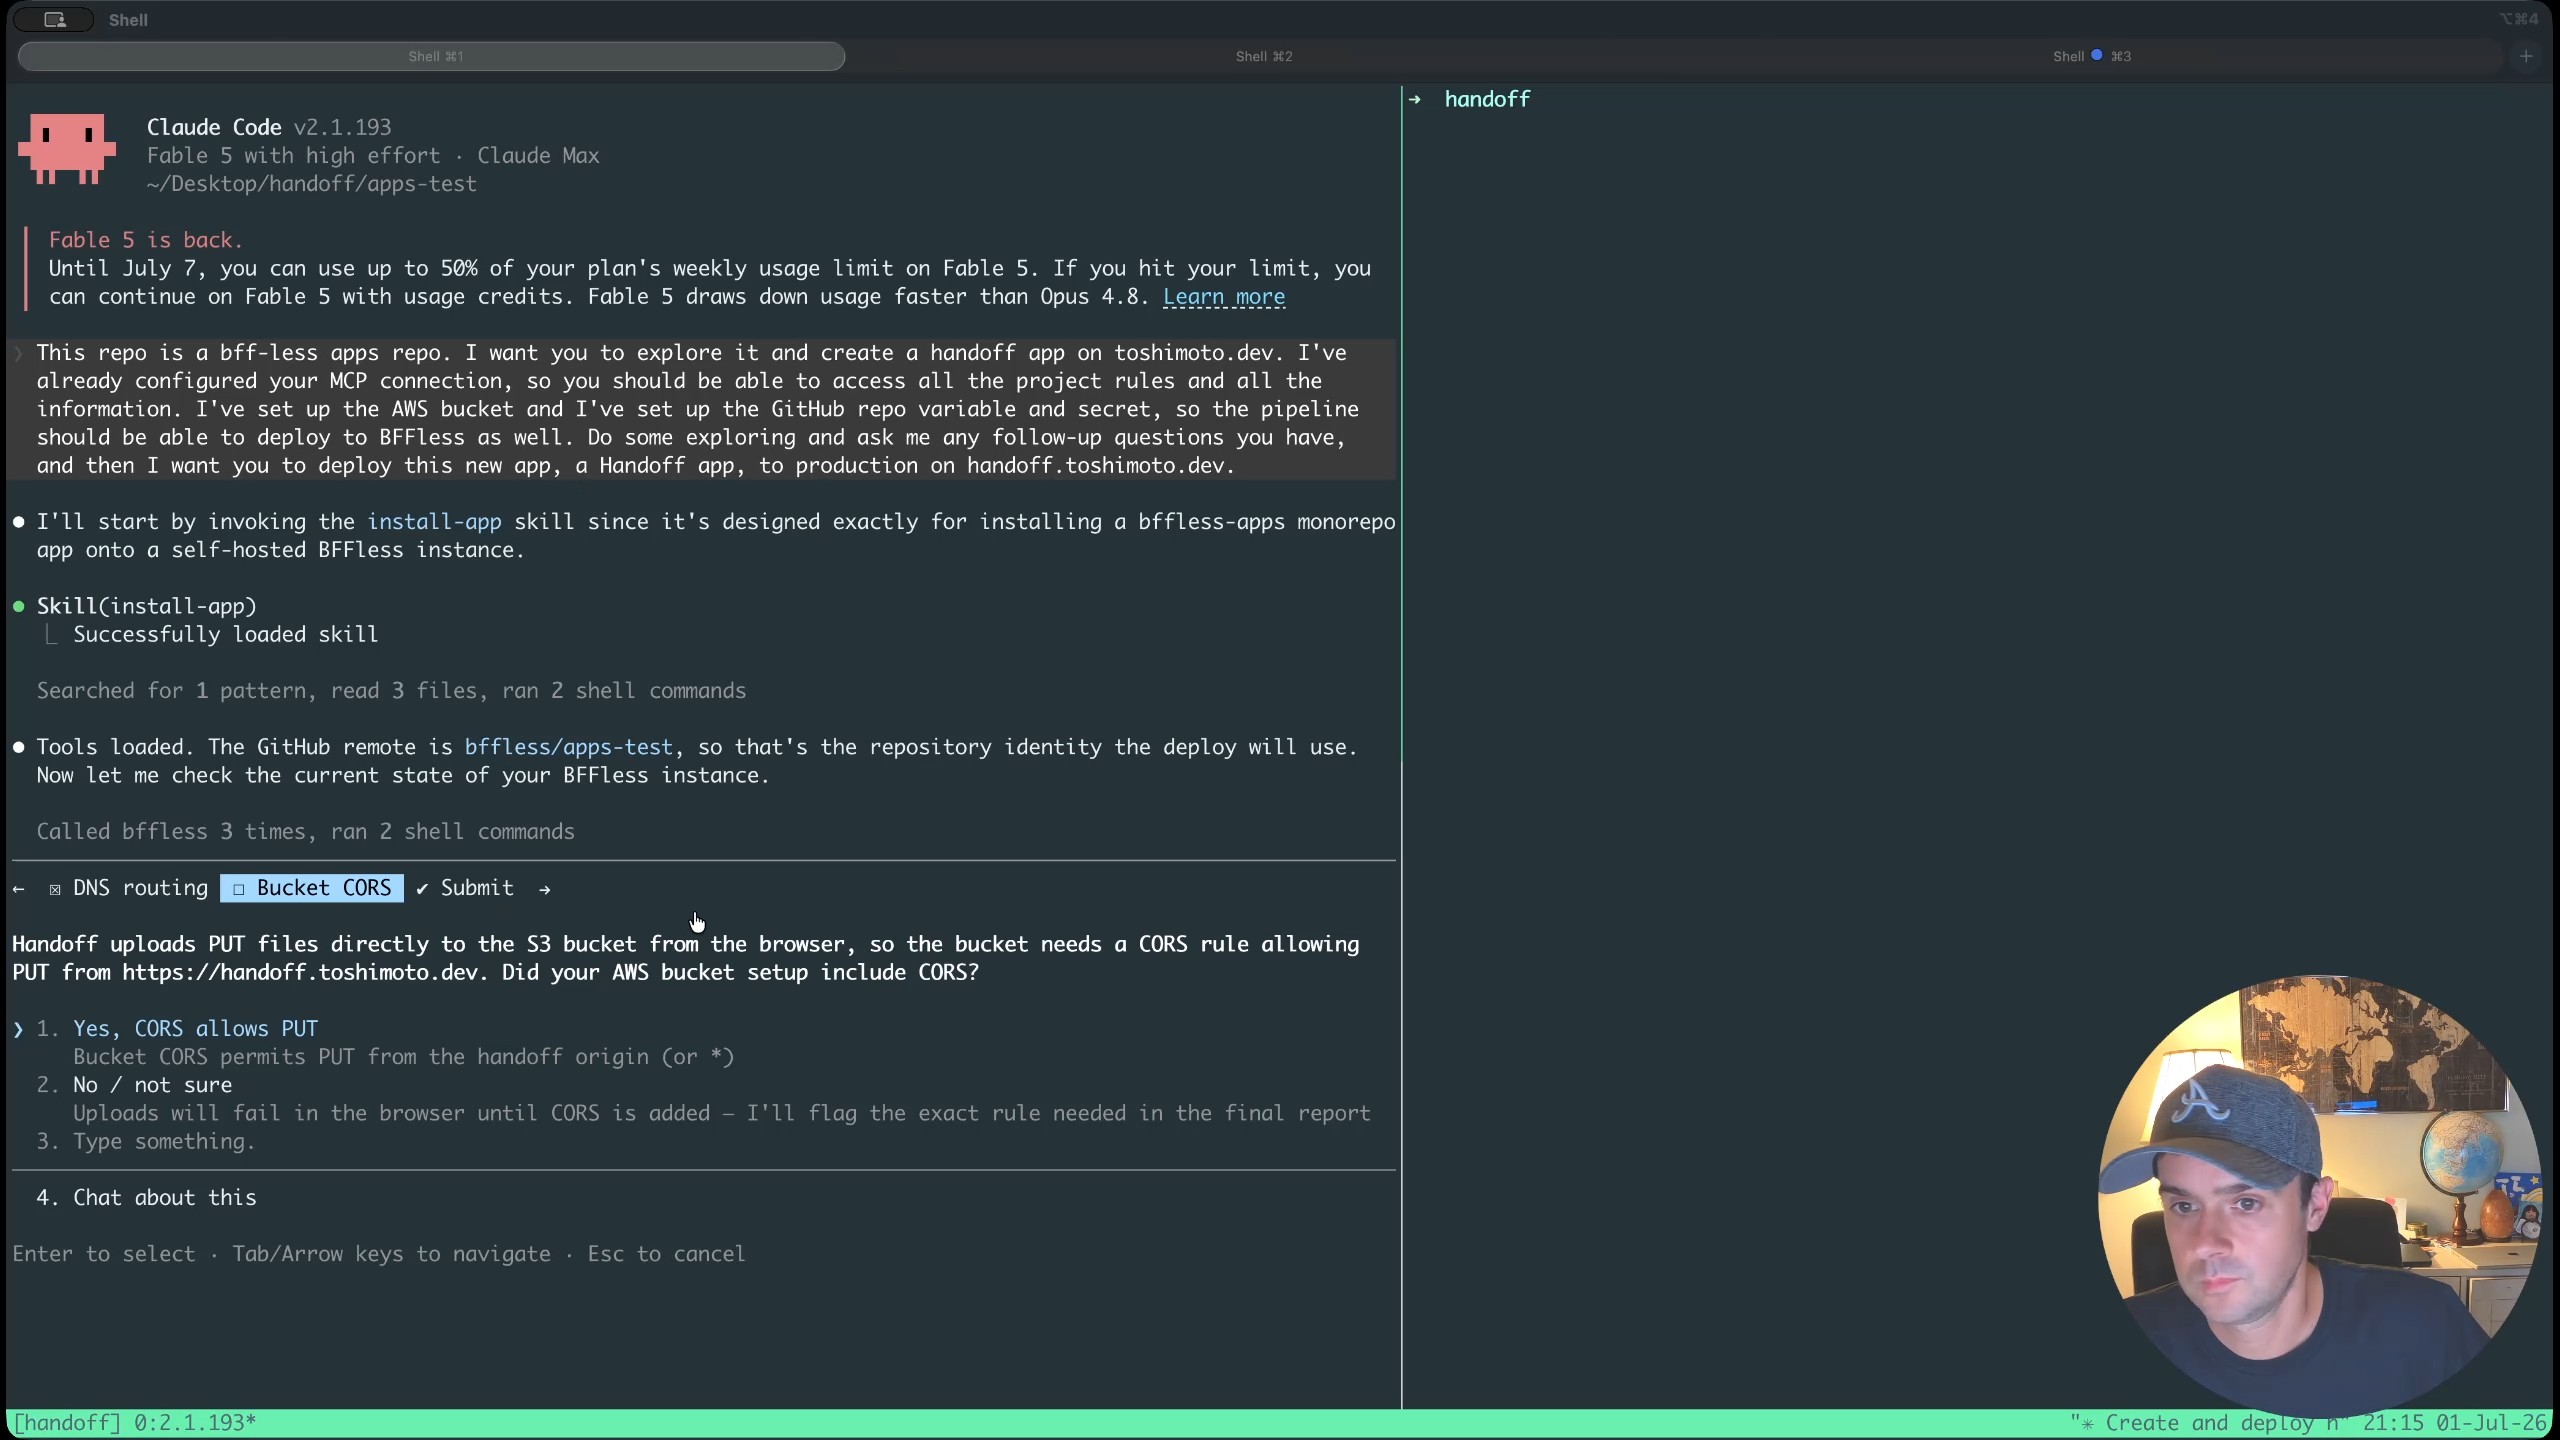
Claude identifies the repository as bffless-apps-test and checks the current state of the BFFless instance via MCP. It asks one important question: "Does handoff.toshimoto.dev already route to your BFFless instance?" — which it does, thanks to a wildcard domain configuration.
Applying CORS Rules
Claude also flags a missing piece: CORS rules on the S3 bucket. Without CORS, the browser won't be able to upload files directly to S3. The BFFless docs for AWS S3 storage include a CORS configuration snippet. Applying it is a single AWS CLI command:
aws s3api put-bucket-cors --bucket <bucket-name> --cors-configuration file://cors.json
After running this command and confirming to Claude that CORS is configured to allow PUT requests, all prerequisites are confirmed. Claude begins executing — starting with creating the project, then the data tables, and finally deploying the application. The whole process takes a few minutes to complete.
Exploring the Deployed Application
Once Claude finishes, the Handoff app is live at handoff.toshimoto.dev. The interface features a file tree on the left side for navigation and a main content area on the right for viewing files.
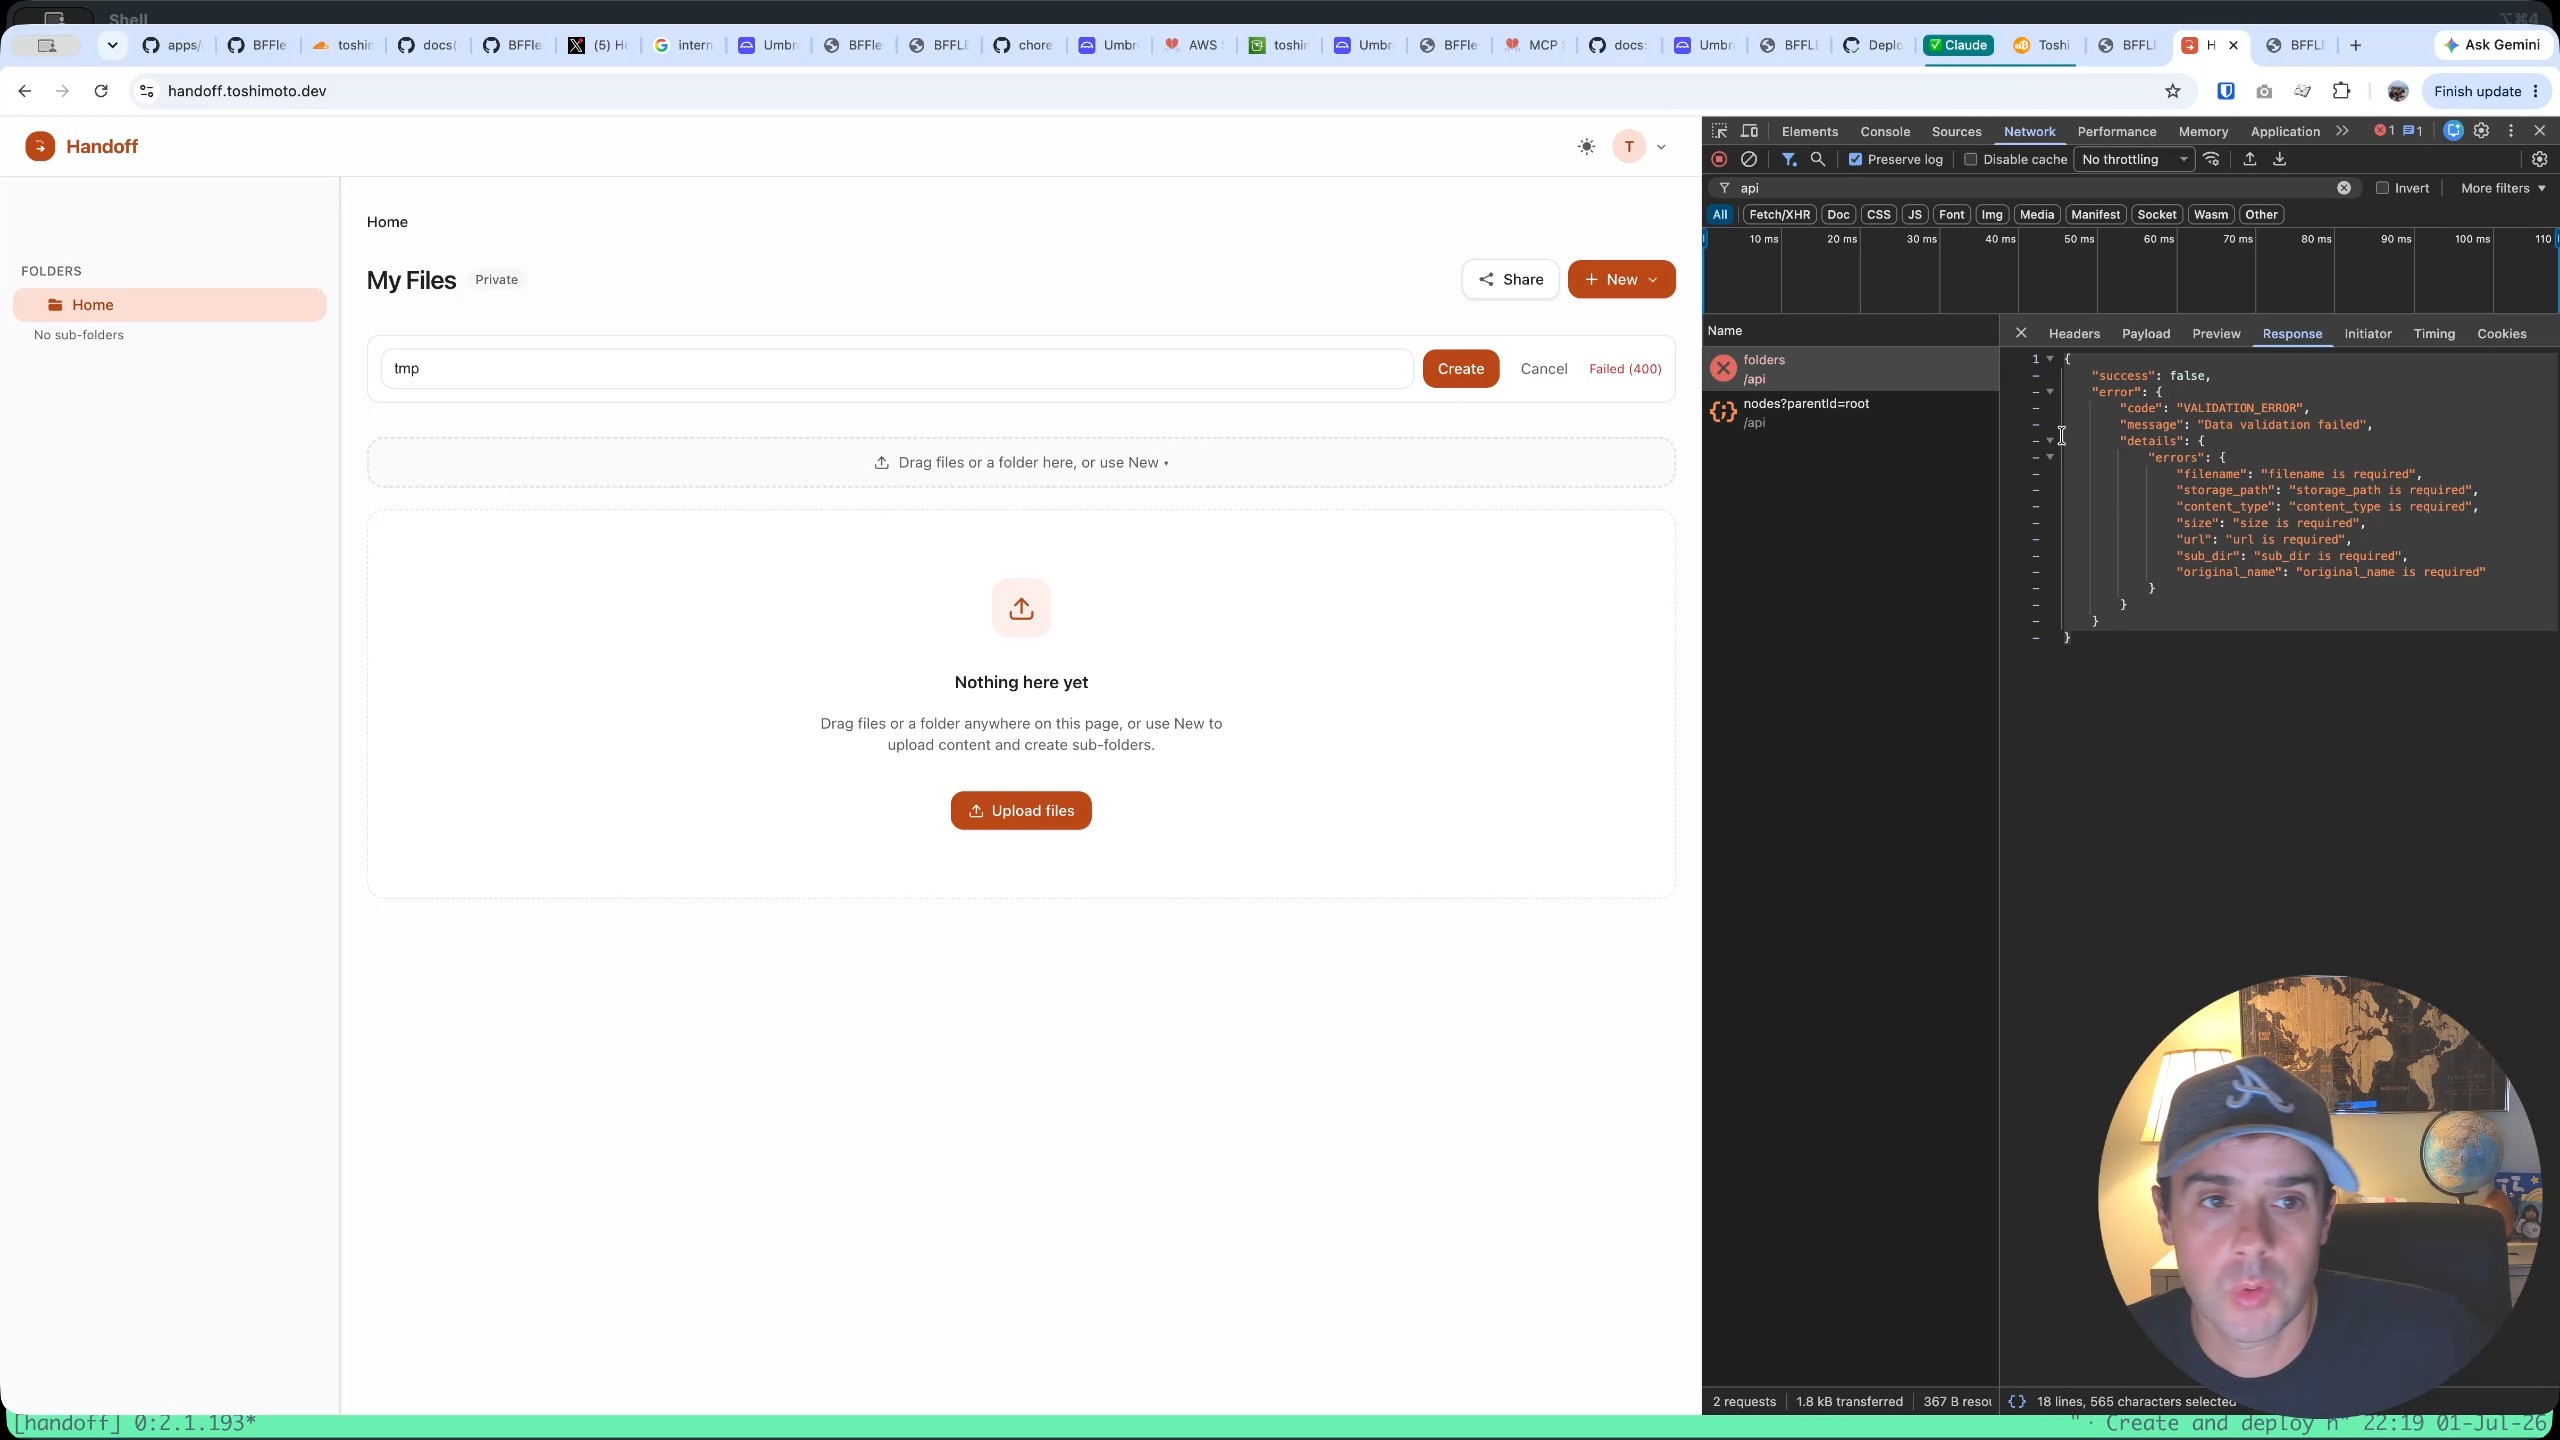
There was one minor bug after deployment: creating a folder initially threw a validation error because Claude had marked seven columns as required in the handoff_nodes data table when they should have been optional. After pasting the error back into Claude, it quickly fixed the issue by flipping those columns to optional.
Uploading and Viewing Files
With the fix in place, creating a folder works perfectly — typing a name like "temp" and clicking create instantly adds it to the file tree. Uploading files is equally simple: just drag and drop a file into the interface. The uploaded file renders directly in the browser with a header bar that provides several options: full-screen view, download, and open in a new tab.
Sharing Files with Share Links
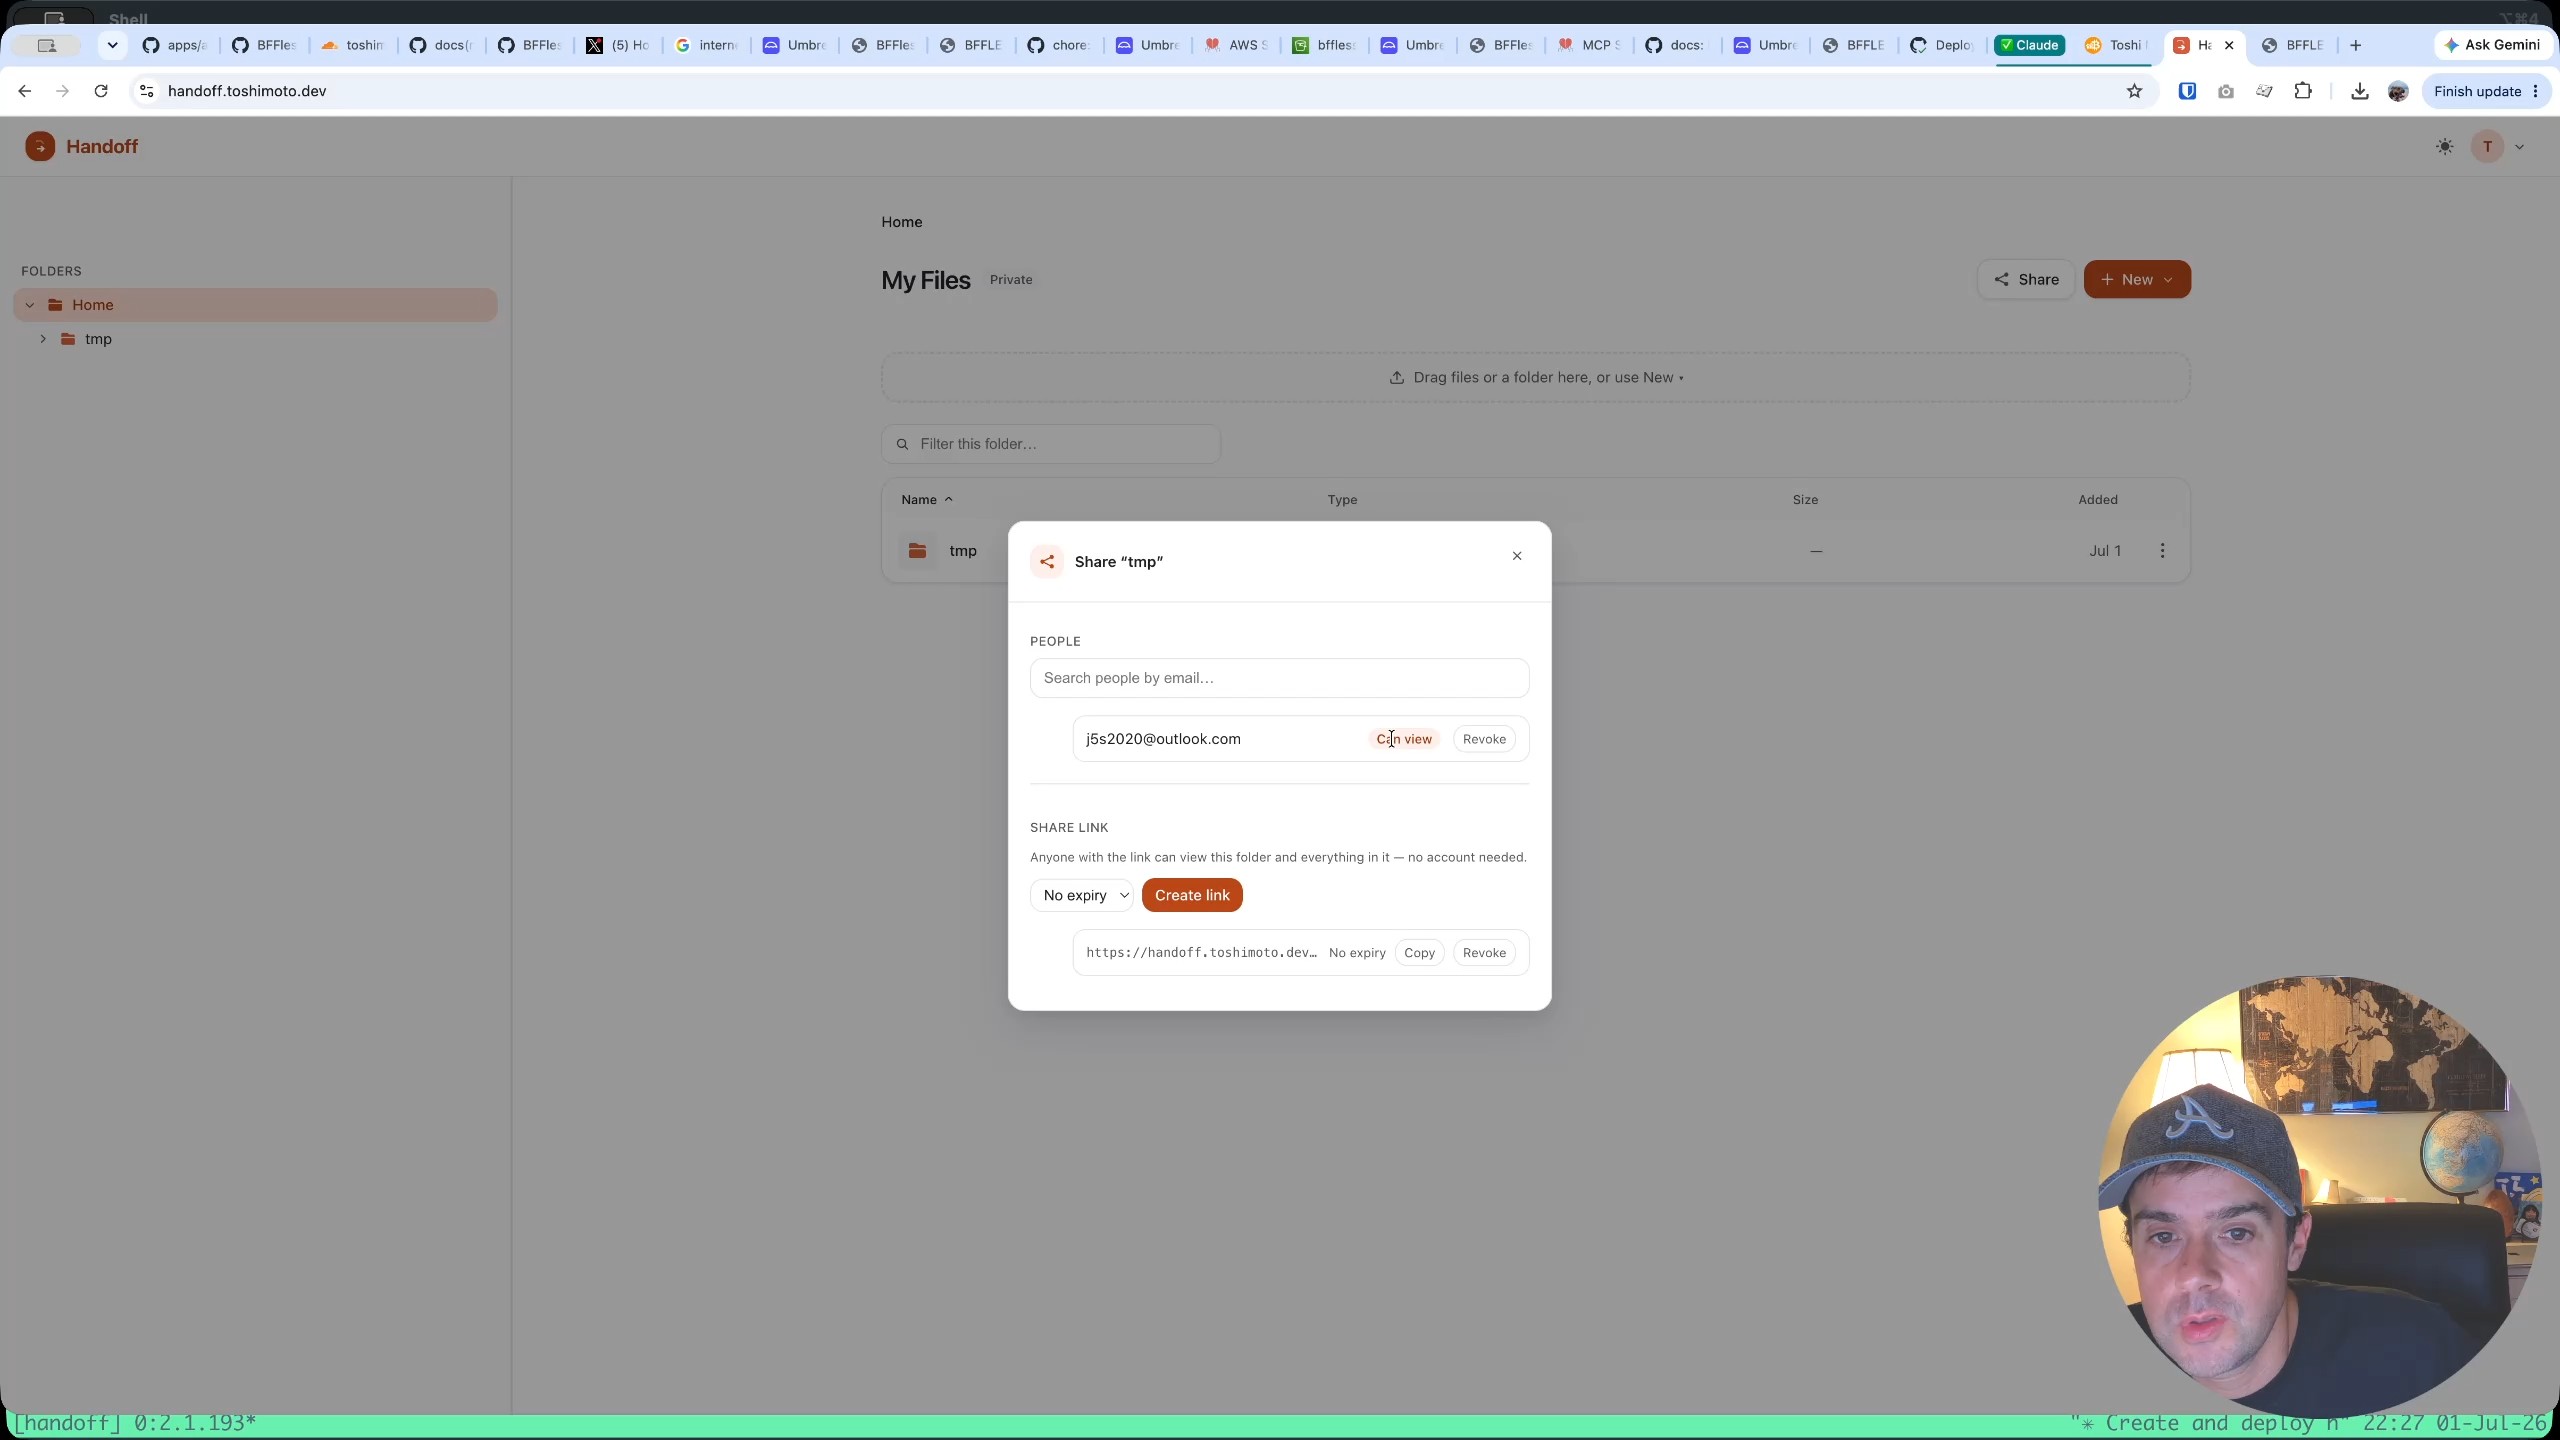
One of the most useful features is share links. From the Handoff interface, you can generate a share link for any file or folder. When someone opens that link — even in a completely different browser with no cookies or authentication — they can view and download the file. Under the hood, the share link triggers a 302 redirect to a signed S3 URL that's valid for five minutes.
This is particularly handy when working with Claude on a VPS server. Instead of SSH-ing files around, you can simply share a link and say, "Hey Claude, take a look at this file."

How It Works Under the Hood
Looking at the BFFless admin dashboard reveals the infrastructure Claude set up. The domain handoff.toshimoto.dev points to the build files and is configured as public. However, "public" here doesn't mean anyone can upload files — authorization controls are in place.
The proxy rules tell the full story. Multiple rules handle different concerns: serving the app's static files, handling share link redirects, and serving content directly from the S3 bucket. Many of these rules point to functions that serve files straight out of the content subdirectory in the AWS bucket. Checking the bucket in the AWS console confirms the structure: bffless-apps/uploads/content/ contains the uploaded files, and they're not publicly accessible through the bucket directly — access is only possible through BFFless's signed URLs.
The data tables show the application state: a nodes table stores the folder and file metadata, including the "temp" folder and the uploaded screenshot file.
User Roles and Access Control
The final part of the walkthrough explores how Handoff handles multi-user access. By default, public signups are disabled, so visiting the site in an unauthenticated browser shows no content.
Enabling Public Signups
To test multi-user scenarios, public signups can be enabled from the BFFless admin dashboard under Site Settings → Authentication → Allow Public Signups. Once enabled, anyone can create an account and will be assigned a basic "viewer" role.

Testing Permissions Across Roles
Signing up as a new user in Firefox and navigating to Handoff reveals the permission model in action:
- Viewer role: The new user can see shared files but cannot upload, create folders, or delete anything. Sharing a folder with this user (via the type-ahead user search in the share dialog) grants them permanent view access to that specific folder's contents.
- Member / Contributor role: Promoting the user to "user" status and then adding them as a contributor to the project still doesn't grant upload or delete permissions.
- Admin role: Only after promoting the user all the way to admin do they gain the ability to upload content and delete files.
The access control model is intentionally straightforward: non-admin users can view content that's been shared with them, but only admins have the ability to make changes or delete files. Anyone who signs up as a viewer has access to view files that have been explicitly shared, but nothing more.
Wrapping Up
Handoff demonstrates the power of the BFFless apps ecosystem. Starting from a bare BFFless instance, the entire deployment — including AWS S3 storage migration, MCP server setup, and the actual application deployment — was handled largely by Claude through the MCP connection. The result is a fully functional file-sharing application with drag-and-drop uploads, share links with signed URLs, folder management, and role-based access control.
The BFFless apps GitHub repo contains the full source, including all the proxy rules and pipeline configurations. Whether you use Claude to deploy or follow the instructions manually, you can have Handoff (or other apps like Studio) running on your own BFFless instance in minutes.